Epson PhotoPC 3100Z User Manual - Page 89
Deselecting All Photos, Adjusting Photos for Printing, You see the PRINT IMAGE
 |
View all Epson PhotoPC 3100Z manuals
Add to My Manuals
Save this manual to your list of manuals |
Page 89 highlights
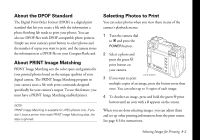
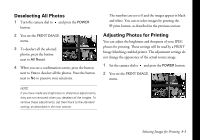
Deselecting All Photos 1 Turn the camera dial to and press the POWER button. 2 You see the PRINT IMAGE menu. 3 To deselect all the selected photos, press the button next to All Reset. 4 When you see a confirmation screen, press the button next to Yes to deselect all the photos. Press the button next to No to preserve your selections. The numbers are set to 0 and the images appear in black and white. You can re-select images by pressing the t print button, as described in the previous section. Adjusting Photos for Printing You can adjust the brightness and sharpness of your JPEG photos for printing. These settings will be read by a PRINT Image Matching enabled printer. The adjustment settings do not change the appearance of the actual source image. 1 Set the camera dial to and press the POWER button. 2 You see the PRINT IMAGE menu. NOTE If you have made any brightness or sharpness adjustments, they are not removed when you deselect all the images. To remove these adjustments, set them back to the standard setting, as described in the next section. Selecting Images for Printing 8-3
-
 1
1 -
2
-
3
-
4
-
5
-
6
-
7
-
8
-
9
-
10
-
11
-
12
-
13
-
14
-
15
-
16
-
17
-
18
-
19
-
20
-
21
-
22
-
23
-
24
-
25
-
26
-
27
-
28
-
29
-
30
-
31
-
32
-
33
-
34
-
35
-
36
-
37
-
38
-
39
-
40
-
41
-
42
-
43
-
44
-
45
-
46
-
47
-
48
-
49
-
50
-
51
-
52
-
53
-
54
-
55
-
56
-
57
-
58
-
59
-
60
-
61
-
62
-
63
-
64
-
65
-
66
-
67
-
68
-
69
-
70
-
71
-
72
-
73
-
74
-
75
-
76
-
77
-
78
-
79
-
80
-
81
-
82
-
83
-
 84
84 -
 85
85 -
 86
86 -
 87
87 -
 88
88 -
 89
89 -
 90
90 -
 91
91 -
 92
92 -
 93
93 -
 94
94 -
95
-
96
-
97
-
98
-
99
-
100
-
101
-
102
-
103
-
104
-
105
-
106
-
107
-
108
-
109
-
110
-
111
-
112
-
113
-
114
-
115
-
116
-
117
-
118
-
119
-
120
-
121
-
122
-
123
-
124
-
125
-
126
-
127
-
128
-
129
-
130
-
131
-
132
-
133
-
134
-
135
-
136
-
137
-
138
-
139
-
140
-
141
-
142
-
143
-
144
-
145
-
146
-
147
-
148
-
149
-
150
-
151
-
152
-
153
-
154
-
155
-
156
-
157
-
158
-
159
-
160
-
161
-
162
-
163
-
164
-
165
-
166
-
167
-
168
-
169
-
170
-
171
-
172
-
173
-
174
-
175
-
176
-
177
-
178
-
179
-
180
-
181
-
182
-
183
-
184
-
185
-
186
-
187
-
188
-
189
-
190
-
191
-
192
-
193
 |
 |
