Epson PhotoPC 3100Z User Manual - Page 96
Installing on a Macintosh, Insert the PhotoPC 3100Z CD-ROM in your
 |
View all Epson PhotoPC 3100Z manuals
Add to My Manuals
Save this manual to your list of manuals |
Page 96 highlights
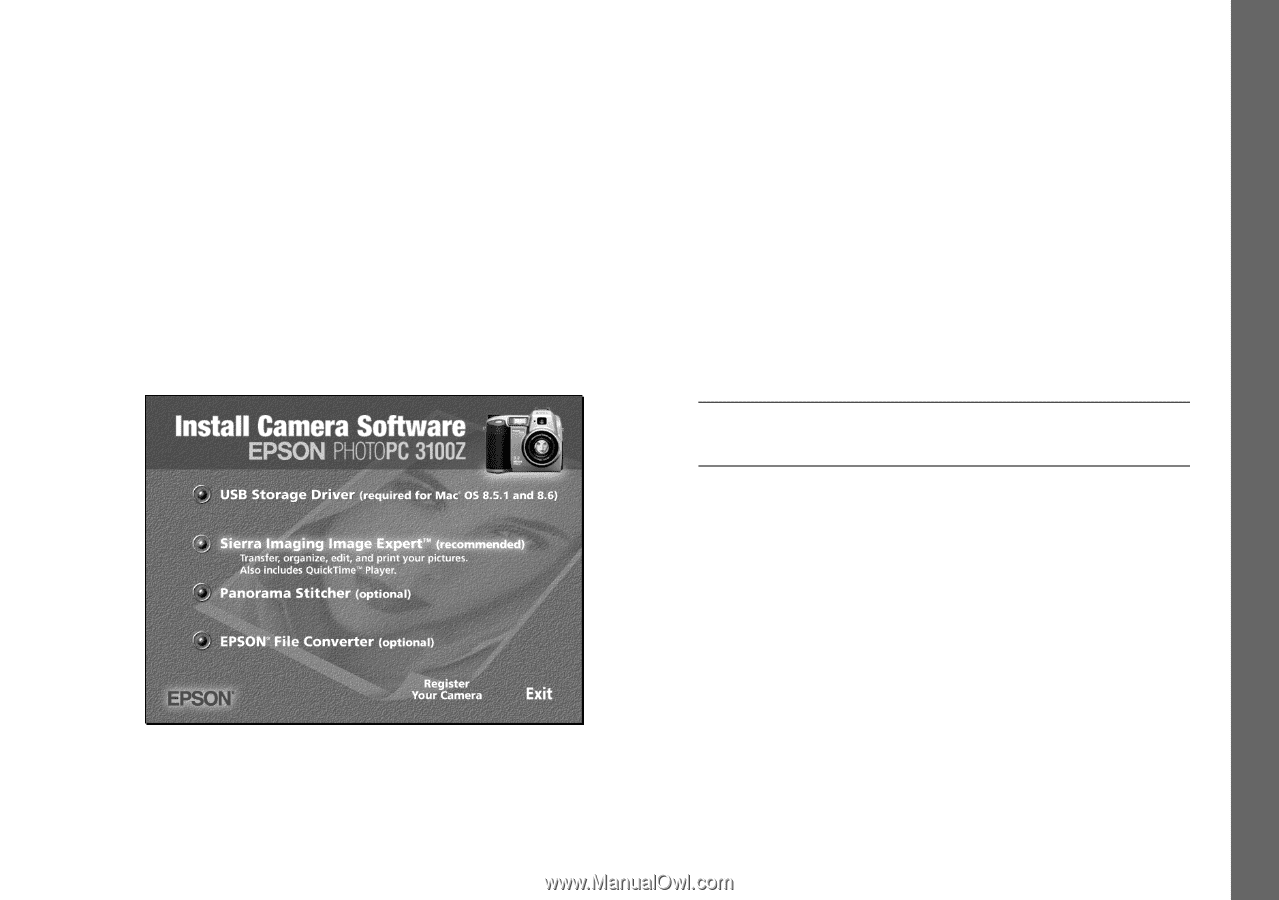
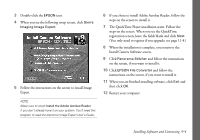
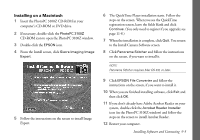
Installing on a Macintosh 1 Insert the PhotoPC 3100Z CD-ROM in your computer's CD-ROM or DVD drive. 2 If necessary, double-click the PhotoPC 3100Z CD-ROM icon to open the PhotoPC 3100Z window. 3 Double-click the EPSON icon. 4 From the Install screen, click Sierra Imaging Image Expert. 5 Follow the instructions on the screen to install Image Expert. 6 The QuickTime Player installation starts. Follow the steps on the screen. When you see the QuickTime registration screen, leave the fields blank and click Continue. (You only need to register if you upgrade; see page 11-8.) 7 When the installation is complete, click Quit. You return to the Install Camera Software screen. 8 Click Panorama Stitcher and follow the instructions on the screen, if you want to install it. NOTE Panorama Stitcher requires Mac OS 8.6, or later. 9 Click EPSON File Converter and follow the instructions on the screen, if you want to install it. 10 When you are finished installing software, click Exit and then click OK. 11 If you don't already have Adobe Acrobat Reader on your system, double-click the Acrobat Reader Installer icon (in the PhotoPC 3100Z window) and follow the steps on the screen to install Acrobat Reader. 12 Restart your computer. Installing Software and Connecting 9-5
-
 1
1 -
2
-
3
-
4
-
5
-
6
-
7
-
8
-
9
-
10
-
11
-
12
-
13
-
14
-
15
-
16
-
17
-
18
-
19
-
20
-
21
-
22
-
23
-
24
-
25
-
26
-
27
-
28
-
29
-
30
-
31
-
32
-
33
-
34
-
35
-
36
-
37
-
38
-
39
-
40
-
41
-
42
-
43
-
44
-
45
-
46
-
47
-
48
-
49
-
50
-
51
-
52
-
53
-
54
-
55
-
56
-
57
-
58
-
59
-
60
-
61
-
62
-
63
-
64
-
65
-
66
-
67
-
68
-
69
-
70
-
71
-
72
-
73
-
74
-
75
-
76
-
77
-
78
-
79
-
80
-
81
-
82
-
83
-
84
-
85
-
86
-
87
-
88
-
89
-
90
-
 91
91 -
 92
92 -
 93
93 -
 94
94 -
 95
95 -
 96
96 -
 97
97 -
 98
98 -
 99
99 -
 100
100 -
 101
101 -
102
-
103
-
104
-
105
-
106
-
107
-
108
-
109
-
110
-
111
-
112
-
113
-
114
-
115
-
116
-
117
-
118
-
119
-
120
-
121
-
122
-
123
-
124
-
125
-
126
-
127
-
128
-
129
-
130
-
131
-
132
-
133
-
134
-
135
-
136
-
137
-
138
-
139
-
140
-
141
-
142
-
143
-
144
-
145
-
146
-
147
-
148
-
149
-
150
-
151
-
152
-
153
-
154
-
155
-
156
-
157
-
158
-
159
-
160
-
161
-
162
-
163
-
164
-
165
-
166
-
167
-
168
-
169
-
170
-
171
-
172
-
173
-
174
-
175
-
176
-
177
-
178
-
179
-
180
-
181
-
182
-
183
-
184
-
185
-
186
-
187
-
188
-
189
-
190
-
191
-
192
-
193
 |
 |