Epson TM-L90 Technical Reference - Page 61
The PAPER OUT LED flashes.
 |
View all Epson TM-L90 manuals
Add to My Manuals
Save this manual to your list of manuals |
Page 61 highlights
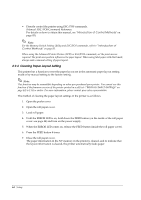
TM-L90/TM-L90 Peeler Model Technical Reference Guide 5. With the roll paper cover open, turn on the power while pressing the FEED button inside the printer. (Keep pressing the FEED button until the ERROR LED comes on.) 6. Check that the ERROR LED is on, and release the FEED button. 7. Press the FEED button 6 times. 8. Then, close the roll paper cover. The printer feeds several labels and remembers the label paper size. This completes the task. ❏ TM-L90 Peeler Model setting procedure (procedure for setting the paper type and size in the printer) There are the following 2 cases. 1. Open the peeler cover. 2. Open the roll paper cover. 3. Set the roll paper in the printer. 4. With the roll paper cover open, turn on the power while pressing the FEED button inside the printer. (Keep pressing the FEED button until the ERROR LED comes on.) 5. Check that the ERROR LED is on, and release the FEED button. 6. Press the FEED button 6 times. 7. For peeling issuing, set the end of the roll paper in the peeler, and for continuous issuing, set it in the ejection path, and close the roll paper cover. The printer feeds several labels and remembers the label paper size. This completes the task. 8. For peeling issuing, after setting the paper, the PAPER OUT LED flashes. To print, insert the label into the peeler path, and press the FEED button. 1. Open the peeler cover. 2. Open the roll paper cover. 3. With the roll paper cover open, press the FEED button inside the printer. 4. Close the roll paper cover. The PAPER OUT LED flashes. Setup 61
-
 1
1 -
2
-
3
-
4
-
5
-
6
-
7
-
8
-
9
-
10
-
11
-
12
-
13
-
14
-
15
-
16
-
17
-
18
-
19
-
20
-
21
-
22
-
23
-
24
-
25
-
26
-
27
-
28
-
29
-
30
-
31
-
32
-
33
-
34
-
35
-
36
-
37
-
38
-
39
-
40
-
41
-
42
-
43
-
44
-
45
-
46
-
47
-
48
-
49
-
50
-
51
-
52
-
53
-
54
-
55
-
 56
56 -
 57
57 -
 58
58 -
 59
59 -
 60
60 -
 61
61 -
 62
62 -
 63
63 -
 64
64 -
 65
65 -
 66
66 -
67
-
68
-
69
-
70
-
71
-
72
-
73
-
74
-
75
-
76
-
77
-
78
-
79
-
80
-
81
-
82
-
83
-
84
-
85
-
86
-
87
-
88
-
89
-
90
-
91
-
92
-
93
-
94
-
95
-
96
-
97
-
98
-
99
-
100
-
101
-
102
-
103
-
104
-
105
-
106
-
107
-
108
-
109
-
110
-
111
-
112
-
113
-
114
-
115
-
116
-
117
-
118
-
119
-
120
-
121
-
122
-
123
-
124
-
125
-
126
-
127
-
128
-
129
-
130
-
131
-
132
-
133
-
134
-
135
-
136
-
137
-
138
-
139
-
140
-
141
-
142
-
143
-
144
-
145
-
146
-
147
-
148
-
149
-
150
-
151
-
152
-
153
-
154
-
155
-
156
-
157
-
158
-
159
-
160
-
161
-
162
-
163
-
164
-
165
-
166
-
167
-
168
-
169
-
170
-
171
-
172
-
173
-
174
-
175
-
176
-
177
-
178
-
179
-
180
-
181
-
182
-
183
-
184
-
185
-
186
-
187
-
188
-
189
-
190
-
191
-
192
-
193
-
194
-
195
-
196
-
197
-
198
-
199
-
200
-
201
-
202
-
203
-
204
-
205
-
206
-
207
-
208
-
209
-
210
-
211
-
212
 |
 |
