HTC Verizon Wireless SMT5800 User Manual - Page 48
View your appointments, Send appointments, Start >, Calendar, Start > Calendar, Attendees
 |
View all HTC Verizon Wireless SMT5800 manuals
Add to My Manuals
Save this manual to your list of manuals |
Page 48 highlights
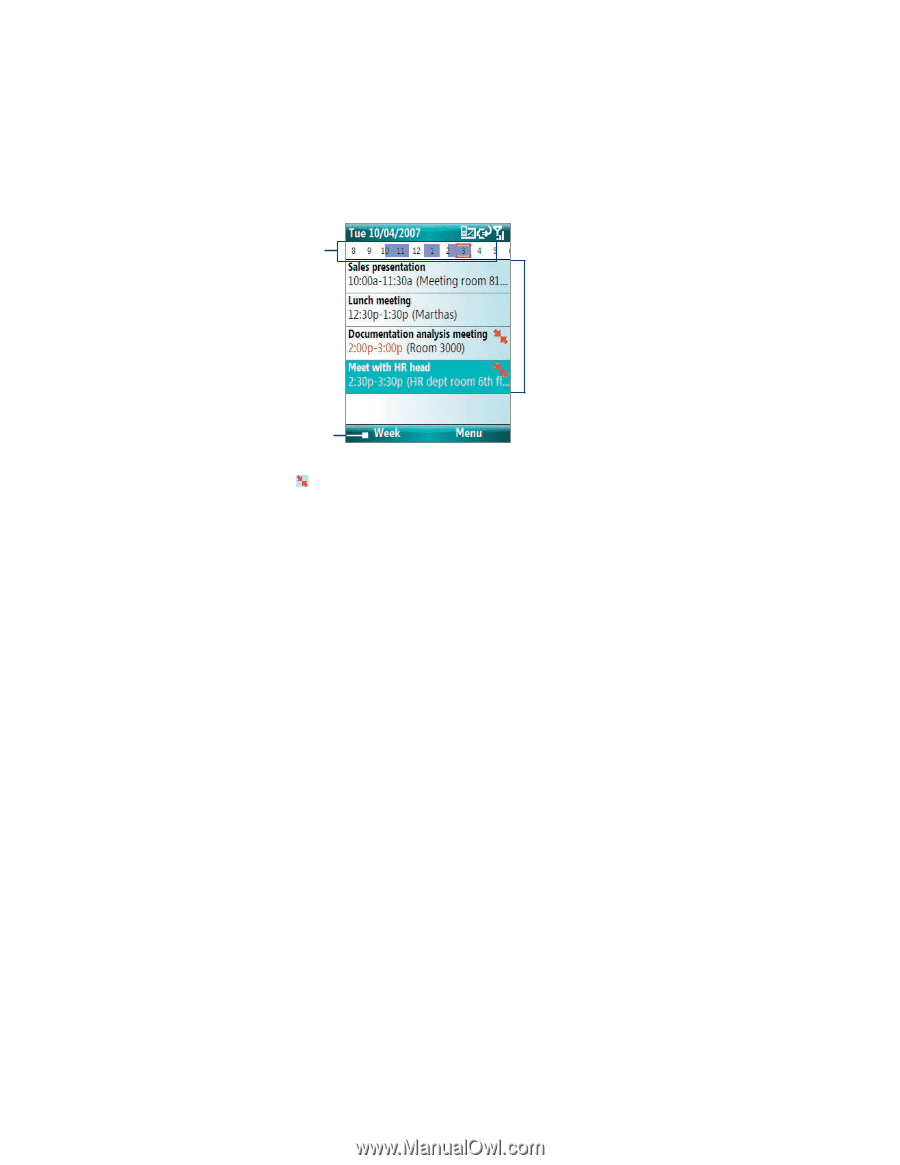
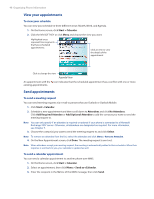
48 Organizing Phone Information View your appointments To view your schedule You can view your schedule in three different views: Month, Week, and Agenda. 1. On the Home screen, click Start > Calendar. 2. Click the left SOFT KEY or click Menu and choose the view you want. Highlighted areas represent time segments that have scheduled appointments. Click an item to view the details of the appointment. Click to change the view. Agenda View An appointment with the icon indicates that the scheduled appointment has a conflict with one or more existing appointments. Send appointments To send a meeting request You can send meeting requests via e-mail to persons that use Outlook or Outlook Mobile. 1. Click Start > Calendar. 2. Schedule a new appointment and then scroll down to Attendees and click No Attendees. Click Add Required Attendee or Add Optional Attendee to add the contacts you want to send the meeting request to. Note You can only specify if an attendee is required or optional if your phone is connected to a Microsoft Exchange 2007 server. Otherwise, all attendees are designated as required. For more information, see Chapter 7. 3. Choose the contact(s) you want to send the meeting request to and click Select. Note To remove an attendee from the list, select the attendee and click Menu > Remove Attendee. 4. On the New Appointment screen, click Done. The meeting request is sent out. Note When attendees accept your meeting request, the meeting is automatically added to their schedules. When their response is sent back to you, your calendar is updated as well. To send a calendar appointment You can send a calendar appointment to another phone over MMS. 1. On the Home screen, click Start > Calendar. 2. Select an appointment, then click Menu > Send as vCalendar. 3. Enter the recipient in the To line of the MMS message, then click Send.
-
 1
1 -
2
-
3
-
4
-
5
-
6
-
7
-
8
-
9
-
10
-
11
-
12
-
13
-
14
-
15
-
16
-
17
-
18
-
19
-
20
-
21
-
22
-
23
-
24
-
25
-
26
-
27
-
28
-
29
-
30
-
31
-
32
-
33
-
34
-
35
-
36
-
37
-
38
-
39
-
40
-
41
-
42
-
 43
43 -
 44
44 -
 45
45 -
 46
46 -
 47
47 -
 48
48 -
 49
49 -
 50
50 -
 51
51 -
 52
52 -
 53
53 -
54
-
55
-
56
-
57
-
58
-
59
-
60
-
61
-
62
-
63
-
64
-
65
-
66
-
67
-
68
-
69
-
70
-
71
-
72
-
73
-
74
-
75
-
76
-
77
-
78
-
79
-
80
-
81
-
82
-
83
-
84
-
85
-
86
-
87
-
88
-
89
-
90
-
91
-
92
-
93
-
94
-
95
-
96
-
97
-
98
-
99
-
100
-
101
-
102
-
103
-
104
-
105
-
106
-
107
-
108
-
109
-
110
-
111
-
112
-
113
-
114
-
115
-
116
 |
 |