HP 303B Maintenance & Service Guide: HP 303B Microtower Business PC
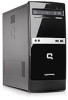
HP 303B - Minitower PC Manual
 |
View all HP 303B manuals
Add to My Manuals
Save this manual to your list of manuals |
HP 303B manual content summary:
- HP 303B | Maintenance & Service Guide: HP 303B Microtower Business PC - Page 1
Maintenance & Service Guide HP 303B Microtower Business PC - HP 303B | Maintenance & Service Guide: HP 303B Microtower Business PC - Page 2
HP products and services are set forth in the express warranty statements accompanying such products and services. Nothing herein should be construed as constituting an additional warranty. HP Hewlett-Packard Company. HP 303B Microtower Business PC First Edition (November 2010) Document Part Number: - HP 303B | Maintenance & Service Guide: HP 303B Microtower Business PC - Page 3
About This Book WARNING! Text set off in this manner indicates that failure to follow directions could result in bodily harm or loss of life. CAUTION: Text set off in this manner indicates that failure to follow directions could result in damage to equipment or loss of information. NOTE: Text set - HP 303B | Maintenance & Service Guide: HP 303B Microtower Business PC - Page 4
iv About This Book - HP 303B | Maintenance & Service Guide: HP 303B Microtower Business PC - Page 5
Table of contents 1 Product Description ...1 Chassis Designations ...1 HP 303B ...1 Product Description ...2 2 Removal and Replacement Procedures Microtower (MT) Chassis 3 Preparation for Disassembly ...3 Access Panel ...4 Front Bezel ...6 Memory ...8 DDR3-SDRAM DIMMs ...8 Populating the DIMM - HP 303B | Maintenance & Service Guide: HP 303B Microtower Business PC - Page 6
CMOS ...44 Appendix C Troubleshooting Without Diagnostics 46 Safety and Comfort ...46 Before You Call for Technical Support 46 Helpful Hints ...47 Solving General Problems ...48 Solving Power Problems ...49 Solving Hard Drive Problems ...50 Solving Media Card Reader Problems 51 Solving Display - HP 303B | Maintenance & Service Guide: HP 303B Microtower Business PC - Page 7
Care ...69 General Cleaning Safety Precautions 69 Cleaning the Computer Case 69 Cleaning the Keyboard ...69 Cleaning the Monitor ...70 Cleaning the Mouse ...70 Service Considerations ...70 Power Supply Fan ...70 Tools and Software Requirements 71 Screws ...71 Cables and Connectors ...71 Hard - HP 303B | Maintenance & Service Guide: HP 303B Microtower Business PC - Page 8
viii - HP 303B | Maintenance & Service Guide: HP 303B Microtower Business PC - Page 9
1 Product Description Chassis Designations The following subsection illustrates the various chassis designs. HP 303B Chassis Designations 1 - HP 303B | Maintenance & Service Guide: HP 303B Microtower Business PC - Page 10
Product Description HP 303B features: ● VIA Nano U2257 processor, 1.3-GHz, 800-MHz FSB, 1MB L2 cache ● VIA ◦ Red Flag Linux ◦ Windows 7 Home Basic-32-bit ◦ Windows 7 Professional-32-bit NOTE: The HP 303B MT does not support a Digital Media Card Reader drive bay. 2 Chapter 1 Product Description - HP 303B | Maintenance & Service Guide: HP 303B Microtower Business PC - Page 11
described in this chapter is essential for proper service. After completing all necessary removal and replacement procedures, run the Diagnostics utility to verify that all components operate properly. NOTE: Not all features listed in this guide are available on all computers. Preparation for - HP 303B | Maintenance & Service Guide: HP 303B Microtower Business PC - Page 12
side cover by loosening the screw that connects the cover to the computer. Figure 2-1 Removing the Computer Access Panel 4 Chapter 2 Removal and Replacement Procedures Microtower (MT) Chassis - HP 303B | Maintenance & Service Guide: HP 303B Microtower Business PC - Page 13
3. Grasp the handle on the side cover and pull towards the back of the computer. Slide the cover about 2.4 cm (1 inch) to remove it. NOTE: You may want to lay the computer on its side to install internal parts. Be sure the side with the access panel is facing up. Figure 2-2 Removing the Computer - HP 303B | Maintenance & Service Guide: HP 303B Microtower Business PC - Page 14
each of the three side tabs (1) that secure the front bezel to the computer, to release the front bezel. 6 Chapter 2 Removal and Replacement Procedures Microtower (MT) Chassis - HP 303B | Maintenance & Service Guide: HP 303B Microtower Business PC - Page 15
4. Swing the front bezel out to remove from the computer (2). Figure 2-3 Removing the Front Bezel To reinstall the front bezel, reverse the removal procedure. Front Bezel 7 - HP 303B | Maintenance & Service Guide: HP 303B Microtower Business PC - Page 16
-standard DIMM. To achieve the maximum memory support, you can populate the system board with up SDRAM DIMM must also: ● support CAS latency 9 DDR3 1333 Mhz (9-9-9 timing information In addition, the computer supports: ● 512Mbit, 1Gbit, and 2Gbit with x4 SDRAM are not supported NOTE: The system will not - HP 303B | Maintenance & Service Guide: HP 303B Microtower Business PC - Page 17
Populating the DIMM Socket There is one DIMM socket on the system board. Figure 2-4 DIMM Socket Location Table 2-1 DIMM Socket Location Item Description 1 DIMM1 socket, Channel A NOTE: A DIMM must occupy the DIMM1 socket. Socket Color Black Memory 9 - HP 303B | Maintenance & Service Guide: HP 303B Microtower Business PC - Page 18
installed in only one way. Match the notch on the module with the tab on the memory socket. 10 Chapter 2 Removal and Replacement Procedures Microtower (MT) Chassis - HP 303B | Maintenance & Service Guide: HP 303B Microtower Business PC - Page 19
5. Push the DIMM module down firmly into the socket, ensuring that the module is fully inserted and properly seated. The DIMM must be pushed all the way down into the socket and sit evenly in the socket to avoid memory corruption. Make sure the latches are in the closed position (3). 6. Replace the - HP 303B | Maintenance & Service Guide: HP 303B Microtower Business PC - Page 20
Item Description 1 PCI expansion slot 2 PCI expansion slot 3 PCI Express x1 expansion slot 4 PCI Express x16 expansion slot 12 Chapter 2 Removal and Replacement Procedures Microtower (MT) Chassis - HP 303B | Maintenance & Service Guide: HP 303B Microtower Business PC - Page 21
NOTE: You can install a PCI Express x1, x4, x8, or x16 expansion card in the PCI Express x16 expansion slot. To remove, replace, or add an expansion card: 1. Prepare the computer for disassembly (Preparation for Disassembly on page 3). 2. Remove the access panel (Access Panel on page 4). 3. Locate - HP 303B | Maintenance & Service Guide: HP 303B Microtower Business PC - Page 22
not to scrape the card against the other components. Figure 2-9 Removing a PCI or PCI Express x1 Expansion Card 14 Chapter 2 Removal and Replacement Procedures Microtower (MT) Chassis - HP 303B | Maintenance & Service Guide: HP 303B Microtower Business PC - Page 23
c. If you are removing a PCI Express x16 card, pull the retention arm on the back of the expansion socket away from the card and carefully rock the card back and forth until the connectors pull free from the socket. Be sure not to scrape the card against the other components. Figure 2-10 Removing a - HP 303B | Maintenance & Service Guide: HP 303B Microtower Business PC - Page 24
card, if needed. Connect internal cables to the system board, if needed. 11. Replace the computer access panel. 16 Chapter 2 Removal and Replacement Procedures Microtower (MT) Chassis - HP 303B | Maintenance & Service Guide: HP 303B Microtower Business PC - Page 25
external devices, then turn on the computer. 13. Reconfigure the computer, if necessary. Refer to the Computer Setup (F10) Utility Guide for instructions on using Computer Setup. Cable Management Always follow good cable management practices when working inside the computer. ● Keep cables away from - HP 303B | Maintenance & Service Guide: HP 303B Microtower Business PC - Page 26
black PCIE16X1 black Description PCI expansion slot PCI expansion slot PCIe x1 expansion slot PCIe x16 expansion slot 18 Chapter 2 Removal and Replacement Procedures Microtower (MT) Chassis - HP 303B | Maintenance & Service Guide: HP 303B Microtower Business PC - Page 27
001 448670-001 507509-001 449283-001 The computer supports one optical drive and one hard drive. This is needed to remove and install the guide screws on a drive. Installing Additional Drives extremes, or products that have magnetic fields such as monitors or speakers. If a drive must be mailed, - HP 303B | Maintenance & Service Guide: HP 303B Microtower Business PC - Page 28
System Board Drive Connections Table 2-4 System Board Drive Connections No. System Board Label 1 SATA2 2 SATA1 Color white blue 20 Chapter 2 Removal and Replacement Procedures Microtower (MT) Chassis - HP 303B | Maintenance & Service Guide: HP 303B Microtower Business PC - Page 29
Recovery Disc Set to restore the operating system, software drivers, and any software applications that were preinstalled on the computer. If you do not have this CD set, select Start > HP Backup and Recovery and create it now. 1. Prepare the computer for disassembly - HP 303B | Maintenance & Service Guide: HP 303B Microtower Business PC - Page 30
the computer (3). Figure 2-15 Disconnecting the hard drive cables NOTE: To install a hard drive, reverse the installation procedures. 22 Chapter 2 Removal and Replacement Procedures Microtower (MT) Chassis - HP 303B | Maintenance & Service Guide: HP 303B Microtower Business PC - Page 31
the screw (1) that secures the housing to the chassis, slide the housing up (2), and then pull the assembly away from the chassis while guiding the cables through the hole in the chassis. Figure 2-16 Removing the front I/O assembly To install the housing assembly, reverse the removal procedures - HP 303B | Maintenance & Service Guide: HP 303B Microtower Business PC - Page 32
from the clips in the optical drive cage. Figure 2-17 Removing the power switch cable from the clips 24 Chapter 2 Removal and Replacement Procedures Microtower (MT) Chassis - HP 303B | Maintenance & Service Guide: HP 303B Microtower Business PC - Page 33
the switch holder (1) to disengage it from the chassis, rotate the bottom of the switch upward (2), and then pull it away from the chassis while guiding the wires through the hole in the chassis. Figure 2-18 Removing the power switch To install the power switch/LED assembly, reverse the removal - HP 303B | Maintenance & Service Guide: HP 303B Microtower Business PC - Page 34
. NOTE: When installing the fan, make sure it is orientated so the air flows out of the computer. 26 Chapter 2 Removal and Replacement Procedures Microtower (MT) Chassis - HP 303B | Maintenance & Service Guide: HP 303B Microtower Business PC - Page 35
Power Supply Description Power supply Spare part number 570028-001 NOTE: Power supply appearance may vary. WARNING! Voltage is always present on the system board when the computer is plugged into an active AC outlet. To avoid possible personal injury and damage to the equipment the power cord - HP 303B | Maintenance & Service Guide: HP 303B Microtower Business PC - Page 36
2-20 Locating the power supply 9. Press the latch (1) near the bottom of the power supply to release it. 28 Chapter 2 Removal and Replacement Procedures Microtower (MT) Chassis - HP 303B | Maintenance & Service Guide: HP 303B Microtower Business PC - Page 37
the power supply latch and removing the power supply To install the power supply, reverse the removal procedure. Note that there is a latch, a guide, and a ledge on the computer that help secure the power supply. System Board Description System board, includes VIA Nano U2250 processor (includes - HP 303B | Maintenance & Service Guide: HP 303B Microtower Business PC - Page 38
is being used on the computer. The latest system ROM BIOS can be found at: http:\\h18000.www1.hp.com/support/files. Battery The battery that comes with your computer provides power to the real-time clock and has to AC power. 30 Chapter 2 Removal and Replacement Procedures Microtower (MT) Chassis - HP 303B | Maintenance & Service Guide: HP 303B Microtower Business PC - Page 39
to back up the computer CMOS settings. When the battery is removed or replaced, the CMOS settings will be cleared. Refer to the Troubleshooting Guide for information on backing up the CMOS settings. NOTE: Batteries, battery packs, and accumulators should not be disposed of together with the general - HP 303B | Maintenance & Service Guide: HP 303B Microtower Business PC - Page 40
and any special system setups, using Computer Setup. Refer to the Computer Setup (F10) Utility Guide. Type 2 Battery Holder 1. To release the battery from its holder, squeeze the metal clamp . Refer to the Computer Setup (F10) Utility Guide. 32 Chapter 2 Removal and Replacement Procedures Microtower - HP 303B | Maintenance & Service Guide: HP 303B Microtower Business PC - Page 41
Setup Utilities menu, complete the following steps: 1. Turn on or restart the computer. 2. As soon as the computer is turned on, press F10 when the monitor light turns green to enter Computer Setup. NOTE: If you do not press F10 at the appropriate time, you must restart the computer and again - HP 303B | Maintenance & Service Guide: HP 303B Microtower Business PC - Page 42
CMOS could become corrupted. It is safe to turn off the computer only after exiting the F10 Setup screen. Computer Setup-Main NOTE: Support for specific Computer Setup options may vary depending on the hardware configuration. Table A-1 Computer Setup-Main Option System Time System Date Language - HP 303B | Maintenance & Service Guide: HP 303B Microtower Business PC - Page 43
: ● Port Configuration - set the ability to configure ports to: ◦ Enabled ◦ Disabled ● (view only) ◦ Capacity (Size - HDD only) ◦ Transfer Mode ● Smart Support - run HDD self-test for selected channel: ◦ SMART Status Check ◦ SMART Short Self-Test ◦ SMART Extended Self-Test System Information (view - HP 303B | Maintenance & Service Guide: HP 303B Microtower Business PC - Page 44
the supervisor password. Onboard Audio Allows you to set the onboard audio to: ● Auto ● Disabled ● Enabled Computer Setup-Power NOTE: Support for specific Computer Setup options may vary depending on the hardware configuration. Table A-3 Computer Setup-Power Option Description 36 Appendix - HP 303B | Maintenance & Service Guide: HP 303B Microtower Business PC - Page 45
or code or for storage of data. Memory designated with the NX attribute may only be used for storing data. Processor instructions should not reside and cannot be executed there. This technology is used to prevent buffer overflow attacks - malicious software that takes over computers by inserting - HP 303B | Maintenance & Service Guide: HP 303B Microtower Business PC - Page 46
Computer Setup-Boot NOTE: Support for specific Computer Setup options may vary depending on the hardware configuration. Table A-4 Computer Setup-Boot Option Description Boot-time Diagnostic Disables/enables POST diagnostic - HP 303B | Maintenance & Service Guide: HP 303B Microtower Business PC - Page 47
Computer Setup-Exit NOTE: Support for specific Computer Setup options may vary depending on the hardware configuration. Table A-5 Computer Setup-Exit Option Description Exit Saving Changes Press Enter to exit - HP 303B | Maintenance & Service Guide: HP 303B Microtower Business PC - Page 48
B Diagnostics Power states The following table describes how button presses and generated events are handled in each power state. Buttons Pressed or Events Generated On Power LED Status On Num/Caps/Scroll Lock LEDs (PS/2) LAN LED (power) On LAN LED (activity) Blinking - active Off - - HP 303B | Maintenance & Service Guide: HP 303B Microtower Business PC - Page 49
for troubleshooting. HP Insight Diagnostics runs from the recovery discs. To access HP Insight Diagnostics system lock-ups. Memory problems can be caused by overheating, problems with the power supply, access HP Diagnostic Tools, the user presses the F9 button when booting the PC. If HP Diagnostic - HP 303B | Maintenance & Service Guide: HP 303B Microtower Business PC - Page 50
Improperly installed Defective The DIMM is not seated properly or a DIMM socket is bad or unusable. Open the computer casing and reseat the DIMM. Check that no debris or corrosion is in the socket. If the above remedies do not solve the DIMM issue, the DIMM could be defective. Replace the DIMM. - HP 303B | Maintenance & Service Guide: HP 303B Microtower Business PC - Page 51
diagnostic screen and/or error message to draw user's attention. For example, HP does not consider replacing a hard drive or CPU as an error condition. DLED (NOT case-sensitive), the system supports the dual-color power button LED and therefore, the BIOS support as described above is required. Using - HP 303B | Maintenance & Service Guide: HP 303B Microtower Business PC - Page 52
HP periodically releases system BIOS updates, which are available from the HP website. These updates often contain fixes for known issues in the BIOS. To find out whether a PC Setup. The BIOS revision number is listed on the main menu. 4. Write Disconnect the keyboard, monitor, and any other - HP 303B | Maintenance & Service Guide: HP 303B Microtower Business PC - Page 53
5. Locate the CMOS jumper header on the motherboard. The jumper is labeled CLR_CMOS. 6. Remove the jumper from pins 1-2 pins and put it on pins 2-3 to clear CMOS. Keep the cap on pins 2-3 for 5 to 10 seconds. 7. Replace the jumper on pins 1-2. 8. Reinstall the battery. 9. Replace the access panel, - HP 303B | Maintenance & Service Guide: HP 303B Microtower Business PC - Page 54
to try to isolate the exact problem before calling for technical support. ● Run the HP diagnostic tool. ● Run the hard drive self-test in Computer Setup. Refer to the Computer Setup (F10) Utility Guide for more information. ● If the screen is blank, plug the monitor into a different video port on - HP 303B | Maintenance & Service Guide: HP 303B Microtower Business PC - Page 55
of your computer when you call. ● Write down the computer serial number, product ID number, and monitor serial number before calling. ● Spend time troubleshooting the problem with the service technician. ● Remove any hardware that was recently added to your system. ● Remove any software that was - HP 303B | Maintenance & Service Guide: HP 303B Microtower Business PC - Page 56
, check to be sure that it is supported on the system. ● If the system has multiple video sources (embedded, PCI, or PCI-Express adapters) installed (embedded video on some models only) and a single monitor, the monitor must be plugged into the monitor connector on the source selected as the primary - HP 303B | Maintenance & Service Guide: HP 303B Microtower Business PC - Page 57
(4-inch) clearance on all vented sides of the computer and above the monitor to permit the required airflow. 2. Make sure fans are connected and interpret the error code. Solving Power Problems Common causes and solutions for power problems are listed in the following table. The computer will - HP 303B | Maintenance & Service Guide: HP 303B Microtower Business PC - Page 58
internal fan is running. Solving Hard Drive Problems Drive not found (identified). Cause Solution HP Setup Utility. ● Select Device Configuration from the Storage menu, and determine whether the device is listed. If the device is not listed list. 50 Appendix C Troubleshooting Without Diagnostics - HP 303B | Maintenance & Service Guide: HP 303B Microtower Business PC - Page 59
driver and firmware, periodically check for new releases of this software on the HP card is one of the supported types: CompactFlash (1, 2, and there is a problem with the USB port. See the USB troubleshooting guide for help in card reader or have the computer serviced. Memory card appears in My - HP 303B | Maintenance & Service Guide: HP 303B Microtower Business PC - Page 60
help. Be sure that the memory card is one of the supported types: CompactFlash (1, 2, and Microdrive), Memory Stick, MultiMedia, Secure serviced. Solving Display Problems If you encounter display problems, see the documentation that came with the monitor and to the common causes and solutions listed - HP 303B | Maintenance & Service Guide: HP 303B Microtower Business PC - Page 61
inside a flat panel monitor. Cause Solution Brightness and/or contrast settings are too high. Lower brightness and/or contrast settings. Solving Audio Problems If the computer has audio features and you encounter audio problems, see the common causes and solutions listed in the following table - HP 303B | Maintenance & Service Guide: HP 303B Microtower Business PC - Page 62
problems are listed in the following table. These guidelines do not discuss the process of debugging the network cabling. Network driver does not detect network controller. Cause Network controller is disabled. Incorrect network driver. Solution Run the HP C Troubleshooting Without Diagnostics - HP 303B | Maintenance & Service Guide: HP 303B Microtower Business PC - Page 63
a DHCP Server is present, and that the Remote System Installation Server contains drivers for the network controller. Solving Memory Problems If you encounter memory problems, some common causes and solutions are listed in the following table. System will not boot or does not function properly - HP 303B | Maintenance & Service Guide: HP 303B Microtower Business PC - Page 64
CD-ROM and DVD Problems If you encounter CD-ROM or DVD problems, see the common causes and solutions listed in the following table or Power off the PC. 2. Reconnect the power and data cables to the drive. 3. Reboot the PC 4. Reinstall the correct (new or updated) device driver. An optical drive - HP 303B | Maintenance & Service Guide: HP 303B Microtower Business PC - Page 65
Panel Component Problems If you encounter problems with devices connected to the front panel, refer to the common causes and solutions listed in the correct driver is not installed. Solution Replace the cable. Reinstall the driver and restart the computer. Solving Front Panel Component Problems 57 - HP 303B | Maintenance & Service Guide: HP 303B Microtower Business PC - Page 66
appendix contains the pin assignments for many computer and workstation connectors. Some of these connectors may not be used on the product being serviced. 4-Pin Power (for CPU) Connector and Icon Pin Signal 1 GND 2 GND 3 +12V CPU 4 -12V CPU Ethernet BNC Connector and Icon Pin Signal - HP 303B | Maintenance & Service Guide: HP 303B Microtower Business PC - Page 67
Microphone Connector and Icon (1/8" miniphone) Pin 1 (Tip) 2 (Ring) 3 (Shield) Signal Audio_left Audio_Right Ground Headphone Connector and Icon (1/8" miniphone) Pin 1 (Tip) 2 (Ring) 3 (Shield) Signal Audio_left Power_Right Ground Line-in Audio Connector and Icon (1/8" miniphone) Pin 1 (Tip) - HP 303B | Maintenance & Service Guide: HP 303B Microtower Business PC - Page 68
1 Carrier Detect (12V if powered) 2 Receive Data 3 Transmit Data 4 Data Terminal Ready 5 Signal Ground 6 Data Set Ready 7 Request to Send 8 Clear to Send 9 Ring Indicator (5V if powered) 60 Appendix D Connector Pin Assignments - HP 303B | Maintenance & Service Guide: HP 303B Microtower Business PC - Page 69
Monitor Connector and Icon Pin Signal 1 Red Analog 2 Green Analog 3 Blue Analog 4 Not used 5 Ground 6 Ground 7 Ground 8 Ground 24-Pin Power Connector Pin Signal 9 +5V ( 3V 14 -12V 15 GND 16 PSON 17 GND 18 GND Pin Signal 19 GND 20 open 21 +5V 22 +5V 23 +5V 24 GND Monitor 61 - HP 303B | Maintenance & Service Guide: HP 303B Microtower Business PC - Page 70
PCI Express x1, x4, x8, and x16 PCI Express Connector Pin A Pin Signal 1 PRSNT1 2 +12V 3 +12V 4 GND 5 JTAG2 26 PERn(2) 27 GND 28 GND 29 PERp3 30 PERn3 51 GND 52 PERp8 53 PERN8 54 GND 55 GND Pin Signal 6 JTAG3 7 JTAG4 8 JTAG5 9 +3.3V 10 +3.3V 31 GND 32 RSVD 33 RSVD 34 GND 35 PERp4 56 PERp9 57 PERn9 - HP 303B | Maintenance & Service Guide: HP 303B Microtower Business PC - Page 71
76 PERp14 81 PERn15 77 PERn14 82 GND 78 GND 79 GND 80 PERp15 Pin B information is on the next page NOTE: x1 PCI Express uses pins 1-18 x4 PCI Express uses pins 1-32 x8 PCI Express uses pins 1-49 x16 PCI Express uses pins 1-8 PCI Express x1, x4, x8, and x16 PCI Express Connector Pin B - HP 303B | Maintenance & Service Guide: HP 303B Microtower Business PC - Page 72
51 PETn8 56 GND 52 GND 57 GND 53 GND 58 PETp10 54 PETp9 59 PETn10 55 PETn9 60 GND 76 GND 81 PRSNT2# 77 GND 82 RSVD 78 PETp15 79 PETn15 80 GND Pin B information is on the next page NOTE: x1 PCI Express uses pins 1-18 x4 PCI Express uses pins 1-32 x8 PCI Express uses pins 1-49 x16 - HP 303B | Maintenance & Service Guide: HP 303B Microtower Business PC - Page 73
information for the computer. Adherence to the procedures and precautions described in this chapter is essential for proper service. CAUTION: When the computer is plugged into an AC power source, voltage is always applied to the system board. You must disconnect the power cord - HP 303B | Maintenance & Service Guide: HP 303B Microtower Business PC - Page 74
Removing DIPs* from vinyl tray 2,000 V Removing DIPs* from Styrofoam 3,500 V Removing bubble pack from PCB 7,000 V Packing PCBs in foam-lined box 5,000 V *These are then multi-packaged inside plastic tubes, trays, or Styrofoam. 4,000 V 5,000 V 20,000 V 11,000 V 11,500 V 14,500 V 26,500 V - HP 303B | Maintenance & Service Guide: HP 303B Microtower Business PC - Page 75
such as ordinary plastic assembly aids and Styrofoam. ● Use field service tools, such as cutters, screwdrivers, and vacuums, that are Static-dissipative table or floor mats with hard tie to ground ● Field service kits ● Static awareness labels ● Wrist straps and footwear straps providing one-megohm - HP 303B | Maintenance & Service Guide: HP 303B Microtower Business PC - Page 76
prolong the life of the computer: ● Keep the computer away from excessive moisture, direct sunlight, and extremes of heat and cold. ● Operate the guidelines listed above will still apply. ● Keep liquids away from the computer and keyboard. ● Never cover the ventilation slots on the monitor with - HP 303B | Maintenance & Service Guide: HP 303B Microtower Business PC - Page 77
Routine Care General Cleaning Safety Precautions 1. Never use solvents or flammable solutions to clean the computer. 2. Never immerse any parts in water or cleaning solutions; apply any liquids to a clean cloth and then use the cloth on the component. 3. Always unplug the computer when cleaning with - HP 303B | Maintenance & Service Guide: HP 303B Microtower Business PC - Page 78
component. Never use solvents or flammable liquids on the monitor. ● To clean the monitor body follow the procedures in Cleaning the Computer Case on the procedures in Cleaning the Computer Case on page 69. Service Considerations Listed below are some of the considerations that you should keep in - HP 303B | Maintenance & Service Guide: HP 303B Microtower Business PC - Page 79
Tools and Software Requirements To service the computer, you need the following: ● Torx T-15 screwdriver (HP screwdriver with bits, PN 161946- caught or snagged by parts being removed or replaced. CAUTION: When servicing this computer, ensure that cables are placed in their proper location during - HP 303B | Maintenance & Service Guide: HP 303B Microtower Business PC - Page 80
extremes, or products that have magnetic fields such as monitors or speakers. Lithium Coin Cell Battery The battery that the chassis you are working on in this guide for instructions on the replacement procedures. WARNING! This computer to HP, their authorized partners, or their agents. - HP 303B | Maintenance & Service Guide: HP 303B Microtower Business PC - Page 81
F Serial ATA (SATA) Drive Guidelines and Features NOTE: HP only supports the use of SATA hard drives on these models of computer. No Parallel ATA (PATA) drives are supported. SATA Hard Drives Serial ATA Hard Drive Characteristics Number of pins/conductors in data cable Number of pins in power - HP 303B | Maintenance & Service Guide: HP 303B Microtower Business PC - Page 82
ATA Drives The Self Monitoring Analysis and Recording Technology (SMART) ATA drives for the HP Personal Computers have built- by the operating system may differ from that marked on the hard drive or listed in the computer specification. Drive size calculations by drive manufacturers are bytes to the - HP 303B | Maintenance & Service Guide: HP 303B Microtower Business PC - Page 83
Power cord sets for use in other countries must meet the requirements of the country where you use the computer. General Requirements The requirements listed below are applicable to all countries: 1. The power cord must be approved by an acceptable accredited agency responsible for evaluation in the - HP 303B | Maintenance & Service Guide: HP 303B Microtower Business PC - Page 84
Country-Specific Requirements Additional requirements specific to a country are shown in parentheses and explained below. Country Accrediting Agency Country Accrediting Agency Australia (1) EANSW Italy (1) IMQ Austria (1) OVE Japan (3) METI Belgium (1) CEBC Norway (1) NEMKO Canada - HP 303B | Maintenance & Service Guide: HP 303B Microtower Business PC - Page 85
drive spinning DVD-ROM sequential reads LWAd = 43 dB LWAd = 55 dB Desktop average LpAm = 32 dBA Deskside average LpAm = 44 dBA NOTE: Listed are the declared A-weighted sound power levels (LWAd) and declared average desktop seated operator position A-weighted sound pressure levels (LpAm) when the - HP 303B | Maintenance & Service Guide: HP 303B Microtower Business PC - Page 86
set requirements 76 Customer Support 46 D diagnostics 40 DIMM slot cover removing 14 expansion slot cover, MT replacing 15 F fan power supply 70 problems 50 headphone pin assignments 59 helpful hints 47 HP Insight Diagnostics 41 I installing drive cables 19 K keyboard cleaning 69 keyboard problems - HP 303B | Maintenance & Service Guide: HP 303B Microtower Business PC - Page 87
monitor pin assignments 61 monitor problems 52 mouse cleaning 70 mouse problems 53 N network problems 54 O operating guidelines 68 optical drive removing 21 spare part number 19 optical drive problems interface pin assignments 59 service considerations 70 software servicing computer 71 spare part
-
 1
1 -
 2
2 -
 3
3 -
 4
4 -
 5
5 -
 6
6 -
 7
7 -
8
-
9
-
10
-
11
-
12
-
13
-
14
-
15
-
16
-
17
-
18
-
19
-
20
-
21
-
22
-
23
-
24
-
25
-
26
-
27
-
28
-
29
-
30
-
31
-
32
-
33
-
34
-
35
-
36
-
37
-
38
-
39
-
40
-
41
-
42
-
43
-
44
-
45
-
46
-
47
-
48
-
49
-
50
-
51
-
52
-
53
-
54
-
55
-
56
-
57
-
58
-
59
-
60
-
61
-
62
-
63
-
64
-
65
-
66
-
67
-
68
-
69
-
70
-
71
-
72
-
73
-
74
-
75
-
76
-
77
-
78
-
79
-
80
-
81
-
82
-
83
-
84
-
85
-
86
-
87
 |
 |

Maintenance & Service Guide
HP 303B Microtower Business PC