HP 303B Maintenance & Service Guide: HP 303B Microtower Business PC - Page 13
Removing the Computer Access Panel,
 |
View all HP 303B manuals
Add to My Manuals
Save this manual to your list of manuals |
Page 13 highlights
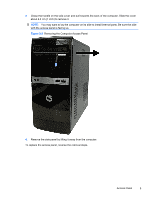
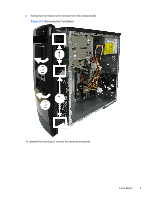
3. Grasp the handle on the side cover and pull towards the back of the computer. Slide the cover about 2.4 cm (1 inch) to remove it. NOTE: You may want to lay the computer on its side to install internal parts. Be sure the side with the access panel is facing up. Figure 2-2 Removing the Computer Access Panel 4. Remove the side panel by lifting it away from the computer. To replace the access panel, reverse the removal steps. Access Panel 5
-
 1
1 -
2
-
3
-
4
-
5
-
6
-
7
-
 8
8 -
 9
9 -
 10
10 -
 11
11 -
 12
12 -
 13
13 -
 14
14 -
 15
15 -
 16
16 -
 17
17 -
 18
18 -
19
-
20
-
21
-
22
-
23
-
24
-
25
-
26
-
27
-
28
-
29
-
30
-
31
-
32
-
33
-
34
-
35
-
36
-
37
-
38
-
39
-
40
-
41
-
42
-
43
-
44
-
45
-
46
-
47
-
48
-
49
-
50
-
51
-
52
-
53
-
54
-
55
-
56
-
57
-
58
-
59
-
60
-
61
-
62
-
63
-
64
-
65
-
66
-
67
-
68
-
69
-
70
-
71
-
72
-
73
-
74
-
75
-
76
-
77
-
78
-
79
-
80
-
81
-
82
-
83
-
84
-
85
-
86
-
87
 |
 |
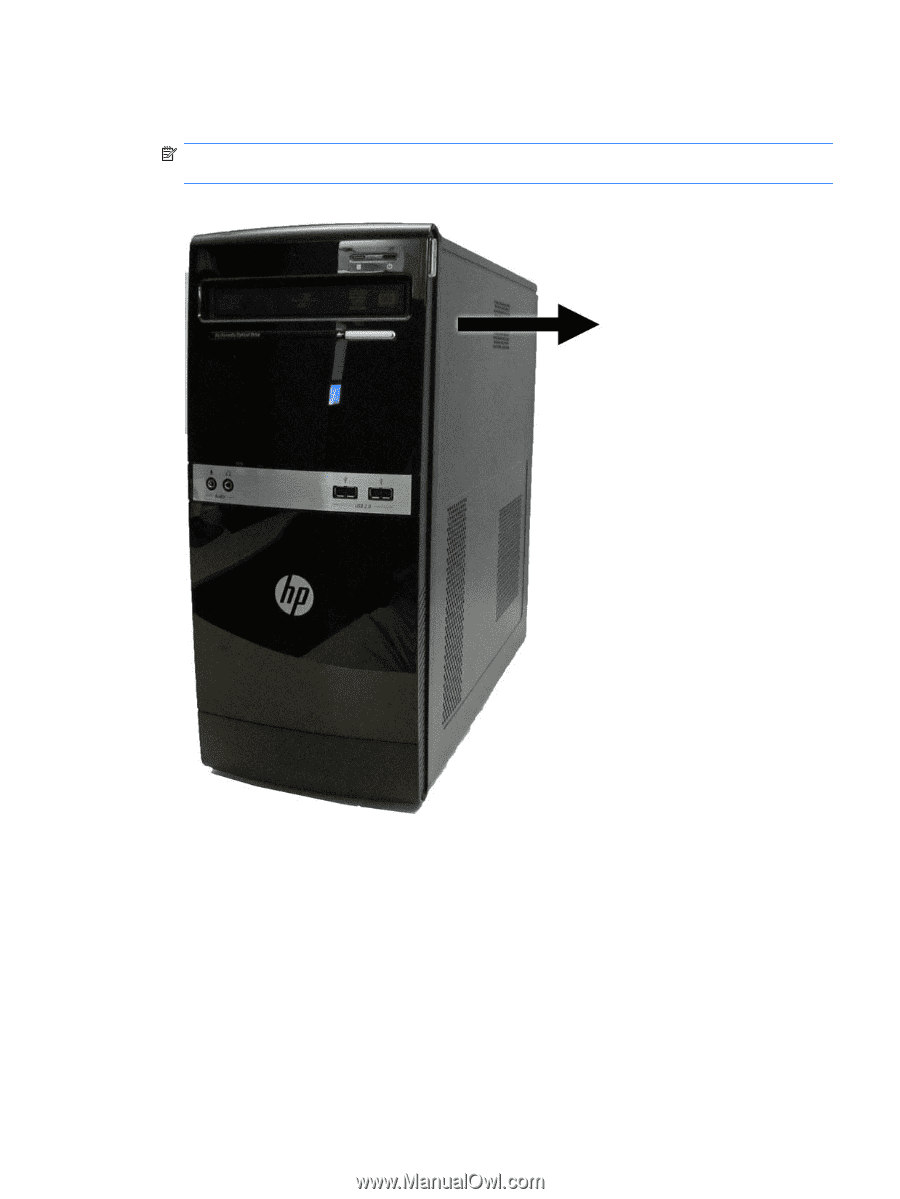
3.
Grasp the handle on the side cover and pull towards the back of the computer. Slide the cover
about 2.4 cm (1 inch) to remove it.
NOTE:
You may want to lay the computer on its side to install internal parts. Be sure the side
with the access panel is facing up.
Figure 2-2
Removing the Computer Access Panel
4.
Remove the side panel by lifting it away from the computer.
To replace the access panel, reverse the removal steps.
Access Panel
5