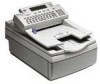
HP 8100C HP Digital Sender 8100C - (English) User Guide, C7707-90005 - Page 35
If you are viewing your Personal E-Mail addresses book or the Fax numbers book, you may
 |
View all HP 8100C manuals
Add to My Manuals
Save this manual to your list of manuals |
Page 35 highlights
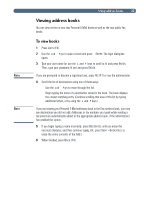
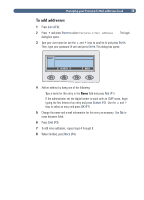
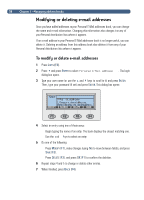
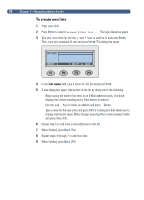
33 You can view entries in your two Personal E-Mail books as well as the two public Fax books. 1 Press LISTS (F4). 2 Use the and keys to select a book and press ENTER. The login dialog box opens. 3 Type your user name (or use the and keys to scroll to it) and press ENTER. Then, type your password (if set) and press ENTER. Note If you are prompted to become a registered user, press YES (F1) or see the administrator 4 Scroll the list of destinations using one of these ways: Use the and keys to move through the list. Begin typing the name of a destination stored in the book. The book displays the closest matching entry. (Continue scrolling that area of the list by typing additional letters, or by using the and keys.) Note If you are viewing your Personal E-Mail addresses book or the Fax numbers book, you may see destinations you did not add. Addresses or fax numbers you typed while sending a document are automatically added to the appropriate address book, if the administrator has enabled this option. 5 If you begin typing a name incorrectyl , press BACKSPACE until you erase the incorrect character, and then continue typing. (Or, press SHIFT+BACKSPACE to erase the entire contents of the field.) 6 When finished, press BACK (F4).
-
 1
1 -
2
-
3
-
4
-
5
-
6
-
7
-
8
-
9
-
10
-
11
-
12
-
13
-
14
-
15
-
16
-
17
-
18
-
19
-
20
-
21
-
22
-
23
-
24
-
25
-
26
-
27
-
28
-
29
-
 30
30 -
 31
31 -
 32
32 -
 33
33 -
 34
34 -
 35
35 -
 36
36 -
 37
37 -
 38
38 -
 39
39 -
 40
40 -
41
-
42
-
43
-
44
-
45
-
46
-
47
-
48
-
49
-
50
-
51
-
52
-
53
-
54
-
55
-
56
-
57
-
58
-
59
-
60
-
61
-
62
-
63
-
64
-
65
-
66
-
67
-
68
-
69
-
70
-
71
-
72
-
73
-
74
-
75
-
76
-
77
-
78
-
79
-
80
 |
 |
