HP Deskjet 840/842/843c HP DeskJet 840C Series - (English) Windows Connect Use - Page 45
Printing Photographs
 |
View all HP Deskjet 840/842/843c manuals
Add to My Manuals
Save this manual to your list of manuals |
Page 45 highlights
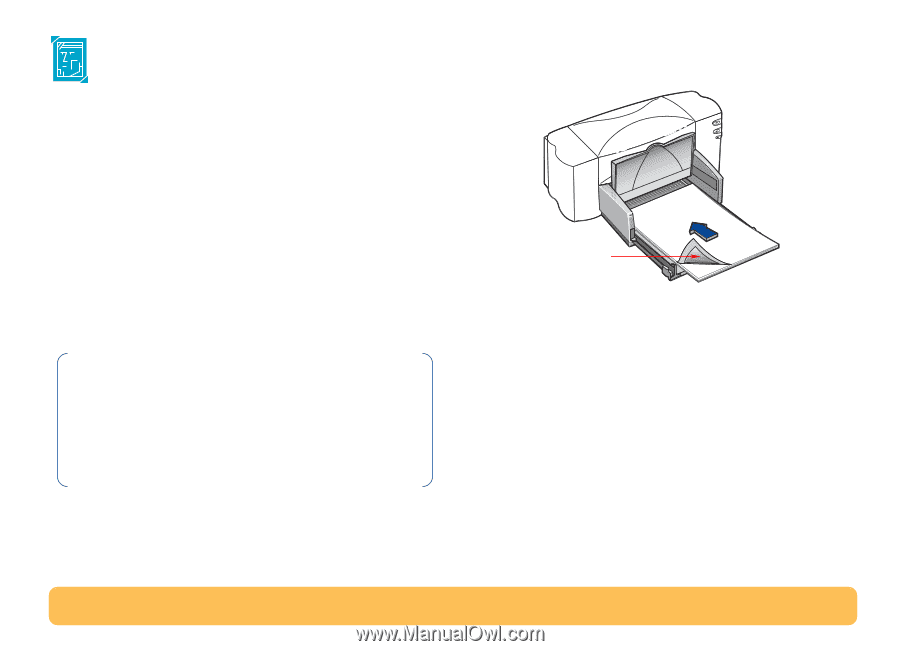
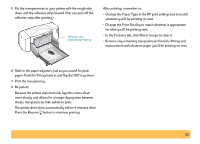
Printing Photographs Printing photographs is similar to printing any other color image. The main differences are paper and print quality selections. For best results when printing photographs, use one of HP's photo papers. For a list of available photo paper products and ordering information, see page 71. 1 In the Setup tab of the HP print settings box, select a photo paper for the Paper Type. (See "Finding the HP print settings box" on page 30.) 2 Make sure Best print quality is selected. When you select an HP photo paper, this option is automatically selected. PhotoREt also becomes available. This feature can only be disabled (unchecked) when an HP photo paper is selected. Note: PhotoREt automatically sets the best print speed and quality for your image. If this feature is disabled (unchecked), the image is printed at the highest available resolution compatible with your settings (up to 600 x 1200 dpi); however, the image will print significantly slower and will temporarily require a large amount of hard disk space. 3 Load the paper as you would for normal printing. Make sure you insert the paper printable side down. Printable side down 4 Print the document. For the best results, remove each sheet promptly after printing, and allow it to dry printable side up. (The drying time will vary depending on the humidity.) After printing, remember to: • Remove any special paper you've used from the IN tray and replace it with whatever you'll be printing on next. • Reset the Paper Size and Paper Type on the Setup tab of the HP print settings box to whatever you'll be printing on next. 45
-
 1
1 -
2
-
3
-
4
-
5
-
6
-
7
-
8
-
9
-
10
-
11
-
12
-
13
-
14
-
15
-
16
-
17
-
18
-
19
-
20
-
21
-
22
-
23
-
24
-
25
-
26
-
27
-
28
-
29
-
30
-
31
-
32
-
33
-
34
-
35
-
36
-
37
-
38
-
39
-
 40
40 -
 41
41 -
 42
42 -
 43
43 -
 44
44 -
 45
45 -
 46
46 -
 47
47 -
 48
48 -
 49
49 -
 50
50 -
51
-
52
-
53
-
54
-
55
-
56
-
57
-
58
-
59
-
60
-
61
-
62
-
63
-
64
-
65
-
66
-
67
-
68
-
69
-
70
-
71
-
72
-
73
-
74
 |
 |