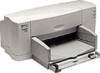
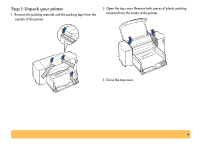
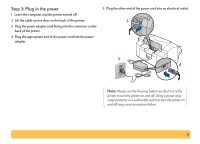
HP Deskjet 840/842/843c HP DeskJet 840C Series - (English) Windows Connect Use - Page 5
Step 2: Connect parallel cable, Plug the end of the cable that does not have screws attached
 |
View all HP Deskjet 840/842/843c manuals
Add to My Manuals
Save this manual to your list of manuals |
Page 5 highlights
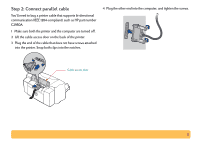
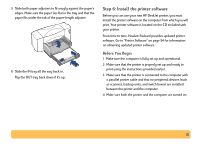
Step 2: Connect parallel cable You'll need to buy a printer cable that supports bi-directional communication (IEEE 1284-compliant), such as HP part number C2950A. 1 Make sure both the printer and the computer are turned off. 2 Lift the cable access door on the back of the printer. 3 Plug the end of the cable that does not have screws attached into the printer. Snap both clips into the notches. 4 Plug the other end into the computer, and tighten the screws. Cable access door 5
-
 1
1 -
 2
2 -
 3
3 -
 4
4 -
 5
5 -
 6
6 -
 7
7 -
 8
8 -
 9
9 -
 10
10 -
 11
11 -
12
-
13
-
14
-
15
-
16
-
17
-
18
-
19
-
20
-
21
-
22
-
23
-
24
-
25
-
26
-
27
-
28
-
29
-
30
-
31
-
32
-
33
-
34
-
35
-
36
-
37
-
38
-
39
-
40
-
41
-
42
-
43
-
44
-
45
-
46
-
47
-
48
-
49
-
50
-
51
-
52
-
53
-
54
-
55
-
56
-
57
-
58
-
59
-
60
-
61
-
62
-
63
-
64
-
65
-
66
-
67
-
68
-
69
-
70
-
71
-
72
-
73
-
74
 |
 |

5
Step 2: Connect parallel cable
You’ll need to buy a printer cable that supports bi-directional
communication (IEEE 1284-compliant), such as HP part number
C2950A.
1
Make sure both the printer and the computer are turned off.
2
Lift the cable access door on the back of the printer.
3
Plug the end of the cable that does not have screws attached
into the printer. Snap both clips into the notches.
4
Plug the other end into the computer, and tighten the screws.
Cable access door