HP Digital Sender Flow 8500 User Guide - Page 103
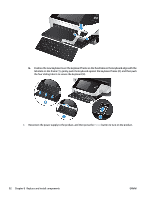
Reconnect the power and Ethernet cables, and, optionally, the cable-style lock
 |
View all HP Digital Sender Flow 8500 manuals
Add to My Manuals
Save this manual to your list of manuals |
Page 103 highlights
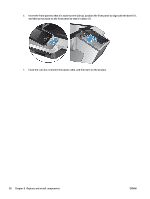
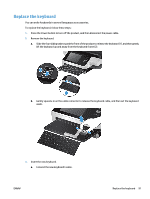
6. Slide the hard drive into the drive housing until it snaps into place (ensure that the pegs on the side of the drive rails fit into the slot on the drive housing), and then connect the drive cable to the drive. NOTE: Make sure to tuck the drive cable under the cable restraint. 7. Slide the rear panel drawer assembly into place (taking care that no cables are pinched), ensure that the drawer assembly is seated firmly against the chassis, and then tighten the thumbscrews. 8. Reconnect the power and Ethernet cables, and, optionally, the cable-style lock, and then press the Power button to turn on the product. ENWW Replace the hard drive 95
-
 1
1 -
2
-
3
-
4
-
5
-
6
-
7
-
8
-
9
-
10
-
11
-
12
-
13
-
14
-
15
-
16
-
17
-
18
-
19
-
20
-
21
-
22
-
23
-
24
-
25
-
26
-
27
-
28
-
29
-
30
-
31
-
32
-
33
-
34
-
35
-
36
-
37
-
38
-
39
-
40
-
41
-
42
-
43
-
44
-
45
-
46
-
47
-
48
-
49
-
50
-
51
-
52
-
53
-
54
-
55
-
56
-
57
-
58
-
59
-
60
-
61
-
62
-
63
-
64
-
65
-
66
-
67
-
68
-
69
-
70
-
71
-
72
-
73
-
74
-
75
-
76
-
77
-
78
-
79
-
80
-
81
-
82
-
83
-
84
-
85
-
86
-
87
-
88
-
89
-
90
-
91
-
92
-
93
-
94
-
95
-
96
-
97
-
 98
98 -
 99
99 -
 100
100 -
 101
101 -
 102
102 -
 103
103 -
 104
104 -
 105
105 -
 106
106 -
 107
107 -
 108
108 -
109
-
110
-
111
-
112
-
113
-
114
-
115
-
116
-
117
-
118
-
119
-
120
-
121
-
122
-
123
-
124
-
125
-
126
-
127
-
128
-
129
-
130
-
131
-
132
-
133
-
134
-
135
-
136
-
137
-
138
-
139
-
140
-
141
-
142
-
143
-
144
-
145
-
146
 |
 |
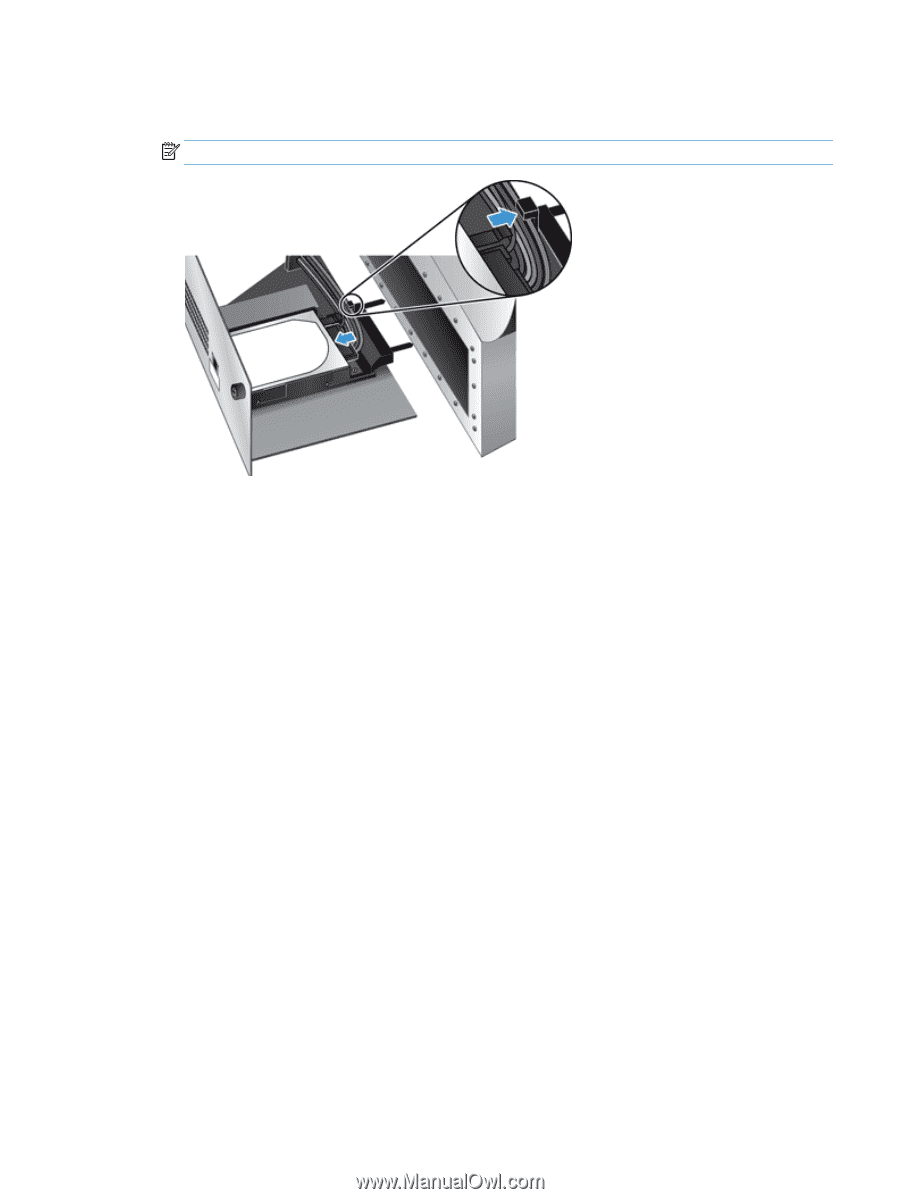
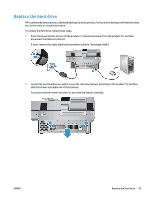
6.
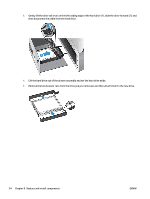
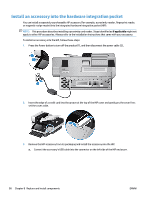
Slide the hard drive into the drive housing until it snaps into place (ensure that the pegs on the side of the
drive rails fit into the slot on the drive housing), and then connect the drive cable to the drive.
NOTE:
Make sure to tuck the drive cable under the cable restraint.
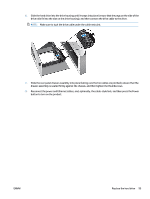
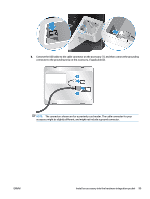
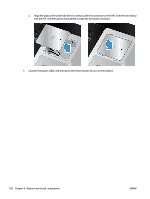
7.
Slide the rear panel drawer assembly into place (taking care that no cables are pinched), ensure that the
drawer assembly is seated firmly against the chassis, and then tighten the thumbscrews.
8.
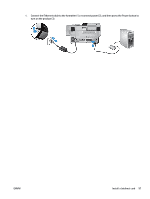
Reconnect the power and Ethernet cables, and, optionally, the cable-style lock, and then press the Power
button to turn on the product.
ENWW
Replace the hard drive
95