HP Digital Sender Flow 8500 User Guide - Page 98
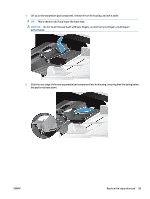
and then press down on the front panel to seat it in place 2., Close the scan lid
 |
View all HP Digital Sender Flow 8500 manuals
Add to My Manuals
Save this manual to your list of manuals |
Page 98 highlights
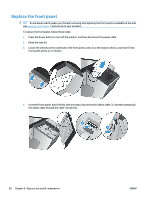
8. Invert the front panel so that it is touch screen side up, position the front panel to align with the bezel (1), and then press down on the front panel to seat it in place (2). 9. Close the scan lid, reconnect the power cable, and then turn on the product. 90 Chapter 8 Replace and install components ENWW
-
 1
1 -
2
-
3
-
4
-
5
-
6
-
7
-
8
-
9
-
10
-
11
-
12
-
13
-
14
-
15
-
16
-
17
-
18
-
19
-
20
-
21
-
22
-
23
-
24
-
25
-
26
-
27
-
28
-
29
-
30
-
31
-
32
-
33
-
34
-
35
-
36
-
37
-
38
-
39
-
40
-
41
-
42
-
43
-
44
-
45
-
46
-
47
-
48
-
49
-
50
-
51
-
52
-
53
-
54
-
55
-
56
-
57
-
58
-
59
-
60
-
61
-
62
-
63
-
64
-
65
-
66
-
67
-
68
-
69
-
70
-
71
-
72
-
73
-
74
-
75
-
76
-
77
-
78
-
79
-
80
-
81
-
82
-
83
-
84
-
85
-
86
-
87
-
88
-
89
-
90
-
91
-
92
-
 93
93 -
 94
94 -
 95
95 -
 96
96 -
 97
97 -
 98
98 -
 99
99 -
 100
100 -
 101
101 -
 102
102 -
 103
103 -
104
-
105
-
106
-
107
-
108
-
109
-
110
-
111
-
112
-
113
-
114
-
115
-
116
-
117
-
118
-
119
-
120
-
121
-
122
-
123
-
124
-
125
-
126
-
127
-
128
-
129
-
130
-
131
-
132
-
133
-
134
-
135
-
136
-
137
-
138
-
139
-
140
-
141
-
142
-
143
-
144
-
145
-
146
 |
 |
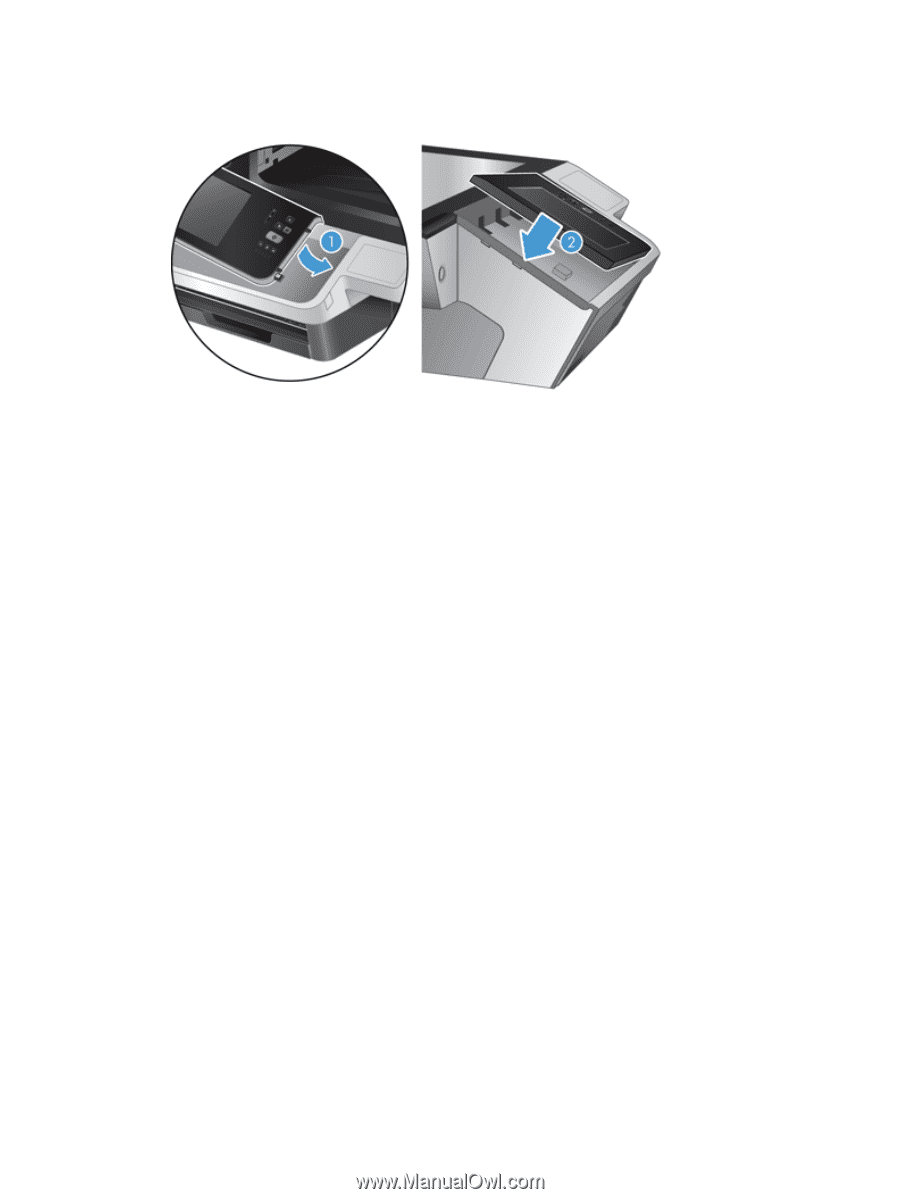
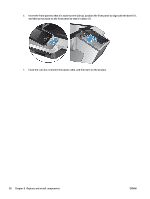
8.
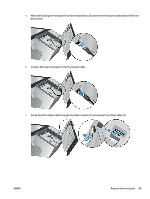
Invert the front panel so that it is touch screen side up, position the front panel to align with the bezel (1),
and then press down on the front panel to seat it in place (2).
9.
Close the scan lid, reconnect the power cable, and then turn on the product.
90
Chapter 8
Replace and install components
ENWW