HP Digital Sender Flow 8500 User Guide - Page 37
Set up and con e-mail settings using the E-mail Setup Wizard
 |
View all HP Digital Sender Flow 8500 manuals
Add to My Manuals
Save this manual to your list of manuals |
Page 37 highlights
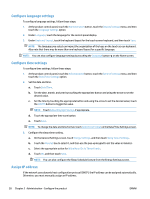
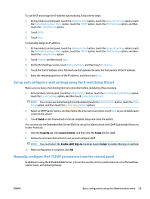
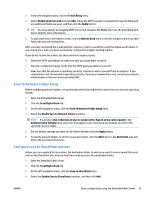
To use DHCP and assign the IP address automatically, follow these steps: 1. At the product control panel, touch the Administration button, touch the Network Settings option, touch the Embedded Jetdirect Menu option, touch the TCP/IP option, touch the IPV4 Settings option, and then touch the Config Method option. 2. Touch DHCP. 3. Touch Save. To manually assign an IP address: 1. At the product control panel, touch the Administration button, touch the Network Settings option, touch the Embedded Jetdirect Menu option, touch the TCP/IP option, touch the IPV4 Settings option, and then touch the Config Method option. 2. Touch Manual, and then touch Save. 3. On the IPv4 Settings screen, touch Manual Settings, and then touch IP Address. 4. Touch the first IP address entry field and use the keyboard to enter the first portion of the IP address. 5. Enter the remaining portions of the IP address, and then touch Save. Set up and configure e-mail settings using the E-mail Setup Wizard Make sure you have a functioning Internet connection before completing this procedure. 1. At the product control panel, touch the Administration button, touch the Scan/Digital Send Settings option, touch the E-mail Settings option, and then touch E-mail Setup Wizard. NOTE: You can also use Initial Setup if it is still enabled (touch the Administration button, touch the Initial Setup option, and then touch the E-mail Setup Wizard option). 2. Select an SMTP server option, and then follow the onscreen instructions; touch Next as you complete each screen in the wizard. 3. Touch Finish on the final wizard screen to complete setup and close the wizard. You can also use the Embedded Web Server (EWS) to set up the address book with LDAP (Lightweight Directory Access Protocol). 1. Click the Security tab, click Access Control, and then click the Setup link for LDAP. 2. Follow the onscreen instructions to set up and configure LDAP. NOTE: You must select the Enable LDAP Sign In checkbox (under Setup) to enable this sign-in method. 3. When configuration is complete, click OK. Manually configure IPv4 TCP/IP parameters from the control panel In addition to using the Embedded Web Server, you can also use the control-panel menus to set an IPv4 address, subnet mask, and default gateway. ENWW Basic configuration using the Administration menu 29
-
 1
1 -
2
-
3
-
4
-
5
-
6
-
7
-
8
-
9
-
10
-
11
-
12
-
13
-
14
-
15
-
16
-
17
-
18
-
19
-
20
-
21
-
22
-
23
-
24
-
25
-
26
-
27
-
28
-
29
-
30
-
31
-
 32
32 -
 33
33 -
 34
34 -
 35
35 -
 36
36 -
 37
37 -
 38
38 -
 39
39 -
 40
40 -
 41
41 -
 42
42 -
43
-
44
-
45
-
46
-
47
-
48
-
49
-
50
-
51
-
52
-
53
-
54
-
55
-
56
-
57
-
58
-
59
-
60
-
61
-
62
-
63
-
64
-
65
-
66
-
67
-
68
-
69
-
70
-
71
-
72
-
73
-
74
-
75
-
76
-
77
-
78
-
79
-
80
-
81
-
82
-
83
-
84
-
85
-
86
-
87
-
88
-
89
-
90
-
91
-
92
-
93
-
94
-
95
-
96
-
97
-
98
-
99
-
100
-
101
-
102
-
103
-
104
-
105
-
106
-
107
-
108
-
109
-
110
-
111
-
112
-
113
-
114
-
115
-
116
-
117
-
118
-
119
-
120
-
121
-
122
-
123
-
124
-
125
-
126
-
127
-
128
-
129
-
130
-
131
-
132
-
133
-
134
-
135
-
136
-
137
-
138
-
139
-
140
-
141
-
142
-
143
-
144
-
145
-
146
 |
 |