HP NetServer LXr Pro8 HP Netserver E 60, LC 3, LH 3/3r, and LPr Processor Upgr - Page 44
Terminator, Board
 |
View all HP NetServer LXr Pro8 manuals
Add to My Manuals
Save this manual to your list of manuals |
Page 44 highlights
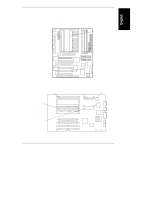
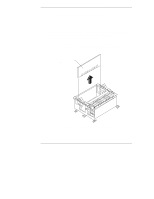
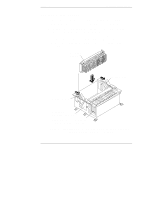
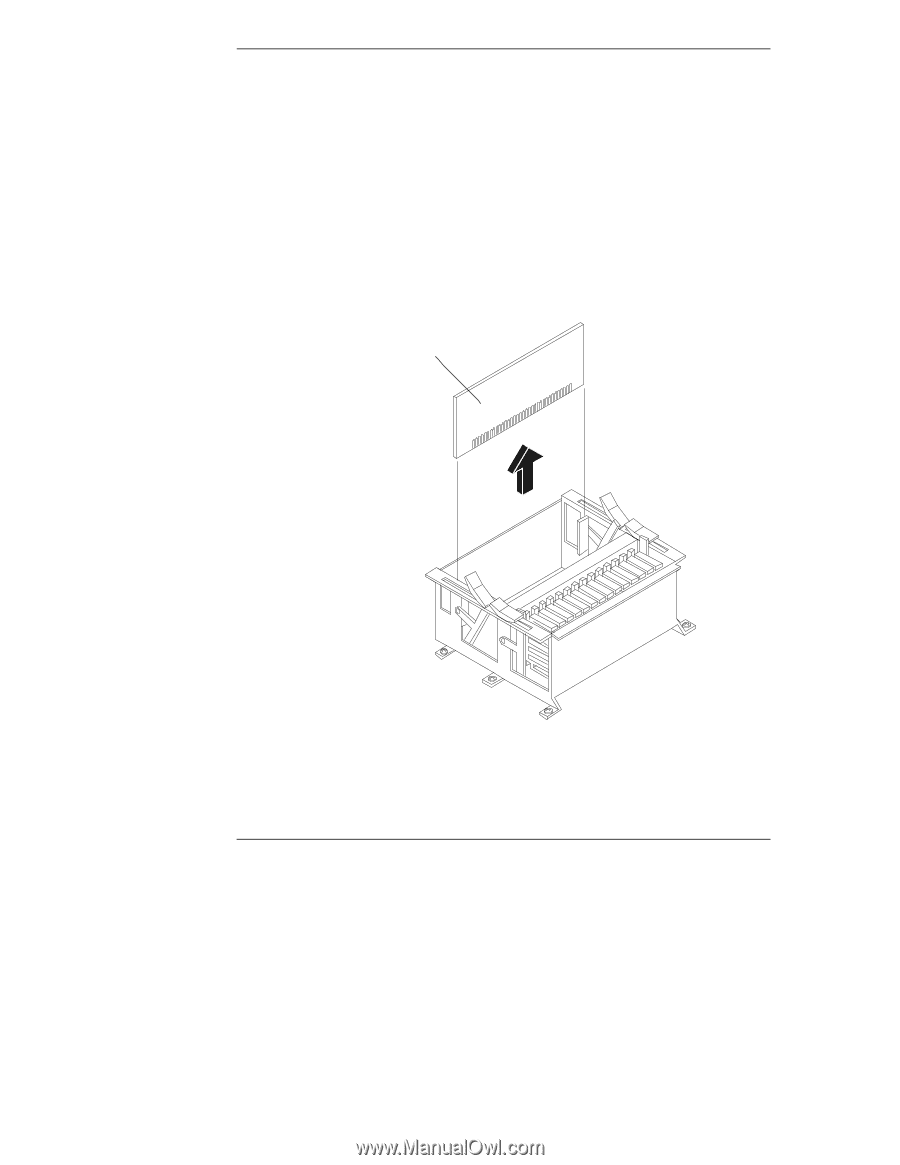
Chapter 4 Installation in E 60 and LPr If any accessory boards block access to the processors (or VRM positions in the HP NetServer LPr), refer to your NetServer documentation to remove those accessory boards. Removing the Terminator Board If your system has one processor, a terminator board is installed in the secondary processor position. You must remove the terminator board before installing a processor module into this slot. (See Figure 4-3). 1. Remove the terminator board from the secondary processor position as shown in Figure 4-3. Hold the terminator board by its edges, and gently pull it directly upwards. Terminator Board Figure 4-3. Removing the Terminator Board 2. Save the terminator board for future use. 40
-
 1
1 -
2
-
3
-
4
-
5
-
6
-
7
-
8
-
9
-
10
-
11
-
12
-
13
-
14
-
15
-
16
-
17
-
18
-
19
-
20
-
21
-
22
-
23
-
24
-
25
-
26
-
27
-
28
-
29
-
30
-
31
-
32
-
33
-
34
-
35
-
36
-
37
-
38
-
 39
39 -
 40
40 -
 41
41 -
 42
42 -
 43
43 -
 44
44 -
 45
45 -
 46
46 -
 47
47 -
 48
48 -
 49
49 -
50
-
51
-
52
-
53
-
54
-
55
-
56
-
57
-
58
-
59
-
60
-
61
-
62
-
63
-
64
-
65
 |
 |
Chapter 4
Installation in E 60 and LPr
40
If any accessory boards block access to the processors (or VRM positions in the
HP NetServer LPr), refer to your NetServer documentation to remove those
accessory boards.
Removing the Terminator Board
If your system has one processor, a terminator board is installed in the secondary
processor position. You must remove the terminator board before installing a
processor module into this slot. (See Figure 4-3).
1.
Remove the terminator board from the secondary processor position as
shown in Figure 4-3. Hold the terminator board by its edges, and gently
pull it directly upwards.
Terminator
Board
Figure 4-3.
Removing the Terminator Board
2.
Save the terminator board for future use.