HP Omni Pro 110 Maintenance and Service Guide: HP Omni Pro 110 All-in-One PC - Page 38
Stand, Removal and Replacement Procedures All-in One AIO Chassis
 |
View all HP Omni Pro 110 manuals
Add to My Manuals
Save this manual to your list of manuals |
Page 38 highlights
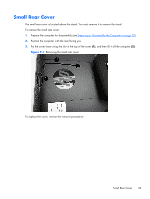
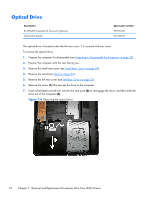
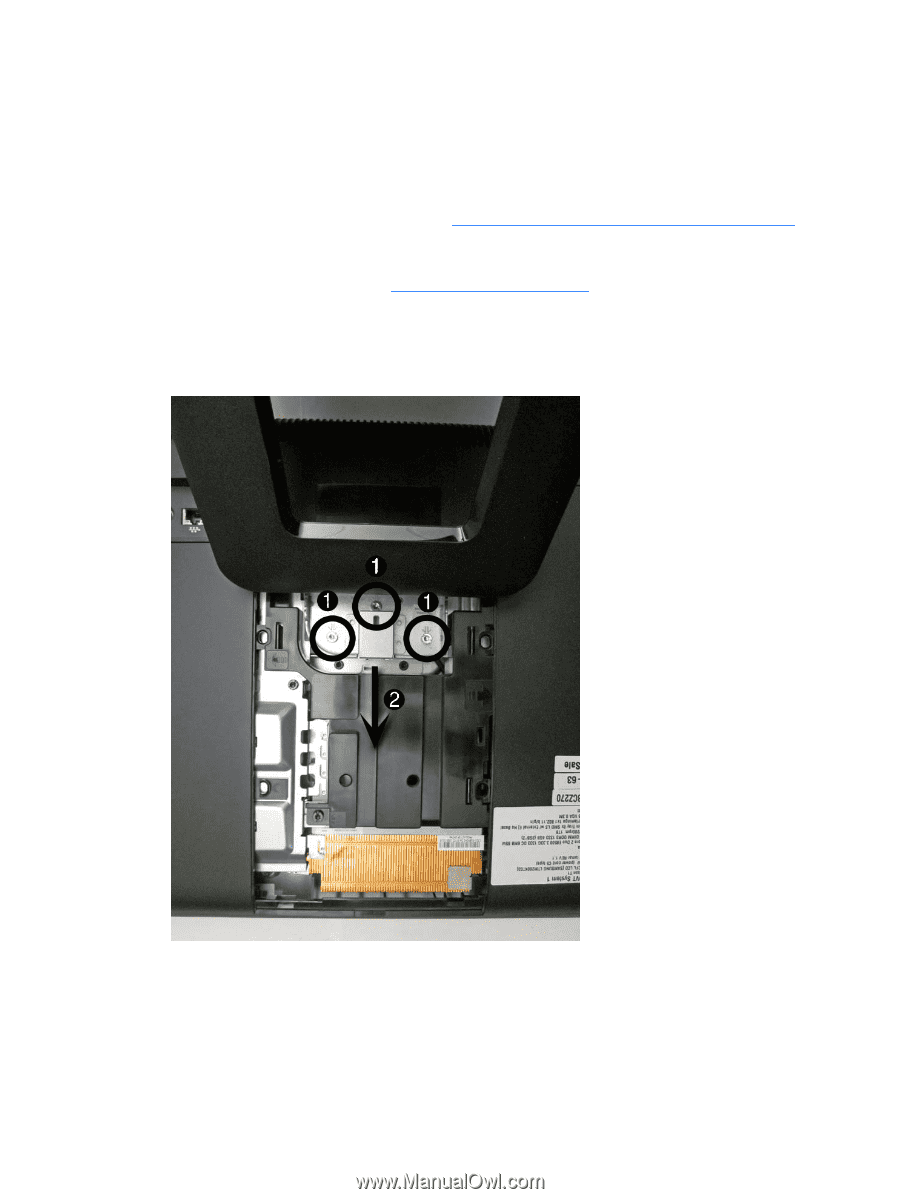
Stand The stand is secured with three screws. To remove the stand: 1. Prepare the computer for disassembly (see Preparing to Disassemble the Computer on page 28). 2. Position the computer with the rear facing you. 3. Remove the small rear cover (see Small Rear Cover on page 29). 4. Remove the three Torx screws (1) that secure the stand to the computer. 5. Slide the stand toward the top of the computer (2), and then lift it off the computer. Figure 7-2 Removing the stand To replace the stand, reverse the removal procedures. 30 Chapter 7 Removal and Replacement Procedures All-in One (AIO) Chassis
-
 1
1 -
2
-
3
-
4
-
5
-
6
-
7
-
8
-
9
-
10
-
11
-
12
-
13
-
14
-
15
-
16
-
17
-
18
-
19
-
20
-
21
-
22
-
23
-
24
-
25
-
26
-
27
-
28
-
29
-
30
-
31
-
32
-
 33
33 -
 34
34 -
 35
35 -
 36
36 -
 37
37 -
 38
38 -
 39
39 -
 40
40 -
 41
41 -
 42
42 -
 43
43 -
44
-
45
-
46
-
47
-
48
-
49
-
50
-
51
-
52
-
53
-
54
-
55
-
56
-
57
-
58
-
59
-
60
-
61
-
62
-
63
-
64
-
65
-
66
-
67
-
68
-
69
-
70
-
71
-
72
-
73
-
74
-
75
-
76
-
77
-
78
-
79
-
80
-
81
-
82
-
83
-
84
-
85
-
86
-
87
-
88
-
89
-
90
-
91
-
92
-
93
-
94
-
95
 |
 |
Stand
The stand is secured with three screws.
To remove the stand:
1.
Prepare the computer for disassembly (see
Preparing to Disassemble the Computer
on page
28
).
2.
Position the computer with the rear facing you.
3.
Remove the small rear cover (see
Small Rear Cover
on page
29
).
4.
Remove the three Torx screws
(1)
that secure the stand to the computer.
5.
Slide the stand toward the top of the computer
(2)
, and then lift it off the computer.
Figure 7-2
Removing the stand
To replace the stand, reverse the removal procedures.
30
Chapter 7
Removal and Replacement Procedures All-in One (AIO) Chassis