HP Omni Pro 110 Maintenance and Service Guide: HP Omni Pro 110 All-in-One PC - Page 40
Optical Drive - aio
 |
View all HP Omni Pro 110 manuals
Add to My Manuals
Save this manual to your list of manuals |
Page 40 highlights
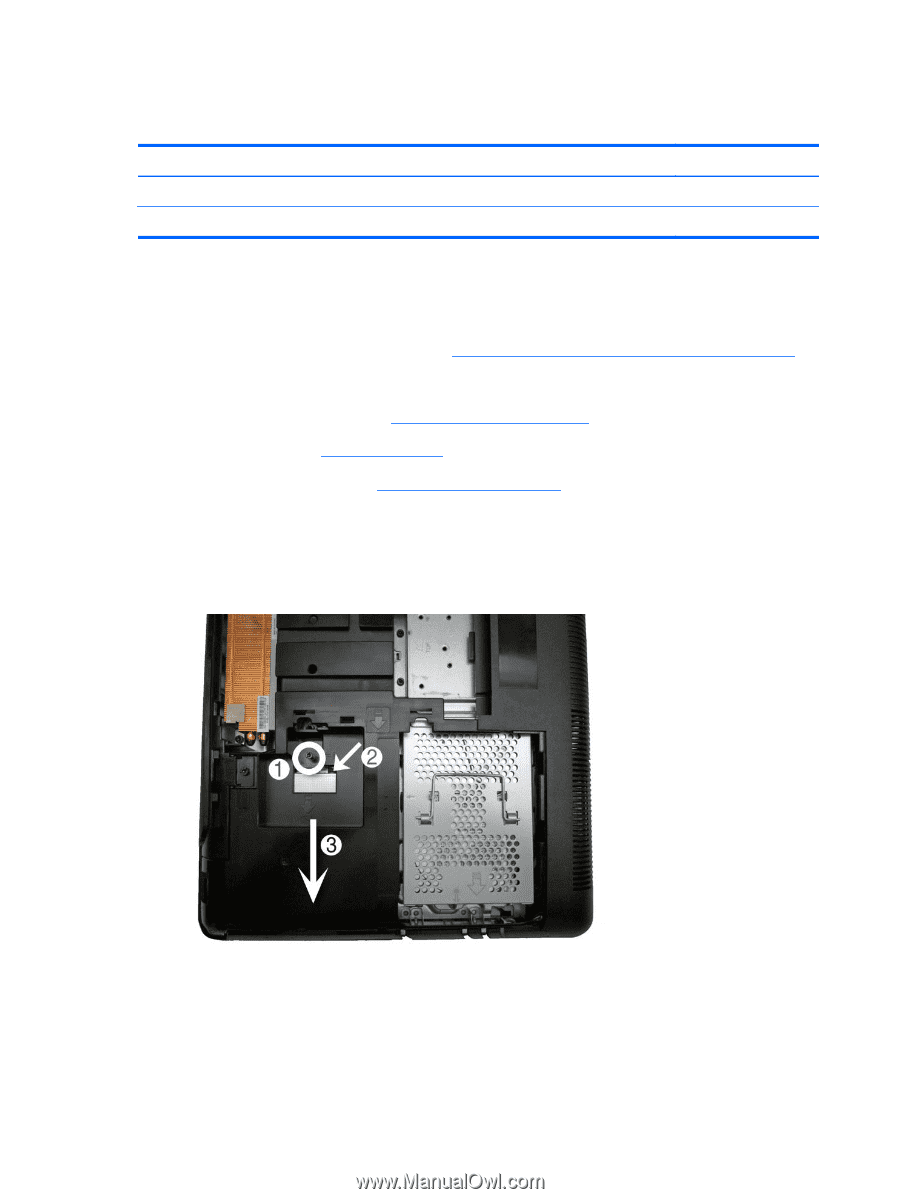
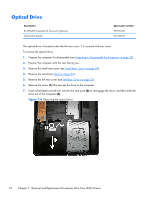
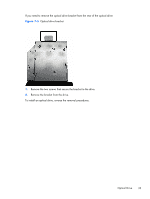
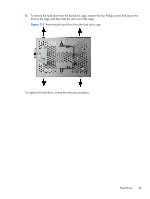
Optical Drive Description 8X DVD±RW SuperMulti DL Drive with LightScribe Optical drive bracket Spare part number 597927-001 651600-001 The optical drive is located under the left rear cover. It is secured with one screw. To remove the optical drive: 1. Prepare the computer for disassembly (see Preparing to Disassemble the Computer on page 28). 2. Position the computer with the rear facing you. 3. Remove the small rear cover (see Small Rear Cover on page 29). 4. Remove the stand (see Stand on page 30). 5. Remove the left rear cover (see Left Rear Cover on page 31). 6. Remove the screw (1) that secures the drive to the computer. 7. Insert a flat blade screwdriver into the slot and push (2) to disengage the drive, and then slide the drive out of the computer (3). Figure 7-4 Removing the optical drive 32 Chapter 7 Removal and Replacement Procedures All-in One (AIO) Chassis
-
 1
1 -
2
-
3
-
4
-
5
-
6
-
7
-
8
-
9
-
10
-
11
-
12
-
13
-
14
-
15
-
16
-
17
-
18
-
19
-
20
-
21
-
22
-
23
-
24
-
25
-
26
-
27
-
28
-
29
-
30
-
31
-
32
-
33
-
34
-
 35
35 -
 36
36 -
 37
37 -
 38
38 -
 39
39 -
 40
40 -
 41
41 -
 42
42 -
 43
43 -
 44
44 -
 45
45 -
46
-
47
-
48
-
49
-
50
-
51
-
52
-
53
-
54
-
55
-
56
-
57
-
58
-
59
-
60
-
61
-
62
-
63
-
64
-
65
-
66
-
67
-
68
-
69
-
70
-
71
-
72
-
73
-
74
-
75
-
76
-
77
-
78
-
79
-
80
-
81
-
82
-
83
-
84
-
85
-
86
-
87
-
88
-
89
-
90
-
91
-
92
-
93
-
94
-
95
 |
 |