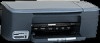
HP PSC 2350 Users Guide - Page 48
Print individual photos, Create borderless prints, Deselect photos - print cartridges
 |
View all HP PSC 2350 manuals
Add to My Manuals
Save this manual to your list of manuals |
Page 48 highlights
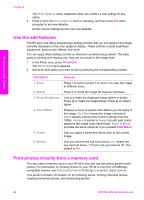
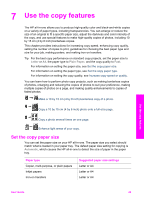
Memory Card and PictBridge Note When printing photos, you should select options for the correct paper type and photo enhancement. For more information, see Set photo print options. You might also want to use the photo print cartridge for superior print quality. For more information, see Use a photo print cartridge. You can do more than print your photos if you use the HP Image Zone software. This software lets you use photos for iron-on transfers, posters, banners, stickers, and other creative projects. For more information, see the onscreen HP Image Zone Help file that came with your software. Print individual photos You can print photos directly from the control panel without using a proof sheet. 1 Insert the memory card into the appropriate slot on your HP all-in-one. The status light next to the memory card slots lights up. 2 Load 10 by 15 cm ((4 by 6 inch)) photo paper in the input tray. 3 Display a photo on the color graphics display and press OK to select it for printing. A selected photo bears a checkmark. Use or to move backward or forward through the photos, one photo at a time. Press and hold or to move rapidly through the photos. 4 In the Photo area, press Print Photos to print the selected photos. Create borderless prints An exceptional feature of your HP all-in-one is its ability to turn photos on a memory card into professional, borderless prints. 1 Insert the memory card into the appropriate slot on your HP all-in-one. The status light next to the memory card slots lights up. 2 Display a photo on the color graphics display and press OK to select it for printing. A selected photo bears a checkmark. Use or to move backward or forward through the photos, one photo at a time. Press and hold or to move rapidly through the photos. 3 Load 10 by 15 cm (4 by 6 inch) photo paper face down in the right back corner of the paper tray and adjust the paper guide. Tip If the photo paper you are using has perforated tabs, load the photo paper so that the tabs are closest to you. 4 In the Photo area, press Print Photos to print the selected photos as borderless prints. Deselect photos You can deselect photos from the control panel. ➔ Do one of the following: - Press OK to deselect the currently selected photo shown in the display. - Press Cancel to deselect all photos and return to the idle screen. User Guide 45
-
 1
1 -
2
-
3
-
4
-
5
-
6
-
7
-
8
-
9
-
10
-
11
-
12
-
13
-
14
-
15
-
16
-
17
-
18
-
19
-
20
-
21
-
22
-
23
-
24
-
25
-
26
-
27
-
28
-
29
-
30
-
31
-
32
-
33
-
34
-
35
-
36
-
37
-
38
-
39
-
40
-
41
-
42
-
 43
43 -
 44
44 -
 45
45 -
 46
46 -
 47
47 -
 48
48 -
 49
49 -
 50
50 -
 51
51 -
 52
52 -
 53
53 -
54
-
55
-
56
-
57
-
58
-
59
-
60
-
61
-
62
-
63
-
64
-
65
-
66
-
67
-
68
-
69
-
70
-
71
-
72
-
73
-
74
-
75
-
76
-
77
-
78
-
79
-
80
-
81
-
82
-
83
-
84
-
85
-
86
-
87
-
88
-
89
-
90
-
91
-
92
-
93
-
94
-
95
-
96
-
97
-
98
-
99
-
100
-
101
-
102
-
103
-
104
-
105
-
106
-
107
-
108
-
109
-
110
-
111
-
112
-
113
-
114
-
115
-
116
-
117
-
118
-
119
-
120
-
121
-
122
-
123
-
124
-
125
-
126
-
127
-
128
-
129
-
130
-
131
-
132
-
133
-
134
-
135
-
136
 |
 |