HP Pavilion v2000 Media Center Software Guide - Page 63
Saving the movie project
 |
View all HP Pavilion v2000 manuals
Add to My Manuals
Save this manual to your list of manuals |
Page 63 highlights
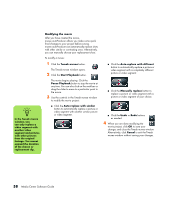
Saving the movie project Once you are satisfied with the look of your movie project, you are ready to save it. To save the movie as a file on your hard disk drive: 1 Click the Save/Burn button. The Listed muvee Files window opens with all your muvee Files listed. 2 Remove the check mark next to any muvee files you do not want to save. 3 Edit the muvee files before saving: ■ Click the Rename button to change the name of the selected muvee file. ■ Click the Move up or Move down button to change the order of the muvee files in the list. ■ Press the Select all or Deselect all button to save all muvee files or to save none of the muvee files. ■ Highlight a muvee file and click the trash can icon to delete the file. 4 The TV System area shows the current TV format (NTSC or PAL). To change the format, click the name of the current format and select the correct format in the window that opens. 5 Click Save Now. The Save muvee window opens. 6 Choose where you want to play the movie (PC, TV, or Mobile Devices) and the file format. The following table lists the format types available in each category: PC Computer playback E-mail Web streaming AVI TV DV camera DVD VCD SVCD Mobile Devices Mobile phone Pocket PC 7 Click the Change Settings button to change the video and audio settings of the movie file type as required (advanced users only). 8 Click Browse to choose a location on the hard disk drive to save the movie. 9 Click the Save button. You can watch the preview as it saves. 10 When saving is complete, you can click Play muvees to watch the files you saved or Open output folder to view the folder where you saved the files. 11 Click Close when you are done. Creating Movies Using muvee autoProducer 59
-
 1
1 -
2
-
3
-
4
-
5
-
6
-
7
-
8
-
9
-
10
-
11
-
12
-
13
-
14
-
15
-
16
-
17
-
18
-
19
-
20
-
21
-
22
-
23
-
24
-
25
-
26
-
27
-
28
-
29
-
30
-
31
-
32
-
33
-
34
-
35
-
36
-
37
-
38
-
39
-
40
-
41
-
42
-
43
-
44
-
45
-
46
-
47
-
48
-
49
-
50
-
51
-
52
-
53
-
54
-
55
-
56
-
57
-
 58
58 -
 59
59 -
 60
60 -
 61
61 -
 62
62 -
 63
63 -
 64
64 -
 65
65 -
 66
66 -
 67
67 -
 68
68 -
69
-
70
-
71
-
72
-
73
-
74
-
75
 |
 |