HP Z3200ps HP Designjet Z3200ps Photo Printer Series - User Guide [English] - Page 166
Vertical continuous lines on the print, Black ink comes off when you touch the print, Edges
 |
UPC - 884420403401
View all HP Z3200ps manuals
Add to My Manuals
Save this manual to your list of manuals |
Page 166 highlights
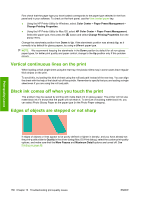
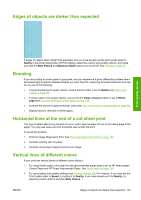
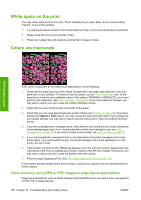
First check that the paper type you have loaded corresponds to the paper type selected in the front panel and in your software. To check on the front panel, use the View loaded paper key. ● Using the HP Printer Utility for Windows, select Color Center > Paper Preset Management > Change Printing Properties. ● Using the HP Printer Utility for Mac OS, select HP Color Center > Paper Preset Management. Select the paper type, then press the popup menu. button and select Change Printing Properties from the Change the starwheels position from Down to Up. If the starwheels position was already Up, as it normally is by default for glossy papers, try using a different paper type. NOTE: We recommend keeping the starwheels in the Down position by default for all non-glossy paper types, for better print quality and paper control; change to the Up position only if this problem occurs. Vertical continuous lines on the print When loading a thick single sheet using the rear tray, the plastic rollers may in some cases leave regular thick stripes on the print. To avoid this, try loading this kind of sheet using the roll load path instead of the rear tray. You can align the sheet with the help of the black hub of the spindle. Remember to specify that you are loading a single sheet even if you are using the roll load path. Black ink comes off when you touch the print This problem may be caused by printing with matte black ink on glossy paper. The printer will not use matte black ink if it knows that the paper will not retain it. To be sure of avoiding matte black ink, you can select Photo Glossy Paper as the paper type (in the Photo Paper category). Edges of objects are stepped or not sharp If edges of objects or lines appear to be poorly defined or lighter in density, and you have already set the print-quality slider to Quality in the driver dialog (Mac OS Print dialog), select the custom print-quality options, and make sure that the More Passes and Maximum Detail options are turned off. See Printing on page 45. Print-quality issues 156 Chapter 13 Troubleshooting print-quality issues ENWW
-
 1
1 -
2
-
3
-
4
-
5
-
6
-
7
-
8
-
9
-
10
-
11
-
12
-
13
-
14
-
15
-
16
-
17
-
18
-
19
-
20
-
21
-
22
-
23
-
24
-
25
-
26
-
27
-
28
-
29
-
30
-
31
-
32
-
33
-
34
-
35
-
36
-
37
-
38
-
39
-
40
-
41
-
42
-
43
-
44
-
45
-
46
-
47
-
48
-
49
-
50
-
51
-
52
-
53
-
54
-
55
-
56
-
57
-
58
-
59
-
60
-
61
-
62
-
63
-
64
-
65
-
66
-
67
-
68
-
69
-
70
-
71
-
72
-
73
-
74
-
75
-
76
-
77
-
78
-
79
-
80
-
81
-
82
-
83
-
84
-
85
-
86
-
87
-
88
-
89
-
90
-
91
-
92
-
93
-
94
-
95
-
96
-
97
-
98
-
99
-
100
-
101
-
102
-
103
-
104
-
105
-
106
-
107
-
108
-
109
-
110
-
111
-
112
-
113
-
114
-
115
-
116
-
117
-
118
-
119
-
120
-
121
-
122
-
123
-
124
-
125
-
126
-
127
-
128
-
129
-
130
-
131
-
132
-
133
-
134
-
135
-
136
-
137
-
138
-
139
-
140
-
141
-
142
-
143
-
144
-
145
-
146
-
147
-
148
-
149
-
150
-
151
-
152
-
153
-
154
-
155
-
156
-
157
-
158
-
159
-
160
-
 161
161 -
 162
162 -
 163
163 -
 164
164 -
 165
165 -
 166
166 -
 167
167 -
 168
168 -
 169
169 -
 170
170 -
 171
171 -
172
-
173
-
174
-
175
-
176
-
177
-
178
-
179
-
180
-
181
-
182
-
183
-
184
-
185
-
186
-
187
-
188
-
189
-
190
-
191
-
192
-
193
-
194
-
195
-
196
-
197
-
198
-
199
-
200
-
201
-
202
-
203
-
204
-
205
 |
 |
