Intel SC5400RA User Guide - Page 48
Removing and Installing the Front Bezel, Removing the Bezel Assembly (Pedestal Only)
 |
UPC - 675900759336
View all Intel SC5400RA manuals
Add to My Manuals
Save this manual to your list of manuals |
Page 48 highlights
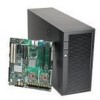
Removing and Installing the Front Bezel Removing the Bezel Assembly (Pedestal Only) Caution: Do not rotate the bezel assembly more than 40 degrees or you will damage the bezel assembly. Note: The bezel assembly consists of two components, a front door and a sub-bezel. The system was sent to you with the bezel key attached to the back of the bezel. 1. Observe the safety and ESD precautions at the beginning of this book. 2. Power down the server and unplug all peripheral devices and the AC power cable. 3. Remove the chassis cover. For instructions, see "Removing the Chassis Cover" on page 24. 4. Release the two plastic tabs on the left side of the bezel assembly to disengage the tabs. See letter "A" in the following figure. 5. Rotate the bezel assembly no more than 40 degrees outward. See letter "B" in the figure. 6. At a 40-degree angle, push the bezel assembly away from the chassis. See letter "C". If the bezel assembly does not immediately disconnect from the chassis, tap the left-hand side of the bezel assembly to disengage the bezel hooks on the righthand side of the chassis. A C A B AF000557 Figure 14. Removing the Front Bezel 26 Intel® Server System SC5400RA User's Guide
-
 1
1 -
2
-
3
-
4
-
5
-
6
-
7
-
8
-
9
-
10
-
11
-
12
-
13
-
14
-
15
-
16
-
17
-
18
-
19
-
20
-
21
-
22
-
23
-
24
-
25
-
26
-
27
-
28
-
29
-
30
-
31
-
32
-
33
-
34
-
35
-
36
-
37
-
38
-
39
-
40
-
41
-
42
-
 43
43 -
 44
44 -
 45
45 -
 46
46 -
 47
47 -
 48
48 -
 49
49 -
 50
50 -
 51
51 -
 52
52 -
 53
53 -
54
-
55
-
56
-
57
-
58
-
59
-
60
-
61
-
62
-
63
-
64
-
65
-
66
-
67
-
68
-
69
-
70
-
71
-
72
-
73
-
74
-
75
-
76
-
77
-
78
-
79
-
80
-
81
-
82
-
83
-
84
-
85
-
86
-
87
-
88
-
89
-
90
-
91
-
92
-
93
-
94
-
95
-
96
-
97
-
98
-
99
-
100
-
101
-
102
-
103
-
104
-
105
-
106
-
107
-
108
-
109
-
110
-
111
-
112
-
113
-
114
-
115
-
116
-
117
-
118
-
119
-
120
-
121
-
122
-
123
-
124
-
125
-
126
-
127
-
128
-
129
-
130
-
131
-
132
-
133
-
134
-
135
-
136
-
137
-
138
-
139
-
140
-
141
-
142
-
143
-
144
-
145
-
146
-
147
-
148
-
149
-
150
-
151
-
152
-
153
-
154
-
155
-
156
-
157
-
158
-
159
-
160
-
161
-
162
-
163
-
164
-
165
-
166
-
167
-
168
-
169
-
170
-
171
-
172
-
173
-
174
-
175
-
176
-
177
-
178
-
179
-
180
-
181
-
182
-
183
-
184
-
185
-
186
-
187
-
188
-
189
-
190
-
191
-
192
-
193
-
194
-
195
-
196
-
197
-
198
 |
 |
