Intel SC5400RA User Guide - Page 61
Securing Hard Drive to Drive Carrier, Inserting Drive Carrier into Hot Swap Cage
 |
UPC - 675900759336
View all Intel SC5400RA manuals
Add to My Manuals
Save this manual to your list of manuals |
Page 61 highlights
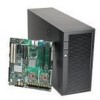
5. Secure the hard drive to the drive carrier using the four screws that were formerly attached to the plastic air baffle. Ensure that the connector end of the hard drive is facing the back of the drive carrier. The label side of the hard drive should be facing up in the drive carrier. AF000591 Figure 35. Securing Hard Drive to Drive Carrier 6. With the black lever open, insert the drive carrier into the drive cage. Once inserted, rotate the black lever upwards to latch the drive carrier into position. AF000592 Figure 36. Inserting Drive Carrier into Hot Swap Cage Intel® Server System SC5400RA User's Guide 39
-
 1
1 -
2
-
3
-
4
-
5
-
6
-
7
-
8
-
9
-
10
-
11
-
12
-
13
-
14
-
15
-
16
-
17
-
18
-
19
-
20
-
21
-
22
-
23
-
24
-
25
-
26
-
27
-
28
-
29
-
30
-
31
-
32
-
33
-
34
-
35
-
36
-
37
-
38
-
39
-
40
-
41
-
42
-
43
-
44
-
45
-
46
-
47
-
48
-
49
-
50
-
51
-
52
-
53
-
54
-
55
-
 56
56 -
 57
57 -
 58
58 -
 59
59 -
 60
60 -
 61
61 -
 62
62 -
 63
63 -
 64
64 -
 65
65 -
 66
66 -
67
-
68
-
69
-
70
-
71
-
72
-
73
-
74
-
75
-
76
-
77
-
78
-
79
-
80
-
81
-
82
-
83
-
84
-
85
-
86
-
87
-
88
-
89
-
90
-
91
-
92
-
93
-
94
-
95
-
96
-
97
-
98
-
99
-
100
-
101
-
102
-
103
-
104
-
105
-
106
-
107
-
108
-
109
-
110
-
111
-
112
-
113
-
114
-
115
-
116
-
117
-
118
-
119
-
120
-
121
-
122
-
123
-
124
-
125
-
126
-
127
-
128
-
129
-
130
-
131
-
132
-
133
-
134
-
135
-
136
-
137
-
138
-
139
-
140
-
141
-
142
-
143
-
144
-
145
-
146
-
147
-
148
-
149
-
150
-
151
-
152
-
153
-
154
-
155
-
156
-
157
-
158
-
159
-
160
-
161
-
162
-
163
-
164
-
165
-
166
-
167
-
168
-
169
-
170
-
171
-
172
-
173
-
174
-
175
-
176
-
177
-
178
-
179
-
180
-
181
-
182
-
183
-
184
-
185
-
186
-
187
-
188
-
189
-
190
-
191
-
192
-
193
-
194
-
195
-
196
-
197
-
198
 |
 |

Intel® Server System SC5400RA User’s Guide
39
5.
Secure the hard drive to the drive carrier using the four screws that were formerly
attached to the plastic air baffle. Ensure that the connector end of the hard drive is
facing the back of the drive carrier. The label side of the hard drive should be facing
up in the drive carrier.
Figure 35. Securing Hard Drive to Drive Carrier
6.
With the black lever open, insert the drive carrier into the drive cage. Once inserted,
rotate the black lever upwards to latch the drive carrier into position.
Figure 36. Inserting Drive Carrier into Hot Swap Cage
AF000591
AF000592