Intel SC5400RA User Guide - Page 67
Securing Slimline CD-ROM Drive or Slimline DVD-ROM Drive to, Drive Cage
 |
UPC - 675900759336
View all Intel SC5400RA manuals
Add to My Manuals
Save this manual to your list of manuals |
Page 67 highlights
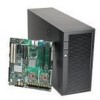
21. Line up the screw holes on the left and right sides of the slimline CD-ROM / DVDROM drive with the corresponding screws on the drive cage. See letter "A" in the following figure. The front of the slimline drive will extend slightly from the front of the drive cage. 22. Use four screws from the bag marked "CD" to attach the drive to each side of the drive cage (two screws on each side). A A AF000487 Figure 46. Securing Slimline CD-ROM Drive or Slimline DVD-ROM Drive to Drive Cage 23. Hold the cage top at a downward angle toward the drive cage. See letter "A" in the following figure. 24. Engage the slots at the right side of the cage top to the tabs at drive cage base. See letter "B" in the figure. 25. Rotate the cage top downward at the left side to engage the left tabs. See letter "C". C A C B AF001519 Figure 47. Installing the Cage Top to the Drive Cage Intel® Server System SC5400RA User's Guide 45
-
 1
1 -
2
-
3
-
4
-
5
-
6
-
7
-
8
-
9
-
10
-
11
-
12
-
13
-
14
-
15
-
16
-
17
-
18
-
19
-
20
-
21
-
22
-
23
-
24
-
25
-
26
-
27
-
28
-
29
-
30
-
31
-
32
-
33
-
34
-
35
-
36
-
37
-
38
-
39
-
40
-
41
-
42
-
43
-
44
-
45
-
46
-
47
-
48
-
49
-
50
-
51
-
52
-
53
-
54
-
55
-
56
-
57
-
58
-
59
-
60
-
61
-
 62
62 -
 63
63 -
 64
64 -
 65
65 -
 66
66 -
 67
67 -
 68
68 -
 69
69 -
 70
70 -
 71
71 -
 72
72 -
73
-
74
-
75
-
76
-
77
-
78
-
79
-
80
-
81
-
82
-
83
-
84
-
85
-
86
-
87
-
88
-
89
-
90
-
91
-
92
-
93
-
94
-
95
-
96
-
97
-
98
-
99
-
100
-
101
-
102
-
103
-
104
-
105
-
106
-
107
-
108
-
109
-
110
-
111
-
112
-
113
-
114
-
115
-
116
-
117
-
118
-
119
-
120
-
121
-
122
-
123
-
124
-
125
-
126
-
127
-
128
-
129
-
130
-
131
-
132
-
133
-
134
-
135
-
136
-
137
-
138
-
139
-
140
-
141
-
142
-
143
-
144
-
145
-
146
-
147
-
148
-
149
-
150
-
151
-
152
-
153
-
154
-
155
-
156
-
157
-
158
-
159
-
160
-
161
-
162
-
163
-
164
-
165
-
166
-
167
-
168
-
169
-
170
-
171
-
172
-
173
-
174
-
175
-
176
-
177
-
178
-
179
-
180
-
181
-
182
-
183
-
184
-
185
-
186
-
187
-
188
-
189
-
190
-
191
-
192
-
193
-
194
-
195
-
196
-
197
-
198
 |
 |
