KitchenAid KFP750WH Use & Care Guide - Page 11
Multipurpose Blade and, Dough Blade Assembly, Slicing and Shredding, Disc Assembly, Mini Bowl
 |
UPC - 050946967295
View all KitchenAid KFP750WH manuals
Add to My Manuals
Save this manual to your list of manuals |
Page 11 highlights
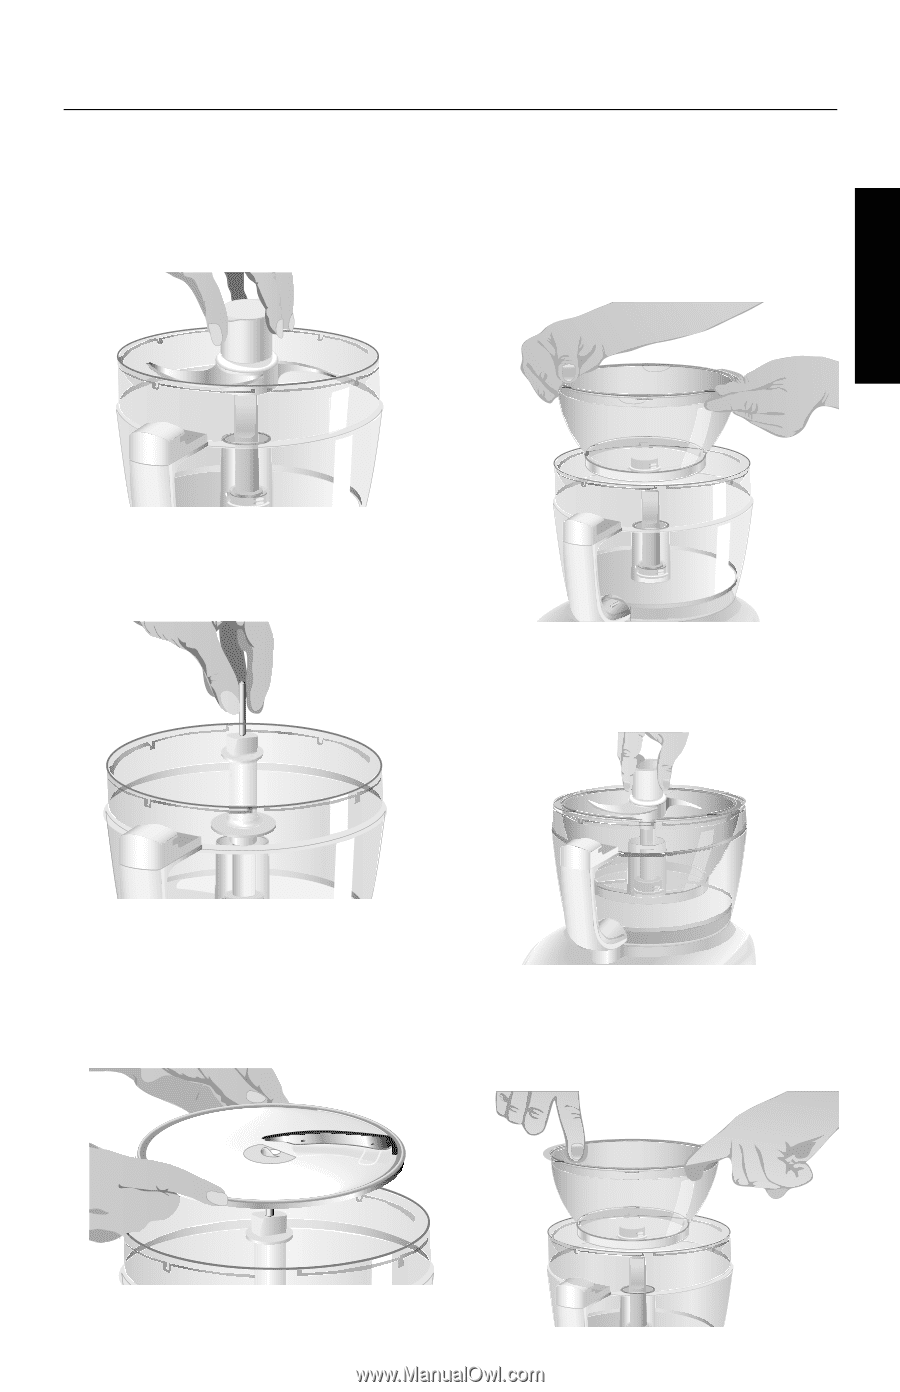
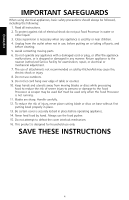
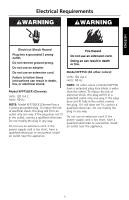
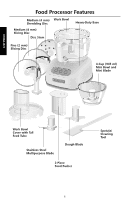
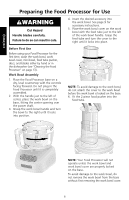
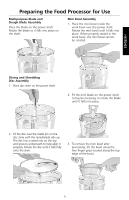
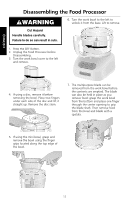
ENGLISH Preparing the Food Processor for Use Multipurpose Blade and Dough Blade Assembly Place the blade on the power shaft. Rotate the blade so it falls into place on the shaft. Mini Bowl Assembly 1. Place the mini bowl inside the work bowl over the power shaft. Rotate the mini bowl until it falls into place. When properly seated in the work bowl, the mini bowl cannot be rotated. Slicing and Shredding Disc Assembly 1. Place disc stem on the power shaft. 2. Fit the mini blade on the power shaft. It may be necessary to rotate the blade until it falls into place. 2. Fit the disc over the metal pin on the disc stem with the raised-blade side up. The disc has a raised nub on the top and grooves underneath to help align it properly. Rotate the disc until it falls fully onto the stem. 3. To remove the mini bowl after processing, lift the bowl using the two finger grips located along the top edge of the bowl. 9
-
 1
1 -
2
-
3
-
4
-
5
-
 6
6 -
 7
7 -
 8
8 -
 9
9 -
 10
10 -
 11
11 -
 12
12 -
 13
13 -
 14
14 -
 15
15 -
 16
16 -
17
-
18
-
19
-
20
-
21
-
22
-
23
-
24
-
25
-
26
-
27
-
28
-
29
-
30
-
31
-
32
-
33
-
34
-
35
-
36
-
37
-
38
-
39
-
40
-
41
-
42
-
43
-
44
-
45
-
46
-
47
-
48
-
49
-
50
-
51
-
52
-
53
-
54
-
55
-
56
-
57
-
58
-
59
-
60
-
61
-
62
-
63
-
64
-
65
-
66
-
67
-
68
-
69
-
70
-
71
-
72
-
73
-
74
-
75
-
76
-
77
-
78
-
79
-
80
-
81
-
82
-
83
-
84
-
85
-
86
-
87
-
88
-
89
-
90
-
91
-
92
-
93
-
94
-
95
-
96
-
97
-
98
-
99
-
100
-
101
 |
 |