Kodak 5300 User Guide - Page 27
Scene Balance, Add Date to Prints, Button Sounds, Photo Print Settings, Use Print Order if Found
 |
UPC - 041778804056
View all Kodak 5300 manuals
Add to My Manuals
Save this manual to your list of manuals |
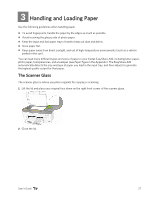
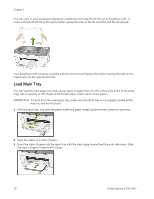
Page 27 highlights
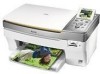
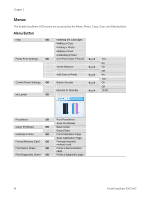
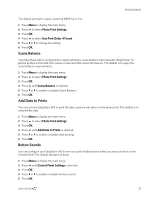
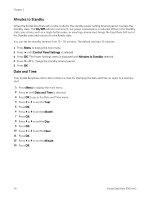
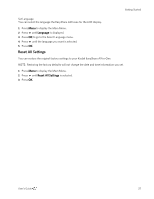
Getting Started The default setting for using a detected DPOF file is Yes. 1 Press Menu to display the main menu. 2 Press b to select Photo Print Settings. 3 Press OK. 4 Press b to select Use Print Order if Found. 5 Press _ or ` to change the setting. 6 Press OK. Scene Balance Your EasyShare AiO is configurable to apply automatic scene balance improvements (brightness) for photos printed on the AiO from camera cards and USB connected devices. The default is to apply the scene balance improvements. 1 Press Menu to display the main menu. 2 Press b to select Photo Print Settings. 3 Press OK. 4 Press b until Scene Balance is selected. 5 Press _ or ` to enable or disable Scene Balance. 6 Press OK. Add Date to Prints You can set your EasyShare AiO to print the date a picture was taken on the photo print. The default is to not print the date. 1 Press Menu to display the main menu. 2 Press b to select Photo Print Settings. 3 Press OK. 4 Press b until Add Date to Prints is selected. 5 Press _ or ` to enable or disable date printing. 6 Press OK. Button Sounds You can configure your EasyShare AiO to emit an audio feedback beep when you press a button on the Control Panel. The default setting is to beep. 1 Press Menu to display the main menu. 2 Press b until Control Panel Settings is selected. 3 Press OK. 4 Press _ or ` to enable or disable button sounds. 5 Press OK. User's Guide 23
-
 1
1 -
2
-
3
-
4
-
5
-
6
-
7
-
8
-
9
-
10
-
11
-
12
-
13
-
14
-
15
-
16
-
17
-
18
-
19
-
20
-
21
-
 22
22 -
 23
23 -
 24
24 -
 25
25 -
 26
26 -
 27
27 -
 28
28 -
 29
29 -
 30
30 -
 31
31 -
 32
32 -
33
-
34
-
35
-
36
-
37
-
38
-
39
-
40
-
41
-
42
-
43
-
44
-
45
-
46
-
47
-
48
-
49
-
50
-
51
-
52
-
53
-
54
-
55
-
56
-
57
-
58
-
59
-
60
-
61
-
62
-
63
-
64
-
65
-
66
-
67
-
68
-
69
-
70
-
71
-
72
-
73
-
74
-
75
-
76
-
77
-
78
-
79
-
80
-
81
-
82
-
83
-
84
-
85
-
86
-
87
-
88
-
89
-
90
-
91
-
92
-
93
-
94
-
95
-
96
-
97
-
98
-
99
-
100
-
101
-
102
-
103
-
104
-
105
-
106
 |
 |