Kodak 5300 User Guide - Page 38
Print Photos from a Camera, Print Photos from the Control Panel, Load Photo Tray, Load Main Tray
 |
UPC - 041778804056
View all Kodak 5300 manuals
Add to My Manuals
Save this manual to your list of manuals |
Page 38 highlights
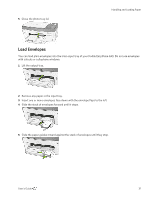
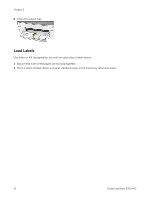
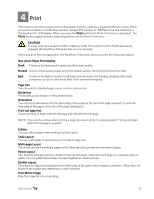
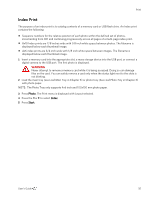
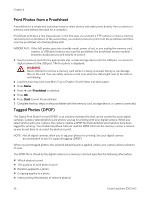
Chapter 4 Two-sided Printing You can print on both sides of the paper. Watermark You can select or create a background watermark. Print Photos from a Camera 1 Connect your camera to the EasyShare AiO. The PictBridge logo is displayed on the LCD. 2 Load the photo tray with photo paper (See Load Photo Tray in Chapter 3). 3 Use your camera to select and print photos. Print Photos from the Control Panel The Photo Print mode is initiated by pressing the Photo button, inserting a memory card, or connecting a USB device to the Kodak EasyShare All-in-One. 1 Insert a memory card into the appropriate slot, a mass storage device into the USB port, or connect a digital camera to the USB port. The last photo is displayed. WARNING Never attempt to remove a memory card while it is being accessed. Doing so can damage files on the card. You can safely remove a card only when the status light next to the slots is not blinking. 2 Load the main tray (see Load Main Tray in Chapter 3) or photo tray (See Load Photo Tray in Chapter 3) with photo paper. NOTE: The Photo Tray only supports 4x6 inch and 100x150 mm photo paper. 3 Press a to select the number of prints for this photo. 4 Press ` to preview the next photo. TIP: To select all the photos on a memory card or mass storage device, hold down the OK button for 2 seconds. Holding down the OK button again for 2 seconds will de-select all the photos. 5 Repeat Steps 3 and 4 until you are finished selecting photos. 6 Press Start to print the selected photos or Photo to set print options. 7 Set print options. See Set Print Layout See Set Number of Prints See Set Color See Set Print Quality After a photo is printed, it is de-selected. 34 Kodak EasyShare 5300 AiO
-
 1
1 -
2
-
3
-
4
-
5
-
6
-
7
-
8
-
9
-
10
-
11
-
12
-
13
-
14
-
15
-
16
-
17
-
18
-
19
-
20
-
21
-
22
-
23
-
24
-
25
-
26
-
27
-
28
-
29
-
30
-
31
-
32
-
 33
33 -
 34
34 -
 35
35 -
 36
36 -
 37
37 -
 38
38 -
 39
39 -
 40
40 -
 41
41 -
 42
42 -
 43
43 -
44
-
45
-
46
-
47
-
48
-
49
-
50
-
51
-
52
-
53
-
54
-
55
-
56
-
57
-
58
-
59
-
60
-
61
-
62
-
63
-
64
-
65
-
66
-
67
-
68
-
69
-
70
-
71
-
72
-
73
-
74
-
75
-
76
-
77
-
78
-
79
-
80
-
81
-
82
-
83
-
84
-
85
-
86
-
87
-
88
-
89
-
90
-
91
-
92
-
93
-
94
-
95
-
96
-
97
-
98
-
99
-
100
-
101
-
102
-
103
-
104
-
105
-
106
 |
 |