Kodak 5300 User Guide - Page 69
Scan, Scan with Control Panel, Save Scan Settings, Scanning Photos, Scan to File
 |
UPC - 041778804056
View all Kodak 5300 manuals
Add to My Manuals
Save this manual to your list of manuals |
Page 69 highlights
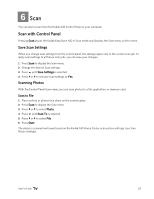
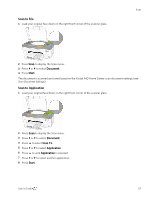
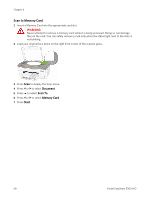
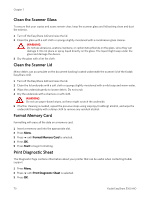
6 Scan Scan You can start a scan from the Kodak AiO Control Panel or your computer. Scan with Control Panel Pressing Scan places the Kodak EasyShare AiO in Scan mode and displays the Scan menu on the screen. Save Scan Settings When you change scan settings from the control panel, the settings apply only to the current scan job. To apply scan settings to all future scan jobs, you can save your changes. 1 Press Scan to display the Scan menu. 2 Change the desired Scan settings. 3 Press b until Save Settings is selected. 4 Press _ or ` to set save scan settings to Yes. Scanning Photos With the Control Panel Scan menu, you can scan photos to a file, application, or memory card. Scan to File 1 Place a photo or photos face down on the scanner glass. 2 Press Scan to display the Scan menu. 3 Press _ or ` to select Photo. 4 Press b until Scan To is selected. 5 Press _ or ` to select File. 6 Press Start. The photo is scanned and saved based on the Kodak AiO Home Center scan picture settings (see Scan Picture Settings). User's Guide 65
-
 1
1 -
2
-
3
-
4
-
5
-
6
-
7
-
8
-
9
-
10
-
11
-
12
-
13
-
14
-
15
-
16
-
17
-
18
-
19
-
20
-
21
-
22
-
23
-
24
-
25
-
26
-
27
-
28
-
29
-
30
-
31
-
32
-
33
-
34
-
35
-
36
-
37
-
38
-
39
-
40
-
41
-
42
-
43
-
44
-
45
-
46
-
47
-
48
-
49
-
50
-
51
-
52
-
53
-
54
-
55
-
56
-
57
-
58
-
59
-
60
-
61
-
62
-
63
-
 64
64 -
 65
65 -
 66
66 -
 67
67 -
 68
68 -
 69
69 -
 70
70 -
 71
71 -
 72
72 -
 73
73 -
 74
74 -
75
-
76
-
77
-
78
-
79
-
80
-
81
-
82
-
83
-
84
-
85
-
86
-
87
-
88
-
89
-
90
-
91
-
92
-
93
-
94
-
95
-
96
-
97
-
98
-
99
-
100
-
101
-
102
-
103
-
104
-
105
-
106
 |
 |