Konica Minolta SL1000 Digital Film Scanner SL1000 User Guide - Page 37
Application start-up, SCAN Mode, VIEW Mode
 |
View all Konica Minolta SL1000 Digital Film Scanner manuals
Add to My Manuals
Save this manual to your list of manuals |
Page 37 highlights
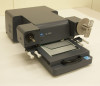
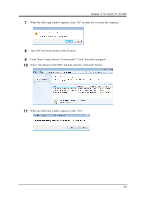
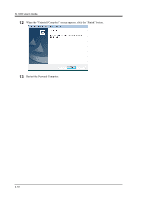
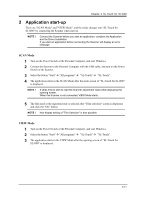
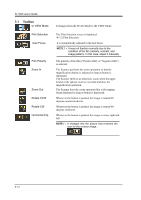
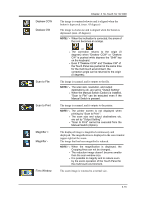
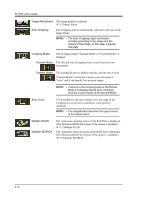
Chapter 3 SL-Touch for SL1000 2 Application start-up There are "SCAN Mode" and "VIEW Mode", and the mode changes into "SL-Touch for SL1000" by connecting the Scanner when start up. NOTE ! Connect the Scanner before you start an application, complete the Application and the Driver Installation. If you start an application before connecting the Scanner will display an error message. SCAN Mode 1 Turn on the Power Switch of the Personal Computer, and start Windows. 2 Connect the Scanner to the Personal Computer with the USB cable, and turn on the Power Switch of the Scanner. 3 Select the button "Start" "All programs" "SL-Touch" "SL-Touch". 4 The application starts in the SCAN Mode after the main screen of "SL-Touch for SL1000" is displayed. NOTE ! It takes time to start to read the Scanner adjustment value while displaying the opening screen. When the Scanner is not connected, VIEW Mode starts. 5 The film used or the registered user is selected after "Film selection" screen is displayed, and click the "OK" button. NOTE ! Non-display setting of "Film Selection" is also possible. VIEW Mode 1 Turn on the Power Switch of the Personal Computer, and start Windows. 2 Select the button "Start" "All programs" "SL-Touch" "SL-Touch". 3 The application starts in the VIEW Mode after the opening screen of "SL-Touch for SL1000" is displayed. 3-11
-
 1
1 -
2
-
3
-
4
-
5
-
6
-
7
-
8
-
9
-
10
-
11
-
12
-
13
-
14
-
15
-
16
-
17
-
18
-
19
-
20
-
21
-
22
-
23
-
24
-
25
-
26
-
27
-
28
-
29
-
30
-
31
-
 32
32 -
 33
33 -
 34
34 -
 35
35 -
 36
36 -
 37
37 -
 38
38 -
 39
39 -
 40
40 -
 41
41 -
 42
42 -
43
-
44
-
45
-
46
-
47
-
48
-
49
-
50
-
51
-
52
-
53
-
54
-
55
-
56
-
57
-
58
-
59
-
60
-
61
-
62
-
63
-
64
-
65
-
66
-
67
-
68
-
69
-
70
-
71
-
72
-
73
-
74
-
75
-
76
-
77
-
78
-
79
-
80
-
81
-
82
-
83
-
84
-
85
-
86
-
87
-
88
-
89
-
90
-
91
-
92
-
93
-
94
-
95
-
96
-
97
-
98
-
99
-
100
-
101
-
102
-
103
-
104
-
105
-
106
 |
 |