Konica Minolta SL1000 Digital Film Scanner SL1000 User Guide - Page 38
SCAN Mode screen
 |
View all Konica Minolta SL1000 Digital Film Scanner manuals
Add to My Manuals
Save this manual to your list of manuals |
Page 38 highlights
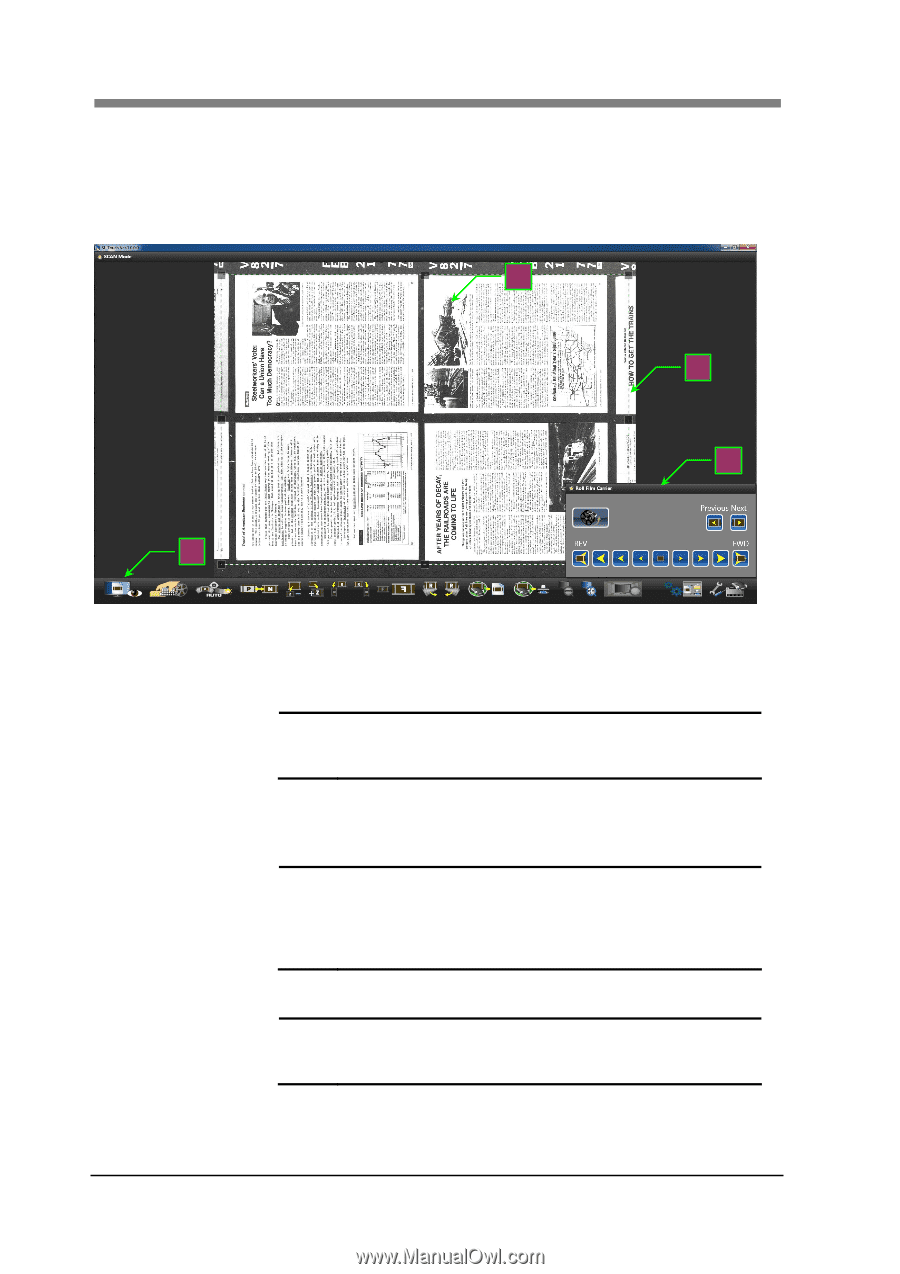
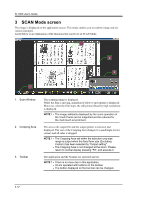
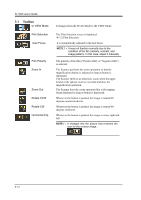
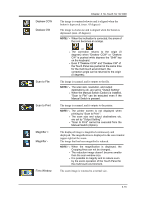
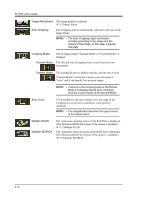
SL1000 User's Guide 3 SCAN Mode screen The image is displayed on the application screen. This mode enables you to read the image and set various functions. Listed below is an explanation of the functions that can be set in SCAN Mode. 1 2 4 3 1. Scan Window 2. Cropping Area 3. Toolbar The scanning image is displayed. While the film is moving, animation (Follow to movement) is displayed. Moreover, when the film stops, the still picture (Read by high resolution) is displayed. NOTE ! The image arbitrarily displayed by the zoom operation of the Touch Panel can be magnified and be reduced for the multi touch environment. The area to the output file and the output printer is selected, and displayed. The size of the Cropping Area changes if a quadrangle in four corners and all sides is dragged. NOTE ! The Cropping Area set within the selection crop size range is output when the fixed form size (Excluding Custom) has been selected by "Output setting", The Cropping Area is not changed at the zoom. Please return to normal display pressing "Fit", and execute it. The application and the Scanner are operated and set. NOTE ! There is no menu bar in this application. All are operated with buttons on the toolbar. The button displayed on the tool bar can be changed. 3-12
-
 1
1 -
2
-
3
-
4
-
5
-
6
-
7
-
8
-
9
-
10
-
11
-
12
-
13
-
14
-
15
-
16
-
17
-
18
-
19
-
20
-
21
-
22
-
23
-
24
-
25
-
26
-
27
-
28
-
29
-
30
-
31
-
32
-
 33
33 -
 34
34 -
 35
35 -
 36
36 -
 37
37 -
 38
38 -
 39
39 -
 40
40 -
 41
41 -
 42
42 -
 43
43 -
44
-
45
-
46
-
47
-
48
-
49
-
50
-
51
-
52
-
53
-
54
-
55
-
56
-
57
-
58
-
59
-
60
-
61
-
62
-
63
-
64
-
65
-
66
-
67
-
68
-
69
-
70
-
71
-
72
-
73
-
74
-
75
-
76
-
77
-
78
-
79
-
80
-
81
-
82
-
83
-
84
-
85
-
86
-
87
-
88
-
89
-
90
-
91
-
92
-
93
-
94
-
95
-
96
-
97
-
98
-
99
-
100
-
101
-
102
-
103
-
104
-
105
-
106
 |
 |