Konica Minolta bizhub 160 Service Manual - Page 173
After the PRN MAIN REGIST and PRN SUB REGIST and CCD SUB ZOOM adjust
 |
View all Konica Minolta bizhub 160 manuals
Add to My Manuals
Save this manual to your list of manuals |
Page 173 highlights
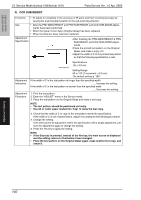
bizhub 160/160f bizhub 161/161f 13. Service Mode (bizhub 160f/bizhub 161f) Field Service Ver. 1.0 Apr. 2005 G. CCD SUB REGIST Functions • To adjust for variations in the accuracy of IR parts and their mounting accuracy by varying the scanning start position in the sub-scanning direction. Use • After the PRN MAIN REGIST and PRN SUB REGIST and CCD SUB ZOOM adjust- ments have been performed • When the Upper Cover Assy. (Original Glass) has been replaced • When the Scanner Assy. has been replaced Adjustment Specification •After finishing the PRN MAIN REGIST & PRN SUB REGIST and CCD SUB ZOOM adjustments. •Place the printed test pattern on the Original Glass, and make a copy of it. •Adjust the width of C in the printed test pattern so that the following specification is met. Adjustment Instruction Adjustment Procedure 4007D051AA Specifications 20 ± 3.0 mm Setting Range 90 to 110 (1 increment = 0.5 mm) The default setting is "100" If the width of C in the test pattern is longer than the specified width ..... Increase the setting. If the width of C in the test pattern is shorter than the specified width ..... Decrease the setting. 1. Print the test pattern. 2. Enter the "ADJUST" menu in the Service mode. 3. Place the test pattern on the Original Glass and make a test copy. NOTE • The test pattern should be positioned vertically. • Use A4 or Letter paper loaded into Tray1 to make the test copy. 4. Check that the width of C in copy of the test pattern meets the specification. If the width of C is out of specification, adjust it according to the following procedure. 5. Change the setting. If the shift cannot be adjusted to within the specification with a single adjustment, perform the adjustment again to change the setting. 6. Press the Yes key to apply the setting. NOTE • If the Stop key is pressed, instead of the Yes key, the main screen is displayed and the setting returns to that before it was changed. • Place the test pattern on the Original Glass again, make another test copy, and check it. Adjustment / Setting 140
-
 1
1 -
2
-
3
-
4
-
5
-
6
-
7
-
8
-
9
-
10
-
11
-
12
-
13
-
14
-
15
-
16
-
17
-
18
-
19
-
20
-
21
-
22
-
23
-
24
-
25
-
26
-
27
-
28
-
29
-
30
-
31
-
32
-
33
-
34
-
35
-
36
-
37
-
38
-
39
-
40
-
41
-
42
-
43
-
44
-
45
-
46
-
47
-
48
-
49
-
50
-
51
-
52
-
53
-
54
-
55
-
56
-
57
-
58
-
59
-
60
-
61
-
62
-
63
-
64
-
65
-
66
-
67
-
68
-
69
-
70
-
71
-
72
-
73
-
74
-
75
-
76
-
77
-
78
-
79
-
80
-
81
-
82
-
83
-
84
-
85
-
86
-
87
-
88
-
89
-
90
-
91
-
92
-
93
-
94
-
95
-
96
-
97
-
98
-
99
-
100
-
101
-
102
-
103
-
104
-
105
-
106
-
107
-
108
-
109
-
110
-
111
-
112
-
113
-
114
-
115
-
116
-
117
-
118
-
119
-
120
-
121
-
122
-
123
-
124
-
125
-
126
-
127
-
128
-
129
-
130
-
131
-
132
-
133
-
134
-
135
-
136
-
137
-
138
-
139
-
140
-
141
-
142
-
143
-
144
-
145
-
146
-
147
-
148
-
149
-
150
-
151
-
152
-
153
-
154
-
155
-
156
-
157
-
158
-
159
-
160
-
161
-
162
-
163
-
164
-
165
-
166
-
167
-
 168
168 -
 169
169 -
 170
170 -
 171
171 -
 172
172 -
 173
173 -
 174
174 -
 175
175 -
 176
176 -
 177
177 -
 178
178 -
179
-
180
-
181
-
182
-
183
-
184
-
185
-
186
-
187
-
188
-
189
-
190
-
191
-
192
-
193
-
194
-
195
-
196
-
197
-
198
-
199
-
200
-
201
-
202
-
203
-
204
-
205
-
206
-
207
-
208
-
209
-
210
-
211
-
212
-
213
-
214
-
215
-
216
-
217
-
218
-
219
-
220
-
221
-
222
-
223
-
224
-
225
-
226
-
227
-
228
-
229
-
230
-
231
-
232
-
233
-
234
-
235
-
236
-
237
-
238
-
239
-
240
-
241
-
242
-
243
-
244
-
245
-
246
-
247
-
248
-
249
-
250
-
251
-
252
-
253
-
254
-
255
-
256
-
257
-
258
-
259
-
260
-
261
-
262
-
263
-
264
-
265
-
266
-
267
-
268
-
269
-
270
-
271
-
272
-
273
-
274
-
275
-
276
-
277
-
278
-
279
-
280
-
281
-
282
-
283
-
284
-
285
-
286
-
287
-
288
-
289
-
290
-
291
-
292
-
293
-
294
-
295
-
296
-
297
-
298
-
299
-
300
-
301
-
302
-
303
-
304
-
305
-
306
-
307
-
308
-
309
-
310
-
311
-
312
-
313
-
314
-
315
-
316
-
317
-
318
-
319
-
320
-
321
-
322
-
323
-
324
-
325
-
326
-
327
-
328
-
329
-
330
-
331
-
332
-
333
-
334
-
335
-
336
-
337
-
338
-
339
-
340
-
341
-
342
-
343
-
344
-
345
-
346
-
347
-
348
-
349
-
350
-
351
-
352
-
353
-
354
-
355
-
356
-
357
-
358
-
359
-
360
-
361
-
362
-
363
-
364
-
365
-
366
-
367
-
368
-
369
-
370
-
371
-
372
-
373
-
374
-
375
-
376
 |
 |
