Konica Minolta bizhub 160 Service Manual - Page 195
Board Switch, Field Service Ver. 1.0 Apr. 2005
 |
View all Konica Minolta bizhub 160 manuals
Add to My Manuals
Save this manual to your list of manuals |
Page 195 highlights
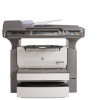
Adjustment / Setting bizhub 160/160f bizhub 161/161f 14. Board Switch No. Key Name 7 10-Key Pad 8 Scan key 9 Fax key 10 Copy key 11 Stop key 12 Panel Reset key 13 123/ ABC key 14 Start key 15 ▲/ ▼ key 16 Zoom key 17 Paper key 18 < / > key 19 Auto/ Photo key 20 Sort key 21 2in1 key 22 Status key 23 Memory TX lamp 24 Auto RX lamp 25 Resolution key 26 Speaker key 27 Phone Book key 162 Field Service Ver. 1.0 Apr. 2005 Function Use to enter the number of copies to be made and any other numeric data. Use to enter text such as a name. Press to enter Scan mode. The indicator lights up in green to indicate that the machine is in Scan mode. (Available only when the Internet Fax & Network Scan Kit is installed.) Press to enter Fax mode. The indicator lights up in green to indicate that the machine is in Fax mode. Press to enter Copy mode. The indicator lights up in green to indicate that the machine is in Copy mode. • Press to stop a print cycle. • Press to stop a scanning sequence. • The indicator flashes in orange when the machine is brought to a pause or in a print cycle. Press to reset all print functions and settings to their defaults. Press to switch the function of the10-Key Pad between typing in numbers and typing in letters. • Press to start a scanning or print cycle. • Press to specify the various settings. • The indicator lights up in green when the machine can accept print jobs. • Press to change the zoom ratio in the range between × 0.25 and × 4.00 in × 0.01 increments. • Press to scan through the various settings and information, in order. • Press to specify the various settings. Press to select a zoom ratio from among those fixed ratios available as standard. Press to select the paper tray that contains the desired paper. • Press to adjust the image density. • Press to specify the various settings. Press to change the image density mode. Press to select the sort function. Press to select the 2in1 function. Press to view the counters and transmission results. In addition, the list of settings specified for each function and the reports can be printed. Lights up when the memory transmission function is selected. Lights up when the automatic reception function is selected. Use to select the image quality (transmission resolution). • Press to answer the call. • Press again to hang up. Use to display the information programmed for one-touch dialing, group dialing and speed dialing.
-
 1
1 -
2
-
3
-
4
-
5
-
6
-
7
-
8
-
9
-
10
-
11
-
12
-
13
-
14
-
15
-
16
-
17
-
18
-
19
-
20
-
21
-
22
-
23
-
24
-
25
-
26
-
27
-
28
-
29
-
30
-
31
-
32
-
33
-
34
-
35
-
36
-
37
-
38
-
39
-
40
-
41
-
42
-
43
-
44
-
45
-
46
-
47
-
48
-
49
-
50
-
51
-
52
-
53
-
54
-
55
-
56
-
57
-
58
-
59
-
60
-
61
-
62
-
63
-
64
-
65
-
66
-
67
-
68
-
69
-
70
-
71
-
72
-
73
-
74
-
75
-
76
-
77
-
78
-
79
-
80
-
81
-
82
-
83
-
84
-
85
-
86
-
87
-
88
-
89
-
90
-
91
-
92
-
93
-
94
-
95
-
96
-
97
-
98
-
99
-
100
-
101
-
102
-
103
-
104
-
105
-
106
-
107
-
108
-
109
-
110
-
111
-
112
-
113
-
114
-
115
-
116
-
117
-
118
-
119
-
120
-
121
-
122
-
123
-
124
-
125
-
126
-
127
-
128
-
129
-
130
-
131
-
132
-
133
-
134
-
135
-
136
-
137
-
138
-
139
-
140
-
141
-
142
-
143
-
144
-
145
-
146
-
147
-
148
-
149
-
150
-
151
-
152
-
153
-
154
-
155
-
156
-
157
-
158
-
159
-
160
-
161
-
162
-
163
-
164
-
165
-
166
-
167
-
168
-
169
-
170
-
171
-
172
-
173
-
174
-
175
-
176
-
177
-
178
-
179
-
180
-
181
-
182
-
183
-
184
-
185
-
186
-
187
-
188
-
189
-
 190
190 -
 191
191 -
 192
192 -
 193
193 -
 194
194 -
 195
195 -
 196
196 -
 197
197 -
 198
198 -
 199
199 -
 200
200 -
201
-
202
-
203
-
204
-
205
-
206
-
207
-
208
-
209
-
210
-
211
-
212
-
213
-
214
-
215
-
216
-
217
-
218
-
219
-
220
-
221
-
222
-
223
-
224
-
225
-
226
-
227
-
228
-
229
-
230
-
231
-
232
-
233
-
234
-
235
-
236
-
237
-
238
-
239
-
240
-
241
-
242
-
243
-
244
-
245
-
246
-
247
-
248
-
249
-
250
-
251
-
252
-
253
-
254
-
255
-
256
-
257
-
258
-
259
-
260
-
261
-
262
-
263
-
264
-
265
-
266
-
267
-
268
-
269
-
270
-
271
-
272
-
273
-
274
-
275
-
276
-
277
-
278
-
279
-
280
-
281
-
282
-
283
-
284
-
285
-
286
-
287
-
288
-
289
-
290
-
291
-
292
-
293
-
294
-
295
-
296
-
297
-
298
-
299
-
300
-
301
-
302
-
303
-
304
-
305
-
306
-
307
-
308
-
309
-
310
-
311
-
312
-
313
-
314
-
315
-
316
-
317
-
318
-
319
-
320
-
321
-
322
-
323
-
324
-
325
-
326
-
327
-
328
-
329
-
330
-
331
-
332
-
333
-
334
-
335
-
336
-
337
-
338
-
339
-
340
-
341
-
342
-
343
-
344
-
345
-
346
-
347
-
348
-
349
-
350
-
351
-
352
-
353
-
354
-
355
-
356
-
357
-
358
-
359
-
360
-
361
-
362
-
363
-
364
-
365
-
366
-
367
-
368
-
369
-
370
-
371
-
372
-
373
-
374
-
375
-
376
 |
 |
