LG KF750 User Guide - Page 37
Using the flash, Adjusting the brightness, Choosing a shot mode - flash mode
 |
UPC - 411378092618
View all LG KF750 manuals
Add to My Manuals
Save this manual to your list of manuals |
Page 37 highlights
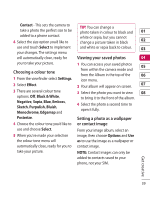
Using the flash Adjusting the brightness The flash is set to off as default, but Contrast defines the difference 01 there are other options. 1 Select to enter the flash sub- between light and dark in an image. A low contrast image will appear foggy, 02 menu. whereas a high contrast image will 03 2 There are three flash options: On - Your camera will always flash appear much sharper. 1 Select Brightness in Settings. 04 when taking a picture. 2 Slide the contrast indicator along 05 Auto - Your camera will assess whether or not the flash is the bar, towards for a lower contrast, hazier image or towards 06 necessary for a good picture. for a higher contrast, sharper 07 image. Off - The camera will never flash. This is useful if you want to save Choosing a shot mode 08 battery power. 1 Select Settings to open the 3 Select the flash option you'd like available shot modes. to use. When you've made your selection the flash menu will automatically close, ready for you to take your picture. 4 The flash icon in the viewfinder will change according to your flash mode. NOTE: Whenever you exit the camera, the flash setting will revert to the off mode. You'll need to switch the flash 2 Choose from the four options: Normal shot -This is the default shot type, the photo will be taken in the normal way, as outlined in Taking a quick photo on page 34. Continuous shot - This enables you to take nine shots automatically in very quick succession. See Using Continuous shot mode on page 36 for details. Get creative back on if you still need it when you reopen the camera. 35
-
 1
1 -
2
-
3
-
4
-
5
-
6
-
7
-
8
-
9
-
10
-
11
-
12
-
13
-
14
-
15
-
16
-
17
-
18
-
19
-
20
-
21
-
22
-
23
-
24
-
25
-
26
-
27
-
28
-
29
-
30
-
31
-
 32
32 -
 33
33 -
 34
34 -
 35
35 -
 36
36 -
 37
37 -
 38
38 -
 39
39 -
 40
40 -
 41
41 -
 42
42 -
43
-
44
-
45
-
46
-
47
-
48
-
49
-
50
-
51
-
52
-
53
-
54
-
55
-
56
-
57
-
58
-
59
-
60
-
61
-
62
-
63
-
64
-
65
-
66
-
67
-
68
-
69
-
70
-
71
-
72
-
73
-
74
-
75
-
76
-
77
-
78
-
79
-
80
-
81
-
82
-
83
-
84
-
85
-
86
-
87
-
88
-
89
-
90
-
91
-
92
-
93
-
94
-
95
-
96
-
97
-
98
 |
 |
