LG KF750 User Guide - Page 39
Using the advanced settings
 |
UPC - 411378092618
View all LG KF750 manuals
Add to My Manuals
Save this manual to your list of manuals |
Page 39 highlights
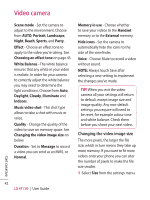
4 In the photo album, the photos will Daylight, Cloudy, Illuminate or be saved as three separate images Indoors. 01 and one panoramic image. NOTE: Due to the image size the Timer - The self-timer allows you to set a delay after the capture button is 02 panoramic photo will appear slightly distorted in the Album view. pressed. Choose from Off, 3 seconds, 03 5 seconds or 10 seconds. Great for a group photo that you want to be 04 Using the advanced settings in too! From the viewfinder select Settings. Shot mode - See page 35~36. 05 Size - Change the size of the photo to save on memory space or take a picture preset to the correct size for contact. See Changing the image size on page 38. ISO - ISO determines the sensitivity of 06 the camera's light sensor. The higher the ISO, the more sensitive the camera 07 will be too light. This is useful in darker 08 conditions when the flash can't be Scene mode - Set the camera to used. Choose an ISO value from Auto, adjust to the environment. Choose ISO 100, ISO 200, ISO 400 or ISO 800. from AUTO, Portrait, Landscape, Night, Beach, Sports, and Party. Size - Change the size of the photo to save on memory space or take a Brightness - Set the contrast of the picture preset to the correct size for image in the viewfinder of the camera. a contact. See Changing the image Effect - Choose a colour tone to size on page 38. apply to the photo you're taking. See Macro - Macro mode allows you to Choosing a colour tone on page 39. take extreme close-ups. If you are White Balance - The white balance trying to take a close-up shot but the Get creative ensures that any white in your photo focus box remains red, try turning the is realistic. In order for your camera macro mode on. to correctly adjust the white balance you may need to determine the light conditions. Choose from Auto, 37
-
 1
1 -
2
-
3
-
4
-
5
-
6
-
7
-
8
-
9
-
10
-
11
-
12
-
13
-
14
-
15
-
16
-
17
-
18
-
19
-
20
-
21
-
22
-
23
-
24
-
25
-
26
-
27
-
28
-
29
-
30
-
31
-
32
-
33
-
 34
34 -
 35
35 -
 36
36 -
 37
37 -
 38
38 -
 39
39 -
 40
40 -
 41
41 -
 42
42 -
 43
43 -
 44
44 -
45
-
46
-
47
-
48
-
49
-
50
-
51
-
52
-
53
-
54
-
55
-
56
-
57
-
58
-
59
-
60
-
61
-
62
-
63
-
64
-
65
-
66
-
67
-
68
-
69
-
70
-
71
-
72
-
73
-
74
-
75
-
76
-
77
-
78
-
79
-
80
-
81
-
82
-
83
-
84
-
85
-
86
-
87
-
88
-
89
-
90
-
91
-
92
-
93
-
94
-
95
-
96
-
97
-
98
 |
 |
