Lenovo ThinkCentre M76 Hardware Maintenance Manual for ThinkCentre M76
Lenovo ThinkCentre M76 Manual
 |
View all Lenovo ThinkCentre M76 manuals
Add to My Manuals
Save this manual to your list of manuals |
Lenovo ThinkCentre M76 manual content summary:
- Lenovo ThinkCentre M76 | Hardware Maintenance Manual for ThinkCentre M76 - Page 1
ThinkCentre Hardware Maintenance Manual Machine Types: 3114, 3120, 3121, 3122, 3123, 3126, 3127, and 3128 - Lenovo ThinkCentre M76 | Hardware Maintenance Manual for ThinkCentre M76 - Page 2
it supports, be sure to read and understand Chapter 2 "Safety information" on page 3 and Appendix A "Notices" on page 205. Third Edition (February 2012) © Copyright Lenovo 2011, 2012. LIMITED AND RESTRICTED RIGHTS NOTICE: If data or software is delivered pursuant a General Services Administration - Lenovo ThinkCentre M76 | Hardware Maintenance Manual for ThinkCentre M76 - Page 3
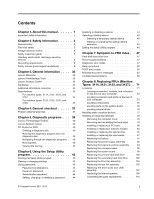
. . . 37 Problem determination tips 37 Chapter 5. Diagnostic programs . . . 39 Lenovo ThinkVantage Toolbox 39 Lenovo Solution Center 39 PC-Doctor for DOS 40 parts on the rear of your computer 73 Locating components 75 Locating parts on the system board . . . . 76 Locating internal drives 76 - Lenovo ThinkCentre M76 | Hardware Maintenance Manual for ThinkCentre M76 - Page 4
the internal speaker 151 Replacing the front audio and USB assembly 156 Completing the parts replacement . . . . . 157 Chapter 10. FRU lists 159 Overall CD . . 200 Chapter 11. Additional service information 201 Security features 201 Hardware-controlled ii ThinkCentre Hardware Maintenance Manual - Lenovo ThinkCentre M76 | Hardware Maintenance Manual for ThinkCentre M76 - Page 5
"Additional service information" chapter apply to all ThinkCentre computers. This manual includes a complete FRU part number list for each machine type listed on the front cover. If you have internet access, the FRU part numbers are also available at: http://www.lenovo.com/support Important safety - Lenovo ThinkCentre M76 | Hardware Maintenance Manual for ThinkCentre M76 - Page 6
2 ThinkCentre Hardware Maintenance Manual - Lenovo ThinkCentre M76 | Hardware Maintenance Manual for ThinkCentre M76 - Page 7
servicing parts in a safe place, away from all personnel, while you are servicing the machine. • Keep your tool case away from walk areas so that other people will not trip over it. • Do not wear loose clothing that can be trapped in the moving parts • After service, reinstall all instructed - Lenovo ThinkCentre M76 | Hardware Maintenance Manual for ThinkCentre M76 - Page 8
you work with very high voltages; these instructions are in the safety sections of maintenance information can cause personal injury and machine damage. • Do not service the following parts with the power on when they are removed from their get medical aid. 4 ThinkCentre Hardware Maintenance Manual - Lenovo ThinkCentre M76 | Hardware Maintenance Manual for ThinkCentre M76 - Page 9
protect users and service personnel from injury. This guide addresses guide. If any unsafe conditions are present, you must determine how serious the apparent hazard could be and whether you can continue without first correcting the problem the parts listings. c. Insulation must not be frayed - Lenovo ThinkCentre M76 | Hardware Maintenance Manual for ThinkCentre M76 - Page 10
charge so that the machine, the part, the work mat, and the person handling the part are all at the same charge. listed below, to provide protection that meets the specific service requirement. Note: The use of a grounding system is Chinese (traditional) 6 ThinkCentre Hardware Maintenance Manual - Lenovo ThinkCentre M76 | Hardware Maintenance Manual for ThinkCentre M76 - Page 11
and modems before you open the device covers, unless instructed otherwise in the installation and configuration procedures. • Connect cables from devices. CAUTION: When replacing the lithium battery, use only Part Number 45C1566 or an equivalent type battery recommended by the manufacturer. If - Lenovo ThinkCentre M76 | Hardware Maintenance Manual for ThinkCentre M76 - Page 12
the laser product could result in exposure to hazardous laser radiation. There are no serviceable parts inside the device. • Use of controls or adjustments or performance of procedures other that all power cords are disconnected from the power source. 2 1 8 ThinkCentre Hardware Maintenance Manual - Lenovo ThinkCentre M76 | Hardware Maintenance Manual for ThinkCentre M76 - Page 13
Chapter 2. Safety information 9 - Lenovo ThinkCentre M76 | Hardware Maintenance Manual for ThinkCentre M76 - Page 14
≥18 kg (37 lb) ≥32 kg (70.5 lb) 10 ThinkCentre Hardware Maintenance Manual ≥55 kg (121.2 lb) - Lenovo ThinkCentre M76 | Hardware Maintenance Manual for ThinkCentre M76 - Page 15
2 1 PERIGO A corrente elétrica proveniente de cabos de alimentação, de telefone e de comunicações é perigosa. Para evitar risco de choque elétrico: • Não conecte nem desconecte nenhum cabo ou execute instalação, manutenção ou reconfiguração deste produto durante uma tempestade com raios. • - Lenovo ThinkCentre M76 | Hardware Maintenance Manual for ThinkCentre M76 - Page 16
exposição direta ao feixe. ≥18 kg (37 lb) ≥32 kg (70.5 lb) ≥55 kg (121.2 lb) CUIDADO: Utilize procedimentos de segurança para levantar equipamentos. 12 ThinkCentre Hardware Maintenance Manual - Lenovo ThinkCentre M76 | Hardware Maintenance Manual for ThinkCentre M76 - Page 17
CUIDADO: O botão de controle de alimentação do dispositivo e o botão para ligar/desligar da fonte de alimentação não desligam a corrente elétrica fornecida ao dispositivo. O dispositivo também pode ter mais de um cabo de alimentação. Para remover toda a corrente elétrica do dispositivo, assegure que - Lenovo ThinkCentre M76 | Hardware Maintenance Manual for ThinkCentre M76 - Page 18
14 ThinkCentre Hardware Maintenance Manual - Lenovo ThinkCentre M76 | Hardware Maintenance Manual for ThinkCentre M76 - Page 19
2 1 Chapter 2. Safety information 15 - Lenovo ThinkCentre M76 | Hardware Maintenance Manual for ThinkCentre M76 - Page 20
2 1 16 ThinkCentre Hardware Maintenance Manual - Lenovo ThinkCentre M76 | Hardware Maintenance Manual for ThinkCentre M76 - Page 21
, que vous déplacez, ou que vous manipulez le présent produit ou des périphériques qui lui sont raccordés, reportez-vous aux instructions ci-dessous pour connecter et déconnecter les différents cordons. Connexion Déconnexion 1. Mettez les unités HORS TENSION. 1. Mettez les unités HORS TENSION - Lenovo ThinkCentre M76 | Hardware Maintenance Manual for ThinkCentre M76 - Page 22
lithium usagée par une pile de référence identique exclusivement, (référence 45C1566), ou suivre les instructions du fabricant qui en définit les équivalences. Si votre système est doté d'un le faisceau ou del'observer à l'aide d'instruments optiques. 18 ThinkCentre Hardware Maintenance Manual - Lenovo ThinkCentre M76 | Hardware Maintenance Manual for ThinkCentre M76 - Page 23
≥18 kg (37 lb) ≥32 kg (70.5 lb) ≥55 kg (121.2 lb) ATTENTION: Soulevez la machine avec précaution. ATTENTION: L'interrupteur de contrôle d'alimentation de l'unité et l'interrupteur dubloc d'alimentation ne coupent pas le courant électrique alimentantl'unité. En outre, le système peut être équipé - Lenovo ThinkCentre M76 | Hardware Maintenance Manual for ThinkCentre M76 - Page 24
. Die Batterie nicht: • mit Wasser in Berührung bringen. • über 100 C erhitzen. • reparieren oder zerlegen. Die örtlichen Bestimmungen für die Entsorgung von Sondermüll beachten. 20 ThinkCentre Hardware Maintenance Manual - Lenovo ThinkCentre M76 | Hardware Maintenance Manual for ThinkCentre M76 - Page 25
ACHTUNG: Bei der Installation von Lasergeräten (wie CD-ROM-Laufwerken, DVD- aufwerken, Einheiten mit Lichtwellenleitertechnik oder Sendern) Folgendes beachten: • Die Abdeckungen nicht entfernen. Durch Entfernen der Abdeckungen des Lasergeräts können gefährliche Laserstrahlungen freigesetzt werden. - Lenovo ThinkCentre M76 | Hardware Maintenance Manual for ThinkCentre M76 - Page 26
22 ThinkCentre Hardware Maintenance Manual - Lenovo ThinkCentre M76 | Hardware Maintenance Manual for ThinkCentre M76 - Page 27
2 1 Chapter 2. Safety information 23 - Lenovo ThinkCentre M76 | Hardware Maintenance Manual for ThinkCentre M76 - Page 28
l'unità. Per scollegarsi 1. SPEGNERE le apparecchiature. 2. Innanzitutto, rimuovere i cavi di alimentazione dalla presa. 3. Rimuovere i cavi di segnale dai connettori. 4. Rimuovere tutti i cavi dalle unità. 24 ThinkCentre Hardware Maintenance Manual - Lenovo ThinkCentre M76 | Hardware Maintenance Manual for ThinkCentre M76 - Page 29
sostituisce la batteria al litio, utilizzare solo il Numero parte 45C1566 o un tipo di batteria equivalente consigliato dal di controlli, regolazioni o l'esecuzione di procedure non descritti nel presente manuale possono provocare l'esposizione a radiazioni pericolose. PERICOLO Alcune unità laser - Lenovo ThinkCentre M76 | Hardware Maintenance Manual for ThinkCentre M76 - Page 30
l'unità disponga di più cavi di alimentazione. Per disattivare l'alimentazione dall'unità, accertarsi che tutti i cavi di alimentazione siano scollegati dalla fonte di alimentazione. 2 1 26 ThinkCentre Hardware Maintenance Manual - Lenovo ThinkCentre M76 | Hardware Maintenance Manual for ThinkCentre M76 - Page 31
Chapter 2. Safety information 27 - Lenovo ThinkCentre M76 | Hardware Maintenance Manual for ThinkCentre M76 - Page 32
2 1 28 ThinkCentre Hardware Maintenance Manual - Lenovo ThinkCentre M76 | Hardware Maintenance Manual for ThinkCentre M76 - Page 33
PELIGRO La corriente eléctrica procedente de cables de alimentación, teléfonos y cables de comunicación puede ser peligrosa. Para evitar el riesgo de descarga eléctrica: • No conecte ni desconecte los cables ni realice ninguna tarea de instalación, mantenimiento o reconfiguración de este producto - Lenovo ThinkCentre M76 | Hardware Maintenance Manual for ThinkCentre M76 - Page 34
directamente al rayo láser. ≥18 kg (37 lb) ≥32 kg (70.5 lb) ≥55 kg (121.2 lb) PRECAUCIÓN: Adopte procedimientos seguros al levantar el equipo. 30 ThinkCentre Hardware Maintenance Manual - Lenovo ThinkCentre M76 | Hardware Maintenance Manual for ThinkCentre M76 - Page 35
PRECAUCIÓN: El botón de control de alimentación del dispositivo y el interruptor de alimentación de la fuente de alimentación no desconectan la corriente eléctrica suministrada al dispositivo. Además, el dispositivo podría tener más de un cable de alimentación. Para suprimir toda la corriente elé - Lenovo ThinkCentre M76 | Hardware Maintenance Manual for ThinkCentre M76 - Page 36
32 ThinkCentre Hardware Maintenance Manual - Lenovo ThinkCentre M76 | Hardware Maintenance Manual for ThinkCentre M76 - Page 37
Enhanced Backup and Restore Update and Drives Lenovo Solution Center The Lenovo Solution Center program enables you to troubleshoot and resolve computer problems. It combines diagnostic tests, system information collection, security status, and support information, along with hints and tips for - Lenovo ThinkCentre M76 | Hardware Maintenance Manual for ThinkCentre M76 - Page 38
lenovo.com/support You can find the following information: • Customer Replaceable Unit (CRU) installation or replacement instructions • Downloads and drivers • Parts information • Publications • Troubleshooting Electrical input • Input voltage: - Low range: 34 ThinkCentre Hardware Maintenance Manual - Lenovo ThinkCentre M76 | Hardware Maintenance Manual for ThinkCentre M76 - Page 39
Minimum: 100 V ac Maximum: 127 V ac Input frequency range: 50 to 60 Hz - High range: Minimum: 200 V ac Maximum: 240 V ac Input frequency range: 50 to 60 Hz For machine types: 3120, 3122, 3126, and 3128. Dimensions Width: 334 mm (13.15 inches) Height: 97 mm (3.8 inches) Depth: 369 mm (14.53 inches) - Lenovo ThinkCentre M76 | Hardware Maintenance Manual for ThinkCentre M76 - Page 40
36 ThinkCentre Hardware Maintenance Manual - Lenovo ThinkCentre M76 | Hardware Maintenance Manual for ThinkCentre M76 - Page 41
instructions or a main menu on the display. If you did not receive the correct response, proceed to step 6. If you do receive If you receive an error, replace the part that the problem determination. If possible, have this information available when requesting assistance from Service Support - Lenovo ThinkCentre M76 | Hardware Maintenance Manual for ThinkCentre M76 - Page 42
the same setup for operating-system-controlled files Comparing the configuration and software set-up between "working and non-working" systems will often lead to problem resolution. 38 ThinkCentre Hardware Maintenance Manual - Lenovo ThinkCentre M76 | Hardware Maintenance Manual for ThinkCentre M76 - Page 43
on the screen. Follow the instructions on the screen. For additional information, refer to the Lenovo ThinkVantage Toolbox help system. Lenovo Solution Center The Lenovo Solution Center program enables you to troubleshoot and resolve computer problems. It combines diagnostic tests, system - Lenovo ThinkCentre M76 | Hardware Maintenance Manual for ThinkCentre M76 - Page 44
problem yourself after running the program, save and print the log files created by the program. You will need the log files when you speak to a Lenovo technical support representative. PC program opens. 5. Follow the instructions on the screen to run the ThinkCentre Hardware Maintenance Manual - Lenovo ThinkCentre M76 | Hardware Maintenance Manual for ThinkCentre M76 - Page 45
Run Normal Test runs a more extensive set of tests than Run Quick Test does and takes longer to complete. • Press F5 to automatically run all selected tests in all categories. • From within a test category, press Ctrl-Enter to automatically run only the selected tests in that category. • Using the - Lenovo ThinkCentre M76 | Hardware Maintenance Manual for ThinkCentre M76 - Page 46
of completion status. • Provides messages that warn the user about a non-recoverable process. Important: Make sure that the QUICK ERASE or FULL ERASE HARD DISK option and follow the instructions. Viewing the test log To view details of a failure or ThinkCentre Hardware Maintenance Manual - Lenovo ThinkCentre M76 | Hardware Maintenance Manual for ThinkCentre M76 - Page 47
Setup Utility program. See "Starting the Setup Utility program" on page 43. Then, follow the instructions on the screen. When working with the Setup Utility program, you must use the keyboard. The keys If you decide to set a password, read the following sections. © Copyright Lenovo 2011, 2012 43 - Lenovo ThinkCentre M76 | Hardware Maintenance Manual for ThinkCentre M76 - Page 48
, select Security ➙ Set Power-On Password or Set Administrator Password. 3. Follow the instructions on the screen to set, change, or delete a password. Note: A password This section provides instructions on how to enable or disable user access to a device. 44 ThinkCentre Hardware Maintenance Manual - Lenovo ThinkCentre M76 | Hardware Maintenance Manual for ThinkCentre M76 - Page 49
Setup ➙ SATA Controller to enable or disable the devices connected to the SATA connectors on the system board. • Select USB Setup and follow the instructions on the screen to enable or disable the USB connector(s) of your choice. 4. Select the desired settings and press Enter. 5. Press Esc to return - Lenovo ThinkCentre M76 | Hardware Maintenance Manual for ThinkCentre M76 - Page 50
settings, select Exit ➙ Discard Changes and Exit. • If you want to return to the default settings, press F9 or select Exit ➙ Load Optimal Defaults. 46 ThinkCentre Hardware Maintenance Manual - Lenovo ThinkCentre M76 | Hardware Maintenance Manual for ThinkCentre M76 - Page 51
FRUs are needed when servicing a computer. If you are unable to correct the problem using this index, go to "Undetermined problems" on page 69. 3. If you did not receive any error message, look for a description of your error symptoms in the first part of this index. Hard disk Lenovo 2011, 2012 47 - Lenovo ThinkCentre M76 | Hardware Maintenance Manual for ThinkCentre M76 - Page 52
000-038-XXX BIOS Extension failure 000-039-XXX BIOS DMI data error 000-195-XXX BIOS Test aborted by user 000-196-XXX BIOS test halt, error threshold exceeded FRU/Action No action 1. Flash the system. See " file 2. Re-start the test to reset the log file 48 ThinkCentre Hardware Maintenance Manual - Lenovo ThinkCentre M76 | Hardware Maintenance Manual for ThinkCentre M76 - Page 53
43 2. Flash the system and retest. See "Updating (flashing) the BIOS from a disc" on page 201 3. Go to "Undetermined problems" on page 69 1. Go to "Undetermined problems" on page 69 2. Flash the system and re-test 3. Replace component under function test 1. Flash the system. See "Updating (flashing - Lenovo ThinkCentre M76 | Hardware Maintenance Manual for ThinkCentre M76 - Page 54
System DMA failure 001-195-XXX System Test aborted by user 001-196-XXX System test halt, error threshold exceeded disc" on page 201 3. Go to "Undetermined problems" on page 69 1. Go to "Undetermined problems" on page 69 2. Flash the system and System board 50 ThinkCentre Hardware Maintenance Manual - Lenovo ThinkCentre M76 | Hardware Maintenance Manual for ThinkCentre M76 - Page 55
Diagnostic Error Code 001-273-XXX System IRQ6 (diskette drive) failure 001-274-XXX System IRQ7 failure 001-275-XXX System IRQ8 failure 001-276-XXX System IRQ9 failure 001-277-XXX System IRQ10 failure 001-278-XXX System IRQ11 failure 001-279-XXX System IRQ12 failure 001-280-XXX System IRQ13 failure - Lenovo ThinkCentre M76 | Hardware Maintenance Manual for ThinkCentre M76 - Page 56
005-195-XXX Video Test aborted by user 005-196-XXX Video test halt, installed 2. System board 1. Run Setup 2. Video drivers update 3. Video card, if installed 4. System board " on page 201 3. Go to "Undetermined problems" on page 69 1. Go to "Undetermined problems" on page 69 2. Flash the system and - Lenovo ThinkCentre M76 | Hardware Maintenance Manual for ThinkCentre M76 - Page 57
011-04X-XXX Serial port failure 011-195-XXX Serial port Test aborted by user FRU/Action 1. Video card, if installed 2. System board No action 1. from a disc" on page 201 3. Go to "Undetermined problems" on page 69 1. Go to "Undetermined problems" on page 69 2. Flash the system and re-test 3. - Lenovo ThinkCentre M76 | Hardware Maintenance Manual for ThinkCentre M76 - Page 58
port failure 014-195-XXX Parallel port Test aborted by user 014-196-XXX Parallel port test halt, error threshold from a disc" on page 201 3. Go to "Undetermined problems" on page 69 1. Go to "Undetermined problems" on page 69 2. Flash the system and re-test ThinkCentre Hardware Maintenance Manual - Lenovo ThinkCentre M76 | Hardware Maintenance Manual for ThinkCentre M76 - Page 59
-XXX USB port IRQ failure 015-195-XXX USB port Test aborted by user FRU/Action 1. Make sure the component that is called out is connected the BIOS from a disc" on page 201 3. Go to "Undetermined problems" on page 69 1. Go to "Undetermined problems" on page 69 2. Flash the system and re-test. See " - Lenovo ThinkCentre M76 | Hardware Maintenance Manual for ThinkCentre M76 - Page 60
user problems" on page 69 018-199-XXX PCI Card test failed, cause unknown 1. Go to "Undetermined problems" on page 69 2. Flash the system and re-test. See "Updating (flashing) the BIOS from a disc" on page 201 3. Replace component under function test 56 ThinkCentre Hardware Maintenance Manual - Lenovo ThinkCentre M76 | Hardware Maintenance Manual for ThinkCentre M76 - Page 61
Card Services error 020-000-XXX PCI Interface Test Passed 020-0XX-XXX PCI Interface error 020-195-XXX PCI Test aborted by user 020- the BIOS from a disc" on page 201 3. Go to "Undetermined problems" on page 69 1. Go to "Undetermined problems" on page 69 2. Flash the system and re-test. See "Updating - Lenovo ThinkCentre M76 | Hardware Maintenance Manual for ThinkCentre M76 - Page 62
interface error 030-195-XXX SCSI interface Test aborted by user FRU/Action 1. IDE signal cable 2. Check power supply from a disc" on page 201 3. Go to "Undetermined problems" on page 69 1. Go to "Undetermined problems" on page 69 2. Flash the system and re-test ThinkCentre Hardware Maintenance Manual - Lenovo ThinkCentre M76 | Hardware Maintenance Manual for ThinkCentre M76 - Page 63
RAID interface Failure 035-195-XXX RAID interface Test aborted by user 035-196-XXX RAID interface test halt, error threshold exceeded 035 the BIOS from a disc" on page 201 3. Go to "Undetermined problems" on page 69 1. Go to "Undetermined problems" on page 69 2. Flash the system and re-test. See " - Lenovo ThinkCentre M76 | Hardware Maintenance Manual for ThinkCentre M76 - Page 64
port failure 071-195-XXX Audio port Test aborted by user 071-196-XXX Audio port test halt, error threshold BIOS from a disc" on page 201 3. Go to "Undetermined problems" on page 69 1. See "Undetermined problems" on page 69 2. Flash the system and re-test. See ThinkCentre Hardware Maintenance Manual - Lenovo ThinkCentre M76 | Hardware Maintenance Manual for ThinkCentre M76 - Page 65
IRQ failure 086-195-XXX Mouse Port interface Test aborted by user 086-196-XXX Mouse Port interface test halt, error threshold exceeded the BIOS from a disc" on page 201 3. Go to "Undetermined problems" on page 69 1. See "Undetermined problems" on page 69 2. Flash the system and re-test. See "Updating - Lenovo ThinkCentre M76 | Hardware Maintenance Manual for ThinkCentre M76 - Page 66
Passed 170-0XX-XXX Voltage Sensor(s) failure 170-195-XXX Voltage Sensor(s) Test aborted by user 170-196-XXX Voltage Sensor(s) test halt, error threshold exceeded 170-197-XXX Voltage BIOS from a disc" on page 201 3. Go to "Undetermined problems" on page 69 62 ThinkCentre Hardware Maintenance Manual - Lenovo ThinkCentre M76 | Hardware Maintenance Manual for ThinkCentre M76 - Page 67
Thermal Sensor(s) failure 175-195-XXX Thermal Sensor(s) Test aborted by user 175-196-XXX Thermal Sensor(s) test halt, error threshold exceeded 175 Intrusion 201-000-XXX System Memory Test Passed FRU/Action 1. See "Undetermined problems" on page 69 2. Flash the system and re-test. See "Updating - Lenovo ThinkCentre M76 | Hardware Maintenance Manual for ThinkCentre M76 - Page 68
mouse 3. System board No action No action 1. Mouse 2. Check and test Keyboard 3. System board No action Remove the Joystick and re-test the system 64 ThinkCentre Hardware Maintenance Manual - Lenovo ThinkCentre M76 | Hardware Maintenance Manual for ThinkCentre M76 - Page 69
• Checks the memory operation • Starts the video operation • Verifies that the boot drive is working If the POST detects a problem, an error message appears on the screen. A single problem can cause several error messages to appear. When you correct the cause of the first error message, the other - Lenovo ThinkCentre M76 | Hardware Maintenance Manual for ThinkCentre M76 - Page 70
program. Keyboard not found Memory size decreased Note: If the problem is caused by the microprocessor fan, pressing F10 will not solve the problem. This error message is displayed when there is no keyboard F10 to save and exit the Setup Utility program. 66 ThinkCentre Hardware Maintenance Manual - Lenovo ThinkCentre M76 | Hardware Maintenance Manual for ThinkCentre M76 - Page 71
POST Error code 0189 0197 0198 0190 0199 POST Error message System Security - Can not read the Security EEPROM Description/Action This error message indicates that the Security EEPROM may be broken or removed. System Security - Unauthorized security data change detected System Security - - Lenovo ThinkCentre M76 | Hardware Maintenance Manual for ThinkCentre M76 - Page 72
light not on, but computer works correctly 1. Power switch/LED assembly 2. System Board Printer problems 1. Printer 2. System Board Program loads from the hard disk with a known-good diagnostics -Test OK? 2. External Device 3. Cable 4. System Board 68 ThinkCentre Hardware Maintenance Manual - Lenovo ThinkCentre M76 | Hardware Maintenance Manual for ThinkCentre M76 - Page 73
. 4. Repeat steps 1 through 3 until you find the failing device or adapter cards. If all devices and adapter cards have been removed, and the problem continues, replace the system board. See "Replacing the system board" on page 98 or "Replacing the system board" on page 148. Chapter 7. Symptom - Lenovo ThinkCentre M76 | Hardware Maintenance Manual for ThinkCentre M76 - Page 74
70 ThinkCentre Hardware Maintenance Manual - Lenovo ThinkCentre M76 | Hardware Maintenance Manual for ThinkCentre M76 - Page 75
you work safely. FRU replacements are to be done only by trained service technicians. This chapter does not contain the remove or replace procedure for provides information to help you locate your computer connectors, components, parts on the system board, and internal drives. Note: The components - Lenovo ThinkCentre M76 | Hardware Maintenance Manual for ThinkCentre M76 - Page 76
drive activity indicator 2 Power indicator 3 Power switch 4 Optical drive eject/close button 5 USB connector (USB port 1) 6 Headphone connector 7 Microphone connector 8 USB connector (USB port 2) 72 ThinkCentre Hardware Maintenance Manual - Lenovo ThinkCentre M76 | Hardware Maintenance Manual for ThinkCentre M76 - Page 77
to connect the cables on your computer. Figure 2. Rear connector and part locations 1 Voltage-selection switch (available on some models) 2 Power cord connector Audio line-out connector DVI monitor connector Description Used to receive audio signals from an external audio device, such as a stereo - Lenovo ThinkCentre M76 | Hardware Maintenance Manual for ThinkCentre M76 - Page 78
a USB hub, which you can use to connect additional USB devices. Used to attach a VGA monitor or other devices that use a VGA monitor connector. 74 ThinkCentre Hardware Maintenance Manual - Lenovo ThinkCentre M76 | Hardware Maintenance Manual for ThinkCentre M76 - Page 79
Locating components Figure 3 "Component locations" on page 75 shows the locations of the various components in your computer. To remove the computer cover, see "Removing the computer cover" on page 78. Figure 3. Component locations 1 Heat sink and fan assembly 2 Memory modules 3 Optical drive 4 - Lenovo ThinkCentre M76 | Hardware Maintenance Manual for ThinkCentre M76 - Page 80
the system board Figure 4 "System board part locations" on page 76 shows the locations of the parts on the system board. Figure 4. System board part locations 1 Microprocessor 2 Microprocessor fan connector 3 cables to the drive installed. Refer to the 76 ThinkCentre Hardware Maintenance Manual - Lenovo ThinkCentre M76 | Hardware Maintenance Manual for ThinkCentre M76 - Page 81
in "Installing or replacing hardware" on page 78 for instructions on how to install or replace internal drives for your can cause static electricity to build up around you. • Always carefully handle the parts and other computer components. Handle PCI cards, memory modules, system boards, and - Lenovo ThinkCentre M76 | Hardware Maintenance Manual for ThinkCentre M76 - Page 82
new part from the ThinkCentre Safety and Warranty Guide, go to: http://www.lenovo.com/support Notes: 1. Use only computer parts provided by Lenovo. 2. When installing or replacing an option, use the appropriate instructions in this section along with the instructions connectors and parts on the rear - Lenovo ThinkCentre M76 | Hardware Maintenance Manual for ThinkCentre M76 - Page 83
understanding the "Important safety information" in the ThinkCentre Safety and Warranty Guide that came with your computer. To obtain a copy of the ThinkCentre Safety and Warranty Guide, go to: http://www.lenovo.com/support This section provides instructions on how to remove and reinstall the front - Lenovo ThinkCentre M76 | Hardware Maintenance Manual for ThinkCentre M76 - Page 84
ThinkCentre Safety and Warranty Guide that came with your computer. To obtain a copy of the ThinkCentre Safety and Warranty Guide, go to: http://www.lenovo.com/support This section provides instructions cover. See "Removing the computer cover" on page 78. 80 ThinkCentre Hardware Maintenance Manual - Lenovo ThinkCentre M76 | Hardware Maintenance Manual for ThinkCentre M76 - Page 85
3. At the rear of the computer, press the release button 1 to open the card latch 2 . Figure 8. Opening the PCI card latch 4. Depending on whether you are installing or replacing a PCI card, do one of the following: • If you are installing a PCI card, remove the appropriate metal slot cover. • If - Lenovo ThinkCentre M76 | Hardware Maintenance Manual for ThinkCentre M76 - Page 86
new PCI card from its static-protective package. 6. Install the new card into the appropriate slot on the system board. See "Locating parts on the system board" on page 76. Note: If you are installing a PCI Express x16 graphics card, make sure the memory slot retaining clips are closed before you - Lenovo ThinkCentre M76 | Hardware Maintenance Manual for ThinkCentre M76 - Page 87
ThinkCentre Safety and Warranty Guide that came with your computer. To obtain a copy of the ThinkCentre Safety and Warranty Guide, go to: http://www.lenovo.com/support This section provides instructions . See "Locating parts on the system board" on page 76. 5. Remove any parts that might prevent - Lenovo ThinkCentre M76 | Hardware Maintenance Manual for ThinkCentre M76 - Page 88
module, open the retaining clips of the memory slot into which you want to install the memory module. Figure 12. Opening the retaining clips 84 ThinkCentre Hardware Maintenance Manual - Lenovo ThinkCentre M76 | Hardware Maintenance Manual for ThinkCentre M76 - Page 89
understanding the "Important safety information" in the ThinkCentre Safety and Warranty Guide that came with your computer. To obtain a copy of the ThinkCentre Safety and Warranty Guide, go to: http://www.lenovo.com/support This section provides instructions on how to install or replace the optical - Lenovo ThinkCentre M76 | Hardware Maintenance Manual for ThinkCentre M76 - Page 90
. Removing the optical drive 5. Install the optical drive retainer on the side of the new optical drive. Figure 15. Installing the optical drive retainer 86 ThinkCentre Hardware Maintenance Manual - Lenovo ThinkCentre M76 | Hardware Maintenance Manual for ThinkCentre M76 - Page 91
and understanding the "Important safety information" in the ThinkCentre Safety and Warranty Guide that came with your computer. To obtain a copy of the ThinkCentre Safety and Warranty Guide, go to: http://www.lenovo.com/support This section provides instructions on how to install or replace the card - Lenovo ThinkCentre M76 | Hardware Maintenance Manual for ThinkCentre M76 - Page 92
the front bezel. See "Removing and reinstalling the front bezel" on page 79. 4. Locate the card reader drive bay. See "Locating internal drives" on page 76. 5. Pivot the card reader retainer to the left and slide it out of the chassis. Figure 18. Removing the card reader retainer 6. Install the card - Lenovo ThinkCentre M76 | Hardware Maintenance Manual for ThinkCentre M76 - Page 93
. Figure 20. Installing the card reader 8. Connect the card reader cable to Front USB connector 2 on the system board. See "Locating parts on the system board" on page 76. 9. Reinstall the front bezel. See "Removing and reinstalling the front bezel" on page 79. Note: You might have to remove the - Lenovo ThinkCentre M76 | Hardware Maintenance Manual for ThinkCentre M76 - Page 94
board" on page 76. 6. Press the blue retaining clip to remove the card reader out of the chassis. Figure 22. Removing the card reader 7. Install the card reader retainer on the side of the new card reader. Figure 23. Installing the card reader retainer 90 ThinkCentre Hardware Maintenance Manual - Lenovo ThinkCentre M76 | Hardware Maintenance Manual for ThinkCentre M76 - Page 95
connector 2 on the system board. See "Locating parts on the system board" on page 76. 10. Reinstall the front bezel. See "Removing ThinkCentre Safety and Warranty Guide that came with your computer. To obtain a copy of the ThinkCentre Safety and Warranty Guide, go to: http://www.lenovo.com/support - Lenovo ThinkCentre M76 | Hardware Maintenance Manual for ThinkCentre M76 - Page 96
battery. See "Locating parts on the system board" on page 76. 4. Remove any parts and disconnect any cables ThinkCentre Safety and Warranty Guide, go to: http://www.lenovo.com/support This section provides instructions on how to replace the power supply assembly. Although there are no moving parts - Lenovo ThinkCentre M76 | Hardware Maintenance Manual for ThinkCentre M76 - Page 97
. There are no serviceable parts inside these components. If you suspect a problem with one of these parts, contact a service technician. To replace from the system board and all drives. See "Locating parts on the system board" on page 76. 4. Release the power supply assembly cables from the cable - Lenovo ThinkCentre M76 | Hardware Maintenance Manual for ThinkCentre M76 - Page 98
and understanding the "Important safety information" in the ThinkCentre Safety and Warranty Guide that came with your computer. To obtain a copy of the ThinkCentre Safety and Warranty Guide, go to: http://www.lenovo.com/support This section provides instructions on how to replace the heat sink and - Lenovo ThinkCentre M76 | Hardware Maintenance Manual for ThinkCentre M76 - Page 99
Lay the computer on its side for easier access to the system board. 4. Locate the heat sink and fan assembly. See "Locating parts on the system board" on page 76. 5. Disconnect any cables that might prevent your access to the heat sink and fan assembly. 6. Disconnect the heat sink and fan assembly - Lenovo ThinkCentre M76 | Hardware Maintenance Manual for ThinkCentre M76 - Page 100
See "Locating parts on the system board" on page 76. 11. ThinkCentre Safety and Warranty Guide that came with your computer. To obtain a copy of the ThinkCentre Safety and Warranty Guide, go to: http://www.lenovo.com/support This section provides instructions ThinkCentre Hardware Maintenance Manual - Lenovo ThinkCentre M76 | Hardware Maintenance Manual for ThinkCentre M76 - Page 101
4. Locate the system board and disconnect all cables connected to the system board. See "Locating parts on the system board" on page 76. 5. Remove the heat sink and fan assembly. See "Replacing the heat sink and fan assembly" on page 94. Note: Place the heat sink and fan - Lenovo ThinkCentre M76 | Hardware Maintenance Manual for ThinkCentre M76 - Page 102
and understanding the "Important safety information" in the ThinkCentre Safety and Warranty Guide that came with your computer. To obtain a copy of the ThinkCentre Safety and Warranty Guide, go to: http://www.lenovo.com/support This section provides instructions on how to replace the system board - Lenovo ThinkCentre M76 | Hardware Maintenance Manual for ThinkCentre M76 - Page 103
page 83 and "Installing or replacing a PCI card" on page 80. 15. Reconnect all remaining cables to the system board. See "Locating parts on the system board" on page 76. 16. Install the hard disk drive. See "Replacing the primary hard disk drive" on page 100 and See "Replacing the secondary hard - Lenovo ThinkCentre M76 | Hardware Maintenance Manual for ThinkCentre M76 - Page 104
ThinkCentre Safety and Warranty Guide that came with your computer. To obtain a copy of the ThinkCentre Safety and Warranty Guide, go to: http://www.lenovo.com/support This section provides instructions internal drives" on page 76. 4. Disconnect the signal ThinkCentre Hardware Maintenance Manual - Lenovo ThinkCentre M76 | Hardware Maintenance Manual for ThinkCentre M76 - Page 105
9. To install a new hard disk drive into the blue bracket, flex the bracket and align pin 1 , pin 2 , pin 3 , and pin 4 on the bracket with the corresponding holes in the hard disk drive. Do not touch the circuit board 5 on the bottom of the hard disk drive. Figure 34. Installing the hard disk drive - Lenovo ThinkCentre M76 | Hardware Maintenance Manual for ThinkCentre M76 - Page 106
ThinkCentre Safety and Warranty Guide, go to: http://www.lenovo.com/support Note: Depending on your model type, your computer might come with a secondary hard disk drive bay for installing or replacing a secondary hard disk drive. This section provides instructions drives" on page 76. 4. Disconnect - Lenovo ThinkCentre M76 | Hardware Maintenance Manual for ThinkCentre M76 - Page 107
. Connect the signal cable and the power cable to the new hard disk drive. 13. To complete the installation or replacement, go to "Completing the parts replacement" on page 110. Chapter 8. Replacing FRUs (Machine Types: 3114, 3121, 3123, and 3127.) 103 - Lenovo ThinkCentre M76 | Hardware Maintenance Manual for ThinkCentre M76 - Page 108
ThinkCentre Safety and Warranty Guide that came with your computer. To obtain a copy of the ThinkCentre Safety and Warranty Guide, go to: http://www.lenovo.com/support This section provides instructions the system board. See "Locating parts on the system board" on page 76. 5. Release the two tabs 1 - Lenovo ThinkCentre M76 | Hardware Maintenance Manual for ThinkCentre M76 - Page 109
ThinkCentre Safety and Warranty Guide that came with your computer. To obtain a copy of the ThinkCentre Safety and Warranty Guide, go to: http://www.lenovo.com/support This section provides instructions See "Locating parts on the system board" on page 76. Chapter 8. Replacing FRUs (Machine Types: 3114, - Lenovo ThinkCentre M76 | Hardware Maintenance Manual for ThinkCentre M76 - Page 110
rear fan assembly by aligning the new rubber mounts with the corresponding holes in the chassis and push the rubber mounts through the holes. 106 ThinkCentre Hardware Maintenance Manual - Lenovo ThinkCentre M76 | Hardware Maintenance Manual for ThinkCentre M76 - Page 111
ThinkCentre Safety and Warranty Guide that came with your computer. To obtain a copy of the ThinkCentre Safety and Warranty Guide, go to: http://www.lenovo.com/support This section provides instructions See "Locating parts on the system board" on page 76. Chapter 8. Replacing FRUs (Machine Types: 3114, 3121 - Lenovo ThinkCentre M76 | Hardware Maintenance Manual for ThinkCentre M76 - Page 112
Safety and Warranty Guide, go to: http://www.lenovo.com/support This section provides instructions on how to replace the internal speaker. Note: The internal speaker is only available in some models. To replace the internal speaker, do the following: 108 ThinkCentre Hardware Maintenance Manual - Lenovo ThinkCentre M76 | Hardware Maintenance Manual for ThinkCentre M76 - Page 113
computer cover. See "Removing the computer cover" on page 78. 3. Locate the internal speaker connector on the system board. See "Locating parts on the system board" on page 76. 4. Disconnect the internal speaker cable from the system board. 5. Push the metal tab 1 on the top of the internal speaker - Lenovo ThinkCentre M76 | Hardware Maintenance Manual for ThinkCentre M76 - Page 114
See "Locating parts on the system board" on page 76. 8. To complete the installation or replacement, go to "Completing the parts replacement" on page 110. Completing the parts replacement After to avoid interference with reinstalling the computer cover. 110 ThinkCentre Hardware Maintenance Manual - Lenovo ThinkCentre M76 | Hardware Maintenance Manual for ThinkCentre M76 - Page 115
that the rail guides on the bottom and power cords to the computer. See "Locating connectors and parts on the rear of your computer" on page 73. 9. program" on page 43. Note: In most areas of the world, Lenovo requires the return of the defective Field Replaceable Units (FRUs). Information about - Lenovo ThinkCentre M76 | Hardware Maintenance Manual for ThinkCentre M76 - Page 116
112 ThinkCentre Hardware Maintenance Manual - Lenovo ThinkCentre M76 | Hardware Maintenance Manual for ThinkCentre M76 - Page 117
you work safely. FRU replacements are to be done only by trained service technicians. This chapter does not contain the remove or replace procedure for provides information to help you locate your computer connectors, components, parts on the system board, and internal drives. Note: The components - Lenovo ThinkCentre M76 | Hardware Maintenance Manual for ThinkCentre M76 - Page 118
eject/close button 2 Power switch 3 Hard disk drive activity indicator 4 Power indicator 5 USB connector (USB port 2) 6 Microphone connector 7 Headphone connector 8 USB connector (USB port 1) 114 ThinkCentre Hardware Maintenance Manual - Lenovo ThinkCentre M76 | Hardware Maintenance Manual for ThinkCentre M76 - Page 119
Locating connectors on the rear of your computer Figure 48 "Rear connector locations" on page 115 shows the locations of the connectors on the rear of your computer. Some connectors on the rear of your computer are color-coded to help you determine where to connect the cables on your computer. - Lenovo ThinkCentre M76 | Hardware Maintenance Manual for ThinkCentre M76 - Page 120
switch (also called Intrusion switch) 11 Hard disk drive 12 PCI card (installed in some models) 13 System board 14 Heat sink fan duct 116 ThinkCentre Hardware Maintenance Manual - Lenovo ThinkCentre M76 | Hardware Maintenance Manual for ThinkCentre M76 - Page 121
page 117 shows the locations of the parts on the system board. Figure 50. System board part locations 1 Microprocessor 2 Microprocessor fan connector to read other types of media. Internal drives are installed in bays. In this manual, the bays are referred to as bay 1, bay 2, and so on. Your - Lenovo ThinkCentre M76 | Hardware Maintenance Manual for ThinkCentre M76 - Page 122
119 for instructions on how part until the defective part has been removed from the computer and you are ready to install the new part . Static electricity, although harmless to you, can seriously damage computer components and parts. When you handle computer parts parts the new part from the - Lenovo ThinkCentre M76 | Hardware Maintenance Manual for ThinkCentre M76 - Page 123
To obtain a copy of the ThinkCentre Safety and Warranty Guide, go to: http://www.lenovo.com/support Notes: 1. Use only computer parts provided by Lenovo. 2. When installing or replacing an option, use the appropriate instructions in this section along with the instructions that come with the option - Lenovo ThinkCentre M76 | Hardware Maintenance Manual for ThinkCentre M76 - Page 124
ThinkCentre Safety and Warranty Guide that came with your computer. To obtain a copy of the ThinkCentre Safety and Warranty Guide, go to: http://www.lenovo.com/support This section provides instructions cover. See "Opening the computer cover" on page 119. 120 ThinkCentre Hardware Maintenance Manual - Lenovo ThinkCentre M76 | Hardware Maintenance Manual for ThinkCentre M76 - Page 125
3. Remove the front bezel by releasing the three plastic tabs on the top of the front bezel and pivoting the front bezel outward to remove it from the computer. Figure 53. Removing the front bezel Chapter 9. Replacing FRUs (Machine Types: 3120, 3122, 3126, and 3128.) 121 - Lenovo ThinkCentre M76 | Hardware Maintenance Manual for ThinkCentre M76 - Page 126
ThinkCentre Safety and Warranty Guide that came with your computer. To obtain a copy of the ThinkCentre Safety and Warranty Guide, go to: http://www.lenovo.com/support This section provides instructions cables. See "Replacing the optical drive" on page 135. 122 ThinkCentre Hardware Maintenance Manual - Lenovo ThinkCentre M76 | Hardware Maintenance Manual for ThinkCentre M76 - Page 127
ThinkCentre Safety and Warranty Guide that came with your computer. To obtain a copy of the ThinkCentre Safety and Warranty Guide, go to: http://www.lenovo.com/support This section provides instructions . See "Locating parts on the system board" on page 76. 8. Remove any parts that might prevent - Lenovo ThinkCentre M76 | Hardware Maintenance Manual for ThinkCentre M76 - Page 128
and understanding the "Important safety information" in the ThinkCentre Safety and Warranty Guide that came with your computer. To obtain a copy of the ThinkCentre Safety and Warranty Guide, go to: http://www.lenovo.com/support This section provides instructions on how to install or replace a PCI - Lenovo ThinkCentre M76 | Hardware Maintenance Manual for ThinkCentre M76 - Page 129
2. Open the computer cover. See "Opening the computer cover" on page 119. 3. Rotate the PCI card retainer to the open position. 4. Depending on whether you are installing or replacing a PCI card, do one of the following: • If you are installing a PCI card, remove the appropriate metal slot cover. • - Lenovo ThinkCentre M76 | Hardware Maintenance Manual for ThinkCentre M76 - Page 130
"Locating parts on the system board" on page 76. Figure 59 ThinkCentre Safety and Warranty Guide that came with your computer. To obtain a copy of the ThinkCentre Safety and Warranty Guide, go to: http://www.lenovo.com/support This section provides instructions ThinkCentre Hardware Maintenance Manual - Lenovo ThinkCentre M76 | Hardware Maintenance Manual for ThinkCentre M76 - Page 131
4. Locate the card reader drive bay. See "Locating internal drives" on page 117. Note: You might have to remove the metal cover of the card reader drive bay. 5. Install the new card reader into the card reader bracket. Then install the two screws to secure the card reader to the bracket. 6. Install - Lenovo ThinkCentre M76 | Hardware Maintenance Manual for ThinkCentre M76 - Page 132
the USB connectors on the system board. See "Locating parts on the system board" on page 76. 9. Reinstall the front bezel. See "Removing and reinstalling parts replacement" on page 157. Replacing the card reader To replace the card reader, do the following: 128 ThinkCentre Hardware Maintenance Manual - Lenovo ThinkCentre M76 | Hardware Maintenance Manual for ThinkCentre M76 - Page 133
the optical drive bay upward and disconnect the card reader cable from the USB connector on the system board. See "Locating parts on the system board" on page 76. 6. Remove the screw that secures the card reader bracket. Then, remove the card reader bracket from the chassis. Figure 63. Removing - Lenovo ThinkCentre M76 | Hardware Maintenance Manual for ThinkCentre M76 - Page 134
9. Install the card reader bracket to the chassis. Then push the bracket to the left to align the screw hole in the bracket with the corresponding hole in the chassis. Figure 64. Installing the card reader 130 ThinkCentre Hardware Maintenance Manual - Lenovo ThinkCentre M76 | Hardware Maintenance Manual for ThinkCentre M76 - Page 135
USB connectors on the system board. See "Locating parts on the system board" on page 76. 12. Reinstall the front bezel. See "Removing ThinkCentre Safety and Warranty Guide that came with your computer. To obtain a copy of the ThinkCentre Safety and Warranty Guide, go to: http://www.lenovo.com/support - Lenovo ThinkCentre M76 | Hardware Maintenance Manual for ThinkCentre M76 - Page 136
parts Guide, go to: http://www.lenovo.com/support This section provides instructions on how to replace the hard disk drive. To replace the hard disk drive, do the following: 1. Turn off the computer and disconnect all power cords from electrical outlets. 132 ThinkCentre Hardware Maintenance Manual - Lenovo ThinkCentre M76 | Hardware Maintenance Manual for ThinkCentre M76 - Page 137
2. Open the computer cover. See "Opening the computer cover" on page 119. 3. Locate the hard disk drive. See "Locating components" on page 116. 4. Pull on the handle of the hard disk drive bracket as shown and then lift the hard disk drive bracket up from the optical drive bay. Figure 68. Removing - Lenovo ThinkCentre M76 | Hardware Maintenance Manual for ThinkCentre M76 - Page 138
pivot the hard disk drive and bracket downwards until the hard disk drive bracket snaps into position. Figure 70. Installing the hard disk drive 134 ThinkCentre Hardware Maintenance Manual - Lenovo ThinkCentre M76 | Hardware Maintenance Manual for ThinkCentre M76 - Page 139
understanding the "Important safety information" in the ThinkCentre Safety and Warranty Guide that came with your computer. To obtain a copy of the ThinkCentre Safety and Warranty Guide, go to: http://www.lenovo.com/support This section provides instructions on how to replace the optical drive. To - Lenovo ThinkCentre M76 | Hardware Maintenance Manual for ThinkCentre M76 - Page 140
the old optical drive 8. Install the optical drive retainer on the side of the new optical drive. Figure 73. Installing the optical drive retainer 136 ThinkCentre Hardware Maintenance Manual - Lenovo ThinkCentre M76 | Hardware Maintenance Manual for ThinkCentre M76 - Page 141
and understanding the "Important safety information" in the ThinkCentre Safety and Warranty Guide that came with your computer. To obtain a copy of the ThinkCentre Safety and Warranty Guide, go to: http://www.lenovo.com/support This section provides instructions on how to replace the heat sink and - Lenovo ThinkCentre M76 | Hardware Maintenance Manual for ThinkCentre M76 - Page 142
fan assembly cable from the microprocessor fan connector on the system board. See "Locating parts on the system board" on page 76. 4. Follow this sequence to remove the four screws that secure the heat sink on the bottom of the heat sink and fan assembly. 138 ThinkCentre Hardware Maintenance Manual - Lenovo ThinkCentre M76 | Hardware Maintenance Manual for ThinkCentre M76 - Page 143
heat sink fan duct from the failing heat sink and fan assembly. Figure 76. Removing the heat sink fan duct 7. Place the new heat sink and fan fan connector on the system board. See "Locating parts on the system board" on page 76. Chapter 9. Replacing FRUs (Machine Types: 3120, 3122, 3126, and - Lenovo ThinkCentre M76 | Hardware Maintenance Manual for ThinkCentre M76 - Page 144
came with your computer. To obtain a copy of the ThinkCentre Safety and Warranty Guide, go to: http://www.lenovo.com/support This section provides instructions on how to replace the power supply assembly. Although there are no moving parts in your computer after the power cord has been disconnected - Lenovo ThinkCentre M76 | Hardware Maintenance Manual for ThinkCentre M76 - Page 145
energy levels are present inside any component that has this label attached. There are no serviceable parts inside these components. If you suspect a problem with one of these parts, contact a service technician. To replace the power supply assembly, do the following: 1. Remove all media from the - Lenovo ThinkCentre M76 | Hardware Maintenance Manual for ThinkCentre M76 - Page 146
5. Remove the two screws that secure the heat sink fan duct, and then lift the heat sink fan duct out of the chassis. Figure 78. Removing the heat sink fan duct 142 ThinkCentre Hardware Maintenance Manual - Lenovo ThinkCentre M76 | Hardware Maintenance Manual for ThinkCentre M76 - Page 147
6. Pivot the optical drive upward and disconnect the power supply assembly cables from all drives and from power connectors 1 and 2 on the system board. Figure 79. Power connectors on the system board Note: You might also need to release the power supply assembly cables from some cable clips or ties - Lenovo ThinkCentre M76 | Hardware Maintenance Manual for ThinkCentre M76 - Page 148
supply assembly in place. Note: Use only screws provided by Lenovo. Figure 81. Installing the power supply assembly 10. Connect the new power supply assembly cables to all drives and the system board. See "Locating parts on the system board" on page 76. 144 ThinkCentre Hardware Maintenance Manual - Lenovo ThinkCentre M76 | Hardware Maintenance Manual for ThinkCentre M76 - Page 149
the "Important safety information" in the ThinkCentre Safety and Warranty Guide that came with your computer. To obtain a copy of the ThinkCentre Safety and Warranty Guide, go to: http://www.lenovo.com/support This section provides instructions on how to replace the microprocessor. CAUTION - Lenovo ThinkCentre M76 | Hardware Maintenance Manual for ThinkCentre M76 - Page 150
the system board and disconnect all cables connected to the system board. See "Locating parts on the system board" on page 76. 4. Remove the heat sink and fan assembly with the fan duct. See and socket might look different from the one illustrated. 146 ThinkCentre Hardware Maintenance Manual - Lenovo ThinkCentre M76 | Hardware Maintenance Manual for ThinkCentre M76 - Page 151
b. Note the orientation of the microprocessor in the socket. You can look for the small triangle 1 on one corner of the microprocessor. This is important when installing the new microprocessor on the system board. c. Touch only the edges of the microprocessor. Do not touch the gold contacts on the - Lenovo ThinkCentre M76 | Hardware Maintenance Manual for ThinkCentre M76 - Page 152
ThinkCentre Safety and Warranty Guide that came with your computer. To obtain a copy of the ThinkCentre Safety and Warranty Guide, go to: http://www.lenovo.com/support This section provides instructions See "Locating parts on the system board" on page 117. 148 ThinkCentre Hardware Maintenance Manual - Lenovo ThinkCentre M76 | Hardware Maintenance Manual for ThinkCentre M76 - Page 153
124. 15. Reconnect all remaining cables to the system board. See "Locating parts on the system board" on page 117. 16. Lower the optical drive replacement, go to "Completing the parts replacement" on page 110. Note: If required, return the failing system board to Lenovo. Chapter 9. Replacing FRUs ( - Lenovo ThinkCentre M76 | Hardware Maintenance Manual for ThinkCentre M76 - Page 154
ThinkCentre Safety and Warranty Guide that came with your computer. To obtain a copy of the ThinkCentre Safety and Warranty Guide, go to: http://www.lenovo.com/support This section provides instructions See "Locating parts on the system board" on page 76. 6. The ThinkCentre Hardware Maintenance Manual - Lenovo ThinkCentre M76 | Hardware Maintenance Manual for ThinkCentre M76 - Page 155
the system board. See "Locating parts on the system board" on page 76. 9. Reinstall the hard disk ThinkCentre Safety and Warranty Guide that came with your computer. To obtain a copy of the ThinkCentre Safety and Warranty Guide, go to: http://www.lenovo.com/support This section provides instructions - Lenovo ThinkCentre M76 | Hardware Maintenance Manual for ThinkCentre M76 - Page 156
the internal speaker. See "Locating components" on page 116. 5. Disconnect the internal speaker cable from the internal speaker connector on the system board. See "Locating parts on the system board" on page 76. 152 ThinkCentre Hardware Maintenance Manual - Lenovo ThinkCentre M76 | Hardware Maintenance Manual for ThinkCentre M76 - Page 157
6. Remove the screw that secures the cover presence switch (intrusion switch) and remove the cover presence switch from the chassis. Figure 90. Removing the cover presence switch Chapter 9. Replacing FRUs (Machine Types: 3120, 3122, 3126, and 3128.) 153 - Lenovo ThinkCentre M76 | Hardware Maintenance Manual for ThinkCentre M76 - Page 158
the new internal speaker with the two metal clips on the chassis, and then slide the speaker as shown until it snaps into position. 154 ThinkCentre Hardware Maintenance Manual - Lenovo ThinkCentre M76 | Hardware Maintenance Manual for ThinkCentre M76 - Page 159
Figure 92. Installing the new internal speaker 9. Reconnect the internal speaker cable to the system board. See "Locating parts on the system board" on page 76. 10. Position the cover presence switch so that the screw hole in the cover presence switch is aligned with the corresponding hole in the - Lenovo ThinkCentre M76 | Hardware Maintenance Manual for ThinkCentre M76 - Page 160
and understanding the "Important safety information" in the ThinkCentre Safety and Warranty Guide that came with your computer. To obtain a copy of the ThinkCentre Safety and Warranty Guide, go to: http://www.lenovo.com/support This section provides instructions on how to replace the front audio and - Lenovo ThinkCentre M76 | Hardware Maintenance Manual for ThinkCentre M76 - Page 161
audio and USB assembly bracket to the chassis. 10. Reconnect the front USB and front audio cables to the system board. See "Locating parts on the system board" on page 76. 11. Reinstall the front bezel. See "Removing and reinstalling the front bezel" on page 120. 12. To complete the installation or - Lenovo ThinkCentre M76 | Hardware Maintenance Manual for ThinkCentre M76 - Page 162
the Setup Utility program" on page 43. Note: In most areas of the world, Lenovo requires the return of the defective Field Replaceable Units (FRUs). Information about this will come with the new FRUs or will come a few days after you receive the new FRUs. 158 ThinkCentre Hardware Maintenance Manual - Lenovo ThinkCentre M76 | Hardware Maintenance Manual for ThinkCentre M76 - Page 163
"N" in the CRU column. "N" means that the part is not a CRU, "1" means that the part is a Self-service CRU, and "2" means that the part is an Optional-service CRU. Overall: MT 3120, 3122, 3126, and cache, AM3, 65W) C2 45nm • MT 3128: FRU # 71Y9191 71Y5429 CRU N N © Copyright Lenovo 2011, 2012 159 - Lenovo ThinkCentre M76 | Hardware Maintenance Manual for ThinkCentre M76 - Page 164
total cache, AM3, 95W) C2 45nm • MT 3128: FRU # 71Y5431 03T7014 64Y8014 03T7015 03T7016 03T7043 03T7017 03T7018 03T6021 89Y0793 03T7019 03T7020 03T7021 71Y5433 CRU N N N N N N N N N N N N N N 160 ThinkCentre Hardware Maintenance Manual - Lenovo ThinkCentre M76 | Hardware Maintenance Manual for ThinkCentre M76 - Page 165
Item # 2 2 2 2 2 2 2 2 3 3 4 4 5 5 8 10 FRUs Microprocessor, Phenom II X3 B75 (3.0GHz, 7.5M total cache, AM3, 95W) C2 45nm • MT 3128: Microprocessor, Phenom II X3 B77 (3.2GHz, 7.5M total cache, AM3, 95W) C3 45nm • MT 3128: Microprocessor, Phenom II X3 740 (3.0GHz, 7.5M total cache, AM3, 95W) C2 - Lenovo ThinkCentre M76 | Hardware Maintenance Manual for ThinkCentre M76 - Page 166
: all models FRU, AMD AM2/AM3 65W cooler kit (no fan grill) • MT 3128: all models FRU, cooler kit to cover 95W microprocessor , no fan grill • disk drive 400mm • MT 3128: all models 162 ThinkCentre Hardware Maintenance Manual FRU # 87H4891 45K0409 03T7040 45K0410 03T7041 45K0412 03T7042 03T7012 - Lenovo ThinkCentre M76 | Hardware Maintenance Manual for ThinkCentre M76 - Page 167
models FRU, optical disk drive bezel assembly • MT 3128: all models FRU, optical disk drive clip • MT 3128: all models FRU, non card reader bezel kit - 323CT • MT 3128: all models FRU, no optical disk drive, blank bezel • MT 3128: all models FRU, card reader bracket assembly -Foxconn • MT 3128: all - Lenovo ThinkCentre M76 | Hardware Maintenance Manual for ThinkCentre M76 - Page 168
3128: Belgium French • MT 3128: Belgium English • MT 3128: Brazilian Portuguese • MT 3128: Bulgarian • MT 3128: 164 ThinkCentre Hardware Maintenance Manual FRU # 03T9591 03T9592 03T9593 03T9594 43N9728 03T9602 03T9603 03T9608 03T9604 03T9696 03T9697 CRU 2 2 2 2 2 2 2 2 2 2 2 FRU # 41A5039 41A5040 - Lenovo ThinkCentre M76 | Hardware Maintenance Manual for ThinkCentre M76 - Page 169
Chinese/US • MT 3128: Czech (ABB) • MT 3128: Danish • MT 3128: Dutch • MT 3128: French • MT 3128: French Canadian • MT 3128: French Canadian • MT 3128: German • MT 3128: Greek • MT 3128: Greek/US • MT 3128: Hebrew • MT 3128: Hungarian • MT 3128: Iceland • MT 3128: Italy • MT 3128: Japanese • MT 3128 - Lenovo ThinkCentre M76 | Hardware Maintenance Manual for ThinkCentre M76 - Page 170
Pro PS/2 Keyboard -Preferred Pro USB US English/Chinese-Simplified • MT 3128: Arabic • MT 3128: Arabic/French • MT 3128: 166 ThinkCentre Hardware Maintenance Manual FRU # 41A5064 41A5065 41A5066 41A5067 41A5068 41A5069 41A5070 41A5071 41A5072 41A5073 41A5074 41A5075 41A5076 41A5077 54Y8382 CRU - Lenovo ThinkCentre M76 | Hardware Maintenance Manual for ThinkCentre M76 - Page 171
Keyboard -Preferred Pro USB Belgium French • MT 3128: Belgium English • MT 3128: Brazilian Portuguese • MT 3128: B2P B3P B4P B5P B6P B7P C1P C2P Bulgarian • MT 3128: Chinese/US • MT 3128: Czech (ABB) • MT 3128: Danish • MT 3128: Dutch • MT 3128: French • MT 3128: French Canadian • MT 3128: French - Lenovo ThinkCentre M76 | Hardware Maintenance Manual for ThinkCentre M76 - Page 172
MT 3128: UK English • MT 3128: US European • MT 3128: Slovenian • MT 3128: Keyboard -Preferred Pro USB 168 ThinkCentre Hardware Maintenance Manual FRU # 41A5311 41A5312 41A5313 41A5314 41A5315 41A5317 41A5316 41A5318 41A5319 41A5320 41A5321 41A5322 41A5323 41A5324 41A5325 41A5326 41A5327 41A5328 - Lenovo ThinkCentre M76 | Hardware Maintenance Manual for ThinkCentre M76 - Page 173
Arabic (New) • MT 3128: Lithuanian • MT 3128: Estonia • MT 3128: India • MT 3128: Keyboard -Preferred Pro USB Keyboard -Fingerprint Fingerprint--US English • MT 3128: Fingerprint--Arabic • MT 3128: Fingerprint--Arabic/French • MT 3128: Fingerprint--Belgium French • MT 3128: Fingerprint--Belgium - Lenovo ThinkCentre M76 | Hardware Maintenance Manual for ThinkCentre M76 - Page 174
: Fingerprint--Serbian/Cyrillic • MT 3128: Fingerprint--Slovak • MT 3128: Fingerprint--Spanish • MT 3128: Keyboard -Fingerprint 170 ThinkCentre Hardware Maintenance Manual FRU # 57Y4794 57Y4795 57Y4796 57Y4797 57Y4798 57Y4899 57Y4800 57Y4801 57Y4802 57Y4803 57Y4804 57Y4805 57Y4806 57Y4807 57Y4808 - Lenovo ThinkCentre M76 | Hardware Maintenance Manual for ThinkCentre M76 - Page 175
Keyboard -Fingerprint Fingerprint--Swedish/Finnish • MT 3128: Fingerprint--Swiss French/German • MT 3128: Fingerprint--Thailand • MT 3128: Fingerprint--Turkish • MT 3128: Fingerprint--Turkish • MT 3128: Fingerprint--UK English • MT 3128: Fingerprint--US European • MT 3128: Fingerprint--Slovenian • - Lenovo ThinkCentre M76 | Hardware Maintenance Manual for ThinkCentre M76 - Page 176
: Fingerprint--Portuguese • MT 3128: Fingerprint--Romanian • MT 3128: Fingerprint--Romanian • MT 3128: Keyboard -Fingerprint 172 ThinkCentre Hardware Maintenance Manual FRU # 03X8011 03X8012 03X8013 03X8014 03X8015 03X8016 03X8017 03X8018 03X8019 03X8020 03X8021 03X8022 03X8023 03X8024 03X8025 - Lenovo ThinkCentre M76 | Hardware Maintenance Manual for ThinkCentre M76 - Page 177
Keyboard -Fingerprint Fingerprint--Russian/Cyrillic • MT 3128: Fingerprint--Serbian/Cyrillic • MT 3128: Fingerprint--Slovak • MT 3128: Fingerprint--Spanish • MT 3128: Fingerprint--Swedish/Finnish • MT 3128: Fingerprint--Swiss French/German • MT 3128: Fingerprint--Thailand • MT 3128: Fingerprint-- - Lenovo ThinkCentre M76 | Hardware Maintenance Manual for ThinkCentre M76 - Page 178
DASH NIC LP ® • MT 3128: Power Cords Line cord-US, (Thailand) • MT 3128: Line cord-China • MT 3128: Power Cords --primary 174 ThinkCentre Hardware Maintenance Manual FRU # 46R1529 64Y8206 46R4220 89Y1712 46R1519 53Y4008 41A5334 89Y6152 43N9160 89Y9227 41X6398 03T9009 71Y8665 03T9027 03T6621 CRU - Lenovo ThinkCentre M76 | Hardware Maintenance Manual for ThinkCentre M76 - Page 179
Power Cords --primary Line cord-Japan • MT 3128: Line cord-Brazil • MT 3128: B2P B3P B4P B5P B6P B7P C1P C2P Line cord-LA (High Voltage) Argentina, Paraguay and Uruguay • MT 3128: Line cord- ANZ • MT 3128: Line cord-Korea • MT 3128: Line cord-Hong Kong, Singapore, Malaysia, Brunei • MT 3128: Line - Lenovo ThinkCentre M76 | Hardware Maintenance Manual for ThinkCentre M76 - Page 180
-Thailand • MT 3128: FRU # 41R3185 41R3257 41R3249 41R3271 41R3177 41R3197 41R3261 41R3225 41R3279 41R3233 41R3209 41R3213 41R3229 41R3237 41R3221 41R3175 41R3209 41R3225 43N9030 CRU 1 1 1 1 1 1 1 1 1 1 1 1 1 1 1 1 1 1 1 176 ThinkCentre Hardware Maintenance Manual - Lenovo ThinkCentre M76 | Hardware Maintenance Manual for ThinkCentre M76 - Page 181
Recovery discs Windows 7 Home Basic 32 SP1 Recovery CD English • MT 3128: Brazilian Portuguese • MT 3128: Windows 7 Home Basic 32bit SP1 Windows 7 Home Premium 32 SP1 Recovery CD English • MT 3128: Windows 7 Home Premium 32 SP1 Recovery CD Windows 7 Home Premium 64 SP1 Recovery CD English • - Lenovo ThinkCentre M76 | Hardware Maintenance Manual for ThinkCentre M76 - Page 182
Portuguese • MT 3128: Simplified Chinese • MT 3128: Traditional Chinese • MT 3128: Czech • MT 3128: Denmark • MT 3128: FRU # 03W7476 03W7477 03W7478 03W7479 03W7480 CRU 1 1 1 1 1 178 ThinkCentre Hardware Maintenance Manual - Lenovo ThinkCentre M76 | Hardware Maintenance Manual for ThinkCentre M76 - Page 183
Finnish • MT 3128: French • MT 3128: Greek • MT 3128: German • MT 3128: Hong Kong • MT 3128: Hungary • MT 3128: Italian • MT 3128: Japanese • MT 3128: Korean • MT 3128: Dutch • MT 3128: Norwegian • MT 3128: Polish • MT 3128: Portuguese • MT 3128: Russian • MT 3128: Spanish • MT 3128: Swedish • MT - Lenovo ThinkCentre M76 | Hardware Maintenance Manual for ThinkCentre M76 - Page 184
B4P Hard disk drive, SATA 320GB 7200 RPM / 3Gb / 8M • MT 3127: B1P B2P B4P FRU # 64Y6649 89Y9224 71Y5543 71Y5545 03T7012 87H4891 45K0409 CRU 2 2 2 2 N 2 2 180 ThinkCentre Hardware Maintenance Manual - Lenovo ThinkCentre M76 | Hardware Maintenance Manual for ThinkCentre M76 - Page 185
Item # 7 7 7 7 7 9 10 10 11 11 11 12 12 12 12 12 12 FRUs Hard disk drive, SATA 320GB 7200 RPM / 3Gb / 8M • MT 3127: B1P B2P B4P Hard disk drive, SATA 500GB 7200RPM / 3Gb / 16M • MT 3127: B3P B5P B6P C1P C2P Hard disk drive, SATA 500GB 7200RPM / 3Gb / 16M • MT 3127: B3P B5P B6P C1P C2P Hard disk - Lenovo ThinkCentre M76 | Hardware Maintenance Manual for ThinkCentre M76 - Page 186
total cache, AM3, 95W) C2 45nm • MT 3127: FRU # 03T7016 03T7043 03T7017 03T7018 03T6021 89Y0793 03T7019 03T7020 03T7021 71Y5433 71Y5435 03T7022 71Y5437 71Y5439 CRU N N N N N N N N N N N N N N 182 ThinkCentre Hardware Maintenance Manual - Lenovo ThinkCentre M76 | Hardware Maintenance Manual for ThinkCentre M76 - Page 187
all models Optical disk drive bezel, button for optical disk drive • MT 3127: all models C2 intrusion switch cable (included in the kit 41R6115) • MT 3127: all models FRU # 71Y5441 03T7024 03T7054 03T6023 FRU # 45C1566 43N9599 54Y9929 45J9577 45J9573 45J9495 43N9091 41R6106 45K6261 45K6265 39K5022 - Lenovo ThinkCentre M76 | Hardware Maintenance Manual for ThinkCentre M76 - Page 188
models Front fan used for 2*500G\1TB • MT 3127: all models AMD 89W 4 pin cooler kit tower (no fan grill) • MT 3127: all models Speaker, internal speaker, cable assembly, 9* FCW-29 • MT 3127: all models 184 ThinkCentre Hardware Maintenance Manual FRU # 42Y8005 43N9599 43N9886 43N9091 54Y9948 41N8050 - Lenovo ThinkCentre M76 | Hardware Maintenance Manual for ThinkCentre M76 - Page 189
Retainer, card reader/ODD/FDD, tower IV • MT 3127: all models Mechanical kit, tower IV • MT 3127: all models ShinEtsu 7783D;1G Syringe • MT 3127: all models Keyboard and Mouse Keyboard - Preferred Pro PS/2 US English • MT 3127: - Lenovo ThinkCentre M76 | Hardware Maintenance Manual for ThinkCentre M76 - Page 190
: Spanish • MT 3127: Swedish/Finnish • MT 3127: Swiss French/German • MT 3127: Keyboard - Preferred Pro PS/2 186 ThinkCentre Hardware Maintenance Manual FRU # 41A5054 41A5080 41A5055 41A5056 41A5057 41A5058 41A5059 41A5060 41A5061 41A5062 41A5063 41A5064 41A5065 41A5066 41A5067 41A5068 41A5069 - Lenovo ThinkCentre M76 | Hardware Maintenance Manual for ThinkCentre M76 - Page 191
Thailand • MT 3127: Turkish • MT 3127: Turkish • MT 3127: UK English • MT 3127: US European • MT 3127: Slovenian • MT 3127: India • MT 3127: Keyboard - Preferred Pro PS/2 Keyboard -Preferred Pro USB US English/Chinese-Simplified • MT 3127: Arabic • MT 3127: Arabic/French • MT 3127: Belgium French - Lenovo ThinkCentre M76 | Hardware Maintenance Manual for ThinkCentre M76 - Page 192
• MT 3127: Romanian • MT 3127: Romanian • MT 3127: Russian/Cyrillic • MT 3127: Keyboard -Preferred Pro USB 188 ThinkCentre Hardware Maintenance Manual FRU # 41A5300 41A5301 41A5302 41A5303 41A5304 41A5305 41A5306 41A5307 41A5308 41A5309 41A5310 41A5311 41A5312 41A5313 41A5314 41A5315 41A5317 - Lenovo ThinkCentre M76 | Hardware Maintenance Manual for ThinkCentre M76 - Page 193
Serbian/Cyrillic • MT 3127: Slovak • MT 3127: Spanish • MT 3127: Swedish/Finnish • MT 3127: Swiss French/German • MT 3127: Thailand • MT 3127: Turkish • MT 3127: Turkish • MT 3127: UK English • MT 3127: US European • MT 3127: Slovenian • MT 3127: Arabic (New) • MT 3127: Lithuanian • MT 3127: Estonia - Lenovo ThinkCentre M76 | Hardware Maintenance Manual for ThinkCentre M76 - Page 194
--Hungarian • MT 3127: Fingerprint--Iceland • MT 3127: Fingerprint--Italy • MT 3127: Fingerprint--Japanese • MT 3127: 190 ThinkCentre Hardware Maintenance Manual FRU # 57Y4783 57Y4784 57Y4785 57Y4786 57Y4787 57Y4788 57Y4789 57Y4790 57Y4791 57Y4792 57Y4793 57Y4794 57Y4795 57Y4796 57Y4797 57Y4798 - Lenovo ThinkCentre M76 | Hardware Maintenance Manual for ThinkCentre M76 - Page 195
Keyboard -Fingerprint Fingerprint--Korean • MT 3127: Fingerprint--LA Spanish • MT 3127: Fingerprint--Norwegian • MT 3127: Fingerprint--Polish • MT 3127: Fingerprint--Portuguese • MT 3127: Fingerprint--Romanian • MT 3127: Fingerprint--Romanian • MT 3127: Fingerprint--Russian/Cyrillic • MT 3127: - Lenovo ThinkCentre M76 | Hardware Maintenance Manual for ThinkCentre M76 - Page 196
--Greek • MT 3127: Fingerprint--Greek/US • MT 3127: Fingerprint--Hebrew • MT 3127: Fingerprint--Hungarian • MT 3127: 192 ThinkCentre Hardware Maintenance Manual FRU # 03X8001 03X8002 03X8003 03X8004 03X8005 03X8006 03X8007 03X8008 03X8009 03X8010 03X8011 03X8012 03X8013 03X8014 03X8015 03X8016 - Lenovo ThinkCentre M76 | Hardware Maintenance Manual for ThinkCentre M76 - Page 197
Keyboard -Fingerprint Fingerprint--Iceland • MT 3127: Fingerprint--Italy • MT 3127: Fingerprint--Japanese • MT 3127: Fingerprint--Korean • MT 3127: Fingerprint--LA Spanish • MT 3127: Fingerprint--Norwegian • MT 3127: Fingerprint--Polish • MT 3127: Fingerprint--Portuguese • MT 3127: Fingerprint-- - Lenovo ThinkCentre M76 | Hardware Maintenance Manual for ThinkCentre M76 - Page 198
and miscellaneous FRUs Single slot SD media card (attached in mechanical line-fit part ) • MT 3127: NVIDIA Quadro FX380LP 512M (DVI+DP) ATX • • MT 3127: BTL external speaker • MT 3127: 194 ThinkCentre Hardware Maintenance Manual FRU # 03X8035 03X8036 03X8037 FRU # 41U3013 41U3030 89Y1273 45J4889 - Lenovo ThinkCentre M76 | Hardware Maintenance Manual for ThinkCentre M76 - Page 199
Adapters and miscellaneous FRUs LI300mm rear USB 2 ports II HP • MT 3127: LI350mm rear Com2 cable II mini • MT 3127: NVIDIA GeForce310 512M DMS59 (HP) • MT 3127: DMS59 to dual DVI dongle • MT 3127: NVIDIA Geforce 310 512M 64BIT (VGA+DP) ATX • MT 3127: NVIDIA Geforce 310 512M 64BIT (VGA+DP) ATX • MT - Lenovo ThinkCentre M76 | Hardware Maintenance Manual for ThinkCentre M76 - Page 200
• MT 3127: Line cord-Hong Kong, Singapore, Malaysia, Brunei • MT 3127: Line cord-Taiwan • MT 3127: 196 ThinkCentre Hardware Maintenance Manual FRU # 41R3208 41R3212 41R3228 41R3236 41R3220 41R3341 CRU 1 1 1 1 1 1 41R3208 1 41R3224 1 43N9029 1 FRU # 41R3185 41R3257 41R3249 41R3271 41R3177 - Lenovo ThinkCentre M76 | Hardware Maintenance Manual for ThinkCentre M76 - Page 201
Power cords --secondary Line cord-Italy • MT 3127: Line cord-Indonesia, Laos, Cambodia and Vietnam • MT 3127: Line cord-Denmark • MT 3127: Line cord-Switzerland • MT 3127: Line cord-Israel • MT 3127: Line cord-South Africa • MT 3127: Line cord-India • MT 3127: Line cord-Austria, Belgium, Croatia, - Lenovo ThinkCentre M76 | Hardware Maintenance Manual for ThinkCentre M76 - Page 202
Windows Vista COA affixed to the system, that model is eligible only for recovery DVDs that match the operating system specified on the COA. 198 ThinkCentre Hardware Maintenance Manual - Lenovo ThinkCentre M76 | Hardware Maintenance Manual for ThinkCentre M76 - Page 203
English • MT 3127: Windows XP Professional 32 Recovery CD FRU # 03T0753 CRU 1 Windows XP Professional Generic Recovery CD Note: The Windows XP Professional recovery DVDs are available only for models with a valid Microsoft Windows XP Professional certificate of authenticity (COA) affixed to the - Lenovo ThinkCentre M76 | Hardware Maintenance Manual for ThinkCentre M76 - Page 204
for recovery DVDs that match the operating system specified on the COA. English • MT 3127: Windows Vista Business 32 Recovery CD FRU # 03T2020 CRU 1 200 ThinkCentre Hardware Maintenance Manual - Lenovo ThinkCentre M76 | Hardware Maintenance Manual for ThinkCentre M76 - Page 205
service user Lenovo support web site: http://www.lenovo.com/support 2. Lenovo Customer Support Center 3. Levels 1 and 2 Support To update (flash) the BIOS, see "Updating (flashing) the BIOS from a disc" on page 201. Updating (flashing) the BIOS from a disc This section provides instructions - Lenovo ThinkCentre M76 | Hardware Maintenance Manual for ThinkCentre M76 - Page 206
Follow the instructions on the lenovo.com/support. 2. Do the following to locate the downloadable files for your machine type: a. Click Download & Drivers. b. In the left pane, click Downloads and drivers. c. From the Brand drop-down list box, select Desktops ThinkCentre Hardware Maintenance Manual - Lenovo ThinkCentre M76 | Hardware Maintenance Manual for ThinkCentre M76 - Page 207
parts on the system board" on page 76. 4. Remove any parts 12. Reinstall any parts and reconnect any cables parts replacement" on page 110. For machine types 3120, 3122, 3126, and 3128, see "Completing the parts systems support receives a specific signal from another computer on the local area network - Lenovo ThinkCentre M76 | Hardware Maintenance Manual for ThinkCentre M76 - Page 208
204 ThinkCentre Hardware Maintenance Manual - Lenovo ThinkCentre M76 | Hardware Maintenance Manual for ThinkCentre M76 - Page 209
Lenovo product, program, or service may be used. Any functionally equivalent product, program, or service that does not infringe any Lenovo intellectual property right may be used instead. However, it is the user other life support applications are not part of the materials for this Lenovo product, - Lenovo ThinkCentre M76 | Hardware Maintenance Manual for ThinkCentre M76 - Page 210
: Lenovo The Lenovo logo Rescue and Recovery ThinkCentre ThinkVantage AMD, AMD Athlon, AMD Phenom, AMD Sempron, and combinations thereof are trademarks of Advanced Micro Devices, Inc. Microsoft and Windows are trademarks of the Microsoft group of companies. Other company, product, or service names - Lenovo ThinkCentre M76 | Hardware Maintenance Manual for ThinkCentre M76 - Page 211
static-sensitive drives bays 76, 117 specifications 76, 117 DVI monitor connector and USB assembly, replacing 107, 156 © Copyright Lenovo 2011, 2012 front bezel removing, reinstalling 79, parts replacement, completing 110, 157 password considerations 44 setting, changing, deleting 44 PC-Doctor - Lenovo ThinkCentre M76 | Hardware Maintenance Manual for ThinkCentre M76 - Page 212
parts 76, 117 location 76, 117 system board components and drives accessing 122 system fan assembly, replacing 150 T temporary startup device 45 the BIOS, updating (flashing) 201-202 U updating (flashing) the BIOS 201 updating (flashing) the BIOS 202 208 ThinkCentre Hardware Maintenance Manual - Lenovo ThinkCentre M76 | Hardware Maintenance Manual for ThinkCentre M76 - Page 213
- Lenovo ThinkCentre M76 | Hardware Maintenance Manual for ThinkCentre M76 - Page 214
Part Number: 0A94225 Printed in USA (1P) P/N: 0A94225 *0A94225*
-
 1
1 -
 2
2 -
 3
3 -
 4
4 -
 5
5 -
 6
6 -
 7
7 -
8
-
9
-
10
-
11
-
12
-
13
-
14
-
15
-
16
-
17
-
18
-
19
-
20
-
21
-
22
-
23
-
24
-
25
-
26
-
27
-
28
-
29
-
30
-
31
-
32
-
33
-
34
-
35
-
36
-
37
-
38
-
39
-
40
-
41
-
42
-
43
-
44
-
45
-
46
-
47
-
48
-
49
-
50
-
51
-
52
-
53
-
54
-
55
-
56
-
57
-
58
-
59
-
60
-
61
-
62
-
63
-
64
-
65
-
66
-
67
-
68
-
69
-
70
-
71
-
72
-
73
-
74
-
75
-
76
-
77
-
78
-
79
-
80
-
81
-
82
-
83
-
84
-
85
-
86
-
87
-
88
-
89
-
90
-
91
-
92
-
93
-
94
-
95
-
96
-
97
-
98
-
99
-
100
-
101
-
102
-
103
-
104
-
105
-
106
-
107
-
108
-
109
-
110
-
111
-
112
-
113
-
114
-
115
-
116
-
117
-
118
-
119
-
120
-
121
-
122
-
123
-
124
-
125
-
126
-
127
-
128
-
129
-
130
-
131
-
132
-
133
-
134
-
135
-
136
-
137
-
138
-
139
-
140
-
141
-
142
-
143
-
144
-
145
-
146
-
147
-
148
-
149
-
150
-
151
-
152
-
153
-
154
-
155
-
156
-
157
-
158
-
159
-
160
-
161
-
162
-
163
-
164
-
165
-
166
-
167
-
168
-
169
-
170
-
171
-
172
-
173
-
174
-
175
-
176
-
177
-
178
-
179
-
180
-
181
-
182
-
183
-
184
-
185
-
186
-
187
-
188
-
189
-
190
-
191
-
192
-
193
-
194
-
195
-
196
-
197
-
198
-
199
-
200
-
201
-
202
-
203
-
204
-
205
-
206
-
207
-
208
-
209
-
210
-
211
-
212
-
213
-
214
 |
 |
ThinkCentre
Hardware Maintenance Manual
Machine Types:
3114, 3120, 3121, 3122, 3123, 3126, 3127, and 3128