Lenovo ThinkCentre M90z (English) User Guide - Page 33
To work with another piece of hardware, go to the appropriate
 |
View all Lenovo ThinkCentre M90z manuals
Add to My Manuals
Save this manual to your list of manuals |
Page 33 highlights
7. Align the four pins 1 on the hard disk drive bracket with the corresponding slots in the hard disk drive bay. Figure 18. Installing the hard disk drive 8. Slide the new hard disk drive with the bracket into the hard disk drive bay. Press the handle of the hard disk drive bracket downward until it is secured by the two tabs 1 . Figure 19. Installing the hard disk drive What to do next: • To work with another piece of hardware, go to the appropriate section. • To complete the installation or replacement, go to "Completing the parts replacement" on page 50. Chapter 2. Installing or replacing hardware 25
-
 1
1 -
2
-
3
-
4
-
5
-
6
-
7
-
8
-
9
-
10
-
11
-
12
-
13
-
14
-
15
-
16
-
17
-
18
-
19
-
20
-
21
-
22
-
23
-
24
-
25
-
26
-
27
-
 28
28 -
 29
29 -
 30
30 -
 31
31 -
 32
32 -
 33
33 -
 34
34 -
 35
35 -
 36
36 -
 37
37 -
 38
38 -
39
-
40
-
41
-
42
-
43
-
44
-
45
-
46
-
47
-
48
-
49
-
50
-
51
-
52
-
53
-
54
-
55
-
56
-
57
-
58
-
59
-
60
-
61
-
62
-
63
-
64
-
65
-
66
-
67
-
68
-
69
-
70
-
71
-
72
-
73
-
74
-
75
-
76
-
77
-
78
-
79
-
80
-
81
-
82
-
83
-
84
-
85
-
86
-
87
-
88
-
89
-
90
-
91
-
92
-
93
-
94
-
95
-
96
-
97
-
98
 |
 |
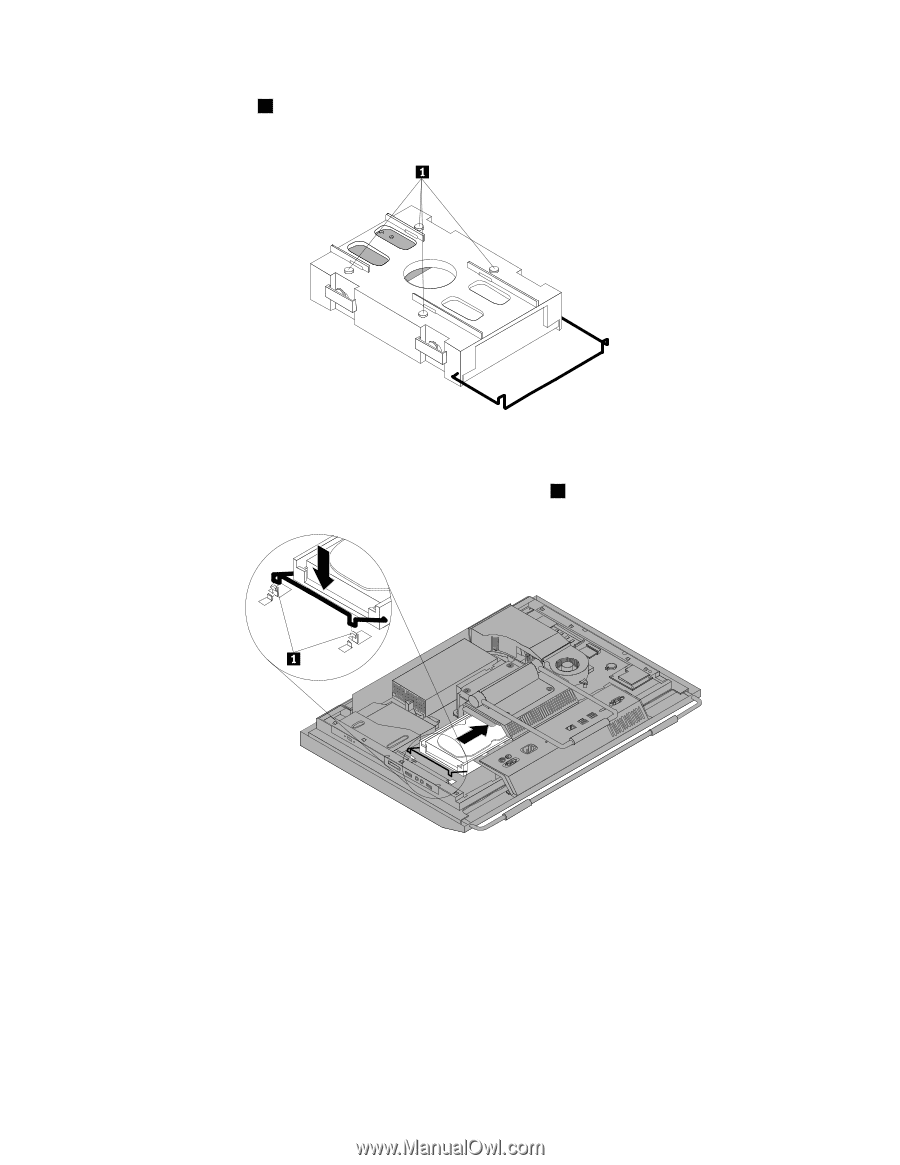
7. Align the four pins
1
on the hard disk drive bracket with the corresponding slots in the hard disk
drive bay.
Figure 18. Installing the hard disk drive
8. Slide the new hard disk drive with the bracket into the hard disk drive bay. Press the handle of the hard
disk drive bracket downward until it is secured by the two tabs
1
.
Figure 19. Installing the hard disk drive
What to do next:
•
To work with another piece of hardware, go to the appropriate section.
•
To complete the installation or replacement, go to “Completing the parts replacement” on page 50.
Chapter 2
.
Installing or replacing hardware
25