Lenovo ThinkCentre M90z (English) User Guide - Page 5

Contents, Using the Setup Utility - multi touch all in one

Page 5 highlights

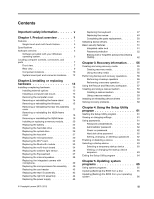
Contents Important safety information v Chapter 1. Product overview 1 Features 1 Single-touch and multi-touch feature . . . . . 3 Specifications 4 Software overview 5 Software provided with your Windows operating system 5 Locating computer controls, connectors, and parts 7 Front view 7 Rear view 9 Component locations 10 System board part and connector locations . 12 Chapter 2. Installing or replacing hardware 13 Installing or replacing hardware 13 Installing external options 13 Installing a computer wall mount 13 Removing the computer cover 14 Removing or reinstalling the frame stand . . 14 Removing or reinstalling the lift stand . . . . 15 Removing or reinstalling the rear I/O assembly cover 17 Removing or reinstalling the VESA frame cover 18 Removing or reinstalling the VESA frame . . 19 Installing or replacing a memory module . . . 20 Replacing the battery 22 Replacing the hard disk drive 23 Replacing the optical drive 26 Replacing the heat sink 27 Replacing the microprocessor 30 Replacing the WI-FI card 32 Replacing the Bluetooth module 33 Replacing the multi-touch board 34 Replacing the ambient light sensor . . . . . 36 Replacing the ExpressCard 37 Replacing the internal speakers 38 Replacing the integrated camera with microphone 39 Replacing the microprocessor fan assembly . 40 Replacing the card reader 42 Replacing the rear I/O assembly 43 Replacing the right I/O assembly. . . . . . 44 Replacing the power supply 45 © Copyright Lenovo 2010, 2012 Replacing the keyboard 47 Replacing the mouse 49 Completing the parts replacement . . . . . 50 Obtaining device drivers 51 Basic security features 51 Integrated cable lock 51 Password protection 52 Erasing lost or forgotten passwords (clearing CMOS 52 Chapter 3. Recovery information . . . 55 Creating and using recovery media 55 Creating recovery media 55 Using recovery media 55 Performing backup and recovery operations . . . 56 Performing a backup operation 56 Performing a recovery operation 57 Using the Rescue and Recovery workspace . . . 57 Creating and using a rescue medium 58 Creating a rescue medium 58 Using a rescue medium 59 Installing or reinstalling device drivers . . . . . 59 Solving recovery problems 60 Chapter 4. Using the Setup Utility program 61 Starting the Setup Utility program 61 Viewing or changing settings 61 Using passwords 61 Password considerations 62 Administrator password 62 Power-on password 62 Hard disk drive password 62 Setting, changing, or deleting a password . . 62 Enabling or disabling a device 63 Selecting a startup device 63 Selecting a temporary startup device . . . . 63 Viewing or changing the startup device sequence 63 Exiting the Setup Utility program 64 Chapter 5. Updating system programs 65 Using system programs 65 Updating (flashing) the BIOS from a disc . . . . 65 Updating (flashing) the BIOS from your operating system 66 iii

  • 1
  • 2
  • 3
  • 4
  • 5
  • 6
  • 7
  • 8
  • 9
  • 10
  • 11
  • 12
  • 13
  • 14
  • 15
  • 16
  • 17
  • 18
  • 19
  • 20
  • 21
  • 22
  • 23
  • 24
  • 25
  • 26
  • 27
  • 28
  • 29
  • 30
  • 31
  • 32
  • 33
  • 34
  • 35
  • 36
  • 37
  • 38
  • 39
  • 40
  • 41
  • 42
  • 43
  • 44
  • 45
  • 46
  • 47
  • 48
  • 49
  • 50
  • 51
  • 52
  • 53
  • 54
  • 55
  • 56
  • 57
  • 58
  • 59
  • 60
  • 61
  • 62
  • 63
  • 64
  • 65
  • 66
  • 67
  • 68
  • 69
  • 70
  • 71
  • 72
  • 73
  • 74
  • 75
  • 76
  • 77
  • 78
  • 79
  • 80
  • 81
  • 82
  • 83
  • 84
  • 85
  • 86
  • 87
  • 88
  • 89
  • 90
  • 91
  • 92
  • 93
  • 94
  • 95
  • 96
  • 97
  • 98

Contents
Important safety information
......
v
Chapter 1. Product overview
......
1
Features
.
.
.
.
.
.
.
.
.
.
.
.
.
.
.
.
.
.
1
Single-touch and multi-touch feature
.
.
.
.
.
3
Specifications
.
.
.
.
.
.
.
.
.
.
.
.
.
.
.
.
4
Software overview
.
.
.
.
.
.
.
.
.
.
.
.
.
.
5
Software provided with your Windows
operating system
.
.
.
.
.
.
.
.
.
.
.
.
.
5
Locating computer controls, connectors, and
parts
.
.
.
.
.
.
.
.
.
.
.
.
.
.
.
.
.
.
.
7
Front view
.
.
.
.
.
.
.
.
.
.
.
.
.
.
.
.
7
Rear view
.
.
.
.
.
.
.
.
.
.
.
.
.
.
.
.
9
Component locations
.
.
.
.
.
.
.
.
.
.
10
System board part and connector locations
.
12
Chapter 2. Installing or replacing
hardware
...............
13
Installing or replacing hardware
.
.
.
.
.
.
.
.
13
Installing external options
.
.
.
.
.
.
.
.
13
Installing a computer wall mount
.
.
.
.
.
.
13
Removing the computer cover
.
.
.
.
.
.
.
14
Removing or reinstalling the frame stand
.
.
14
Removing or reinstalling the lift stand
.
.
.
.
15
Removing or reinstalling the rear I/O assembly
cover
.
.
.
.
.
.
.
.
.
.
.
.
.
.
.
.
17
Removing or reinstalling the VESA frame
cover
.
.
.
.
.
.
.
.
.
.
.
.
.
.
.
.
18
Removing or reinstalling the VESA frame
.
.
19
Installing or replacing a memory module .
.
.
20
Replacing the battery
.
.
.
.
.
.
.
.
.
.
22
Replacing the hard disk drive
.
.
.
.
.
.
.
23
Replacing the optical drive
.
.
.
.
.
.
.
.
26
Replacing the heat sink
.
.
.
.
.
.
.
.
.
27
Replacing the microprocessor
.
.
.
.
.
.
.
30
Replacing the WI-FI card
.
.
.
.
.
.
.
.
.
32
Replacing the Bluetooth module
.
.
.
.
.
.
33
Replacing the multi-touch board
.
.
.
.
.
.
34
Replacing the ambient light sensor
.
.
.
.
.
36
Replacing the ExpressCard
.
.
.
.
.
.
.
.
37
Replacing the internal speakers
.
.
.
.
.
.
38
Replacing the integrated camera with
microphone
.
.
.
.
.
.
.
.
.
.
.
.
.
.
39
Replacing the microprocessor fan assembly
.
40
Replacing the card reader
.
.
.
.
.
.
.
.
42
Replacing the rear I/O assembly
.
.
.
.
.
.
43
Replacing the right I/O assembly
.
.
.
.
.
.
44
Replacing the power supply
.
.
.
.
.
.
.
45
Replacing the keyboard
.
.
.
.
.
.
.
.
.
47
Replacing the mouse
.
.
.
.
.
.
.
.
.
.
49
Completing the parts replacement
.
.
.
.
.
50
Obtaining device drivers
.
.
.
.
.
.
.
.
.
.
.
51
Basic security features
.
.
.
.
.
.
.
.
.
.
.
51
Integrated cable lock
.
.
.
.
.
.
.
.
.
.
51
Password protection
.
.
.
.
.
.
.
.
.
.
52
Erasing lost or forgotten passwords (clearing
CMOS)
.
.
.
.
.
.
.
.
.
.
.
.
.
.
.
.
52
Chapter 3. Recovery information . . .
55
Creating and using recovery media
.
.
.
.
.
.
55
Creating recovery media
.
.
.
.
.
.
.
.
.
55
Using recovery media
.
.
.
.
.
.
.
.
.
.
55
Performing backup and recovery operations .
.
.
56
Performing a backup operation
.
.
.
.
.
.
56
Performing a recovery operation
.
.
.
.
.
.
57
Using the Rescue and Recovery workspace .
.
.
57
Creating and using a rescue medium
.
.
.
.
.
.
58
Creating a rescue medium
.
.
.
.
.
.
.
.
58
Using a rescue medium
.
.
.
.
.
.
.
.
.
59
Installing or reinstalling device drivers
.
.
.
.
.
59
Solving recovery problems
.
.
.
.
.
.
.
.
.
.
60
Chapter 4. Using the Setup Utility
program
................
61
Starting the Setup Utility program
.
.
.
.
.
.
.
61
Viewing or changing settings
.
.
.
.
.
.
.
.
.
61
Using passwords
.
.
.
.
.
.
.
.
.
.
.
.
.
.
61
Password considerations
.
.
.
.
.
.
.
.
.
62
Administrator password
.
.
.
.
.
.
.
.
.
62
Power-on password
.
.
.
.
.
.
.
.
.
.
.
62
Hard disk drive password
.
.
.
.
.
.
.
.
62
Setting, changing, or deleting a password .
.
62
Enabling or disabling a device
.
.
.
.
.
.
.
.
63
Selecting a startup device
.
.
.
.
.
.
.
.
.
.
63
Selecting a temporary startup device
.
.
.
.
63
Viewing or changing the startup device
sequence
.
.
.
.
.
.
.
.
.
.
.
.
.
.
.
63
Exiting the Setup Utility program
.
.
.
.
.
.
.
64
Chapter 5. Updating system
programs
...............
65
Using system programs
.
.
.
.
.
.
.
.
.
.
.
65
Updating (flashing) the BIOS from a disc
.
.
.
.
65
Updating (flashing) the BIOS from your operating
system
.
.
.
.
.
.
.
.
.
.
.
.
.
.
.
.
.
.
66
© Copyright Lenovo 2010, 2012
iii