Lexmark MS911 User's Guide - Page 39
Attaching cables
 |
View all Lexmark MS911 manuals
Add to My Manuals
Save this manual to your list of manuals |
Page 39 highlights
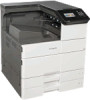
Additional printer setup 39 13 Turn on the printer. 14 Set the printer software to recognize the optional tray. For more information, see "Adding available options in the print driver" on page 40. Attaching cables CAUTION-POTENTIAL INJURY: Do not set up this product or make any electrical or cabling connections, such as a power cord, a fax feature or USB cable, during a lightning storm. Connect the printer to the computer using a USB cable, or to the network using an Ethernet cable. Make sure to match the following: • The USB symbol on the cable with the USB symbol on the printer • The appropriate Ethernet cable to the Ethernet port Use the 1 Printer power cord socket 2 Internal Solutions Port (ISP) or printer hard disk slot Note: If the printer has support for wireless connection, then the wireless antenna is attached here. 3 Ethernet port 4 USB ports 5 USB printer port To Connect the printer to a properly grounded electrical outlet. Attach an ISP or a printer hard disk. Connect the printer to a network. Attach a keyboard. Connect the printer to a computer. Warning-Potential Damage: Do not touch the USB cable, any wireless network adapter, or the printer in the area shown while actively printing. Loss of data or a malfunction can occur.
-
 1
1 -
2
-
3
-
4
-
5
-
6
-
7
-
8
-
9
-
10
-
11
-
12
-
13
-
14
-
15
-
16
-
17
-
18
-
19
-
20
-
21
-
22
-
23
-
24
-
25
-
26
-
27
-
28
-
29
-
30
-
31
-
32
-
33
-
 34
34 -
 35
35 -
 36
36 -
 37
37 -
 38
38 -
 39
39 -
 40
40 -
 41
41 -
 42
42 -
 43
43 -
 44
44 -
45
-
46
-
47
-
48
-
49
-
50
-
51
-
52
-
53
-
54
-
55
-
56
-
57
-
58
-
59
-
60
-
61
-
62
-
63
-
64
-
65
-
66
-
67
-
68
-
69
-
70
-
71
-
72
-
73
-
74
-
75
-
76
-
77
-
78
-
79
-
80
-
81
-
82
-
83
-
84
-
85
-
86
-
87
-
88
-
89
-
90
-
91
-
92
-
93
-
94
-
95
-
96
-
97
-
98
-
99
-
100
-
101
-
102
-
103
-
104
-
105
-
106
-
107
-
108
-
109
-
110
-
111
-
112
-
113
-
114
-
115
-
116
-
117
-
118
-
119
-
120
-
121
-
122
-
123
-
124
-
125
-
126
-
127
-
128
-
129
-
130
-
131
-
132
-
133
-
134
-
135
-
136
-
137
-
138
-
139
-
140
-
141
-
142
-
143
-
144
-
145
-
146
-
147
-
148
-
149
-
150
-
151
-
152
-
153
-
154
-
155
-
156
-
157
-
158
-
159
-
160
-
161
-
162
-
163
-
164
-
165
-
166
-
167
-
168
-
169
-
170
-
171
-
172
-
173
-
174
-
175
-
176
-
177
-
178
-
179
-
180
-
181
-
182
-
183
-
184
-
185
-
186
-
187
-
188
-
189
-
190
-
191
-
192
-
193
-
194
-
195
-
196
-
197
-
198
-
199
-
200
-
201
-
202
-
203
-
204
-
205
-
206
-
207
-
208
-
209
-
210
-
211
-
212
-
213
-
214
-
215
-
216
-
217
-
218
-
219
-
220
-
221
-
222
-
223
-
224
-
225
-
226
-
227
-
228
-
229
-
230
-
231
-
232
-
233
-
234
-
235
-
236
-
237
-
238
-
239
-
240
-
241
-
242
-
243
-
244
-
245
-
246
-
247
-
248
-
249
-
250
-
251
-
252
-
253
-
254
-
255
-
256
 |
 |
