Netgear EX7000 User Manual - Page 14
Install the Extender to Boost Your WiFi Range, Set Up the Extender Hardware - as access point
 |
View all Netgear EX7000 manuals
Add to My Manuals
Save this manual to your list of manuals |
Page 14 highlights
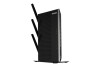
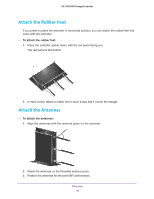
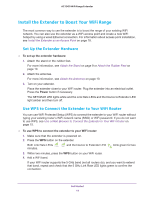
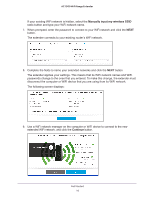
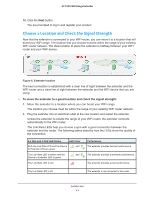
AC1900 WiFi Range Extender Install the Extender to Boost Your WiFi Range The most common way to use the extender is to boost the range of your existing WiFi network. You can also use the extender as a WiFi access point and create a new WiFi hotspot by using a wired Ethernet connection. For information about access point installation, see Install the Extender as an Access Point on page 18. Set Up the Extender Hardware To set up the extender hardware: 1. Attach the stand or the rubber feet. For more information, see Attach the Stand on page 9 or Attach the Rubber Feet on page 10. 2. Attach the antennas. For more information, see Attach the Antennas on page 10. 3. Turn on your extender. Place the extender close to your WiFi router. Plug the extender into an electrical outlet. Press the Power button if necessary. The NETGEAR LED lights white and the Link Rate LEDs and the Device to Extender LED light amber and then turn off. Use WPS to Connect the Extender to Your WiFi Router You can use WiFi Protected Setup (WPS) to connect the extender to your WiFi router without typing your existing router's WiFi network name (SSID) or WiFi password. If you do not want to use WPS, see Use a Web Browser to Connect the Extender to Your WiFi Router on page 15. To use WPS to connect the extender to your WiFi router: 1. Make sure that the extender is powered on. 2. Press the WPS button on the extender. Both Link Rate LEDs minutes. and the Device to Extender LED blink green for two 3. Within two minutes, press the WPS button on your WiFi router. 4. Add a WiFi band. If your WiFi router supports the 5 GHz band (not all routers do), and you want to extend that band, repeat and check that the 5 GHz Link Rate LED lights green to confirm the connection. Get Started 14
-
 1
1 -
2
-
3
-
4
-
5
-
6
-
7
-
8
-
 9
9 -
 10
10 -
 11
11 -
 12
12 -
 13
13 -
 14
14 -
 15
15 -
 16
16 -
 17
17 -
 18
18 -
 19
19 -
20
-
21
-
22
-
23
-
24
-
25
-
26
-
27
-
28
-
29
-
30
-
31
-
32
-
33
-
34
-
35
-
36
-
37
-
38
-
39
-
40
-
41
-
42
-
43
-
44
-
45
-
46
-
47
-
48
-
49
-
50
-
51
-
52
-
53
-
54
-
55
-
56
-
57
-
58
-
59
-
60
-
61
-
62
-
63
-
64
-
65
-
66
-
67
-
68
-
69
-
70
-
71
-
72
-
73
-
74
-
75
-
76
 |
 |