Panasonic AV-HS410 Operating Instructions Advanced - Page 26
Key decorations, Setting the key edge, Selecting the Edge Fill settings, Setting the edge color
 |
View all Panasonic AV-HS410 manuals
Add to My Manuals
Save this manual to your list of manuals |
Page 26 highlights
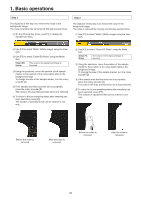
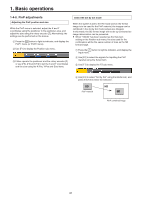
1. Basic operations 1-3-7. Key decorations A border, shadow or other edge can be added to the key. Setting the key edge 1 Press the k button to light its indicator, and display the Key menu. 2 Use [F1] to display the Edge1 sub menu. 3 Use [F2] to select the edge type. Off Border Drop Shadow Outline An edge is not added. A border is added around the entire edge. A diagonal border is added. A shadow is added. An outline (only a border with no fill) is added. Border Drop Selecting the Edge Fill settings Materials to be inserted as edges can be set. 1 On the Key menu, use [F1] to display the Edge2 sub menu. 2 Use [F2] to select the edge material using the Edge Fill items. Color CBGD1 CBGD2 Still1 Still2 Clip1 Clip2 The color set using Edge Color is used. The color background is used. The still image video memory (Still1) is used. The still image video memory (Still2) is used. The moving image video memory (Clip1) is used. The moving image video memory (Clip2) is used. Setting the edge color Shadow Outline 1 On the Key menu, use [F1] to display the Edge Color sub menu. 4 Use [F3] to set the edge width. 5 Use [F4] to set the direction (in 45-degree increments) in which "Drop" and "Shadow" will be added. (Top) 180 225 270 (Left) 135 315 (Right) 90 45 0 (Bottom) 6 Use [F5] to set the darkness (Density) of the edges. 2 Use [F2] ,[F3] and [F4] to adjust the Hue, Sat and Lum of the edge color. ww To call the preset color Use [F5] to select the preset color using the Load item, and press the [F5]. ppWhen [F5] is pressed, what has been set so far is canceled and replaced with the preset color values. ppTo save the values that were set before calling the preset color, refer to "1-10. Memory". 26
-
 1
1 -
2
-
3
-
4
-
5
-
6
-
7
-
8
-
9
-
10
-
11
-
12
-
13
-
14
-
15
-
16
-
17
-
18
-
19
-
20
-
 21
21 -
 22
22 -
 23
23 -
 24
24 -
 25
25 -
 26
26 -
 27
27 -
 28
28 -
 29
29 -
 30
30 -
 31
31 -
32
-
33
-
34
-
35
-
36
-
37
-
38
-
39
-
40
-
41
-
42
-
43
-
44
-
45
-
46
-
47
-
48
-
49
-
50
-
51
-
52
-
53
-
54
-
55
-
56
-
57
-
58
-
59
-
60
-
61
-
62
-
63
-
64
-
65
-
66
-
67
-
68
-
69
-
70
-
71
-
72
-
73
-
74
-
75
-
76
-
77
-
78
-
79
-
80
-
81
-
82
-
83
-
84
-
85
-
86
-
87
-
88
-
89
-
90
-
91
-
92
-
93
-
94
-
95
-
96
-
97
-
98
-
99
-
100
-
101
-
102
-
103
-
104
-
105
-
106
-
107
-
108
-
109
-
110
-
111
-
112
-
113
-
114
-
115
-
116
-
117
-
118
-
119
-
120
-
121
-
122
-
123
-
124
-
125
-
126
-
127
-
128
-
129
-
130
-
131
-
132
-
133
-
134
-
135
-
136
-
137
-
138
-
139
-
140
-
141
-
142
-
143
-
144
-
145
-
146
 |
 |
