Panasonic WJHD200 WJHD200 User Guide - Page 66
Switcher Setup, Multi Sequence Setup, Camera View Setup CAMERA VIEW SETUP
 |
View all Panasonic WJHD200 manuals
Add to My Manuals
Save this manual to your list of manuals |
Page 66 highlights
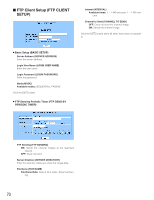
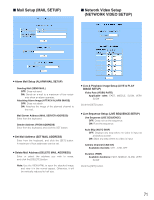
SNMP Community (SNMP COMMUNITY) Enter from the keyboard. SNMP Contact (SNMP CONTACT) Enter from the keyboard. SNMP System Name (SNMP SYSTEM NAME) Enter from the keyboard. SNMP System Location (SNMP SYSTEM LOCATION) Enter from the keyboard. Click the [SET] button when all items have been set properly. The WJ-HD200 will restart, and you will be requested to enter the URL as described earlier in Main Page and Control Panel. I Switcher Setup (SWITCHER SETUP) This window specifies sequence setups only for the WJHD200. The browser's sequence is set up in LIVE SEQUENCE SETUP on page 71. 8 Multiscreen Sequence Setup (MULTI SEQUENCE SETUP) Sequence Timing (SEQUENCE TIMING) INT: The time preset on the internal timer allows the sequence to move a step forward. EXT: The SEQ IN signal on the rear panel allows the sequence to move a step forward. Auto Skip (AUTO SKIP) ON: The sequence skips any step where no video is input. OFF: The sequence does not skip the step. Click the button to open the Multi Sequence Setup window. 8 Spot-screen Sequence Setup (SPOT SEQUENCE SETUP) Sequence Timing (SEQUENCE TIMING) INT: The time preset on the internal timer allows the sequence to move a step forward. EXT: SEQ IN signal to the rear panel allows the sequence to step forward. Auto Skip (AUTO SKIP) ON: The sequence skips any step where no video is input. OFF: The sequence does not skip the step. Click the button to open the Spot Sequence Setup window. 8 Camera View Setup (CAMERA VIEW SETUP) Click the button to open the Camera View Setup window. I Multi Sequence Setup (MULTI SEQUENCE SETUP) 8 Common Setup (COMMON SETUP) Start Display (START DISPLAY) The image in the selected form will be displayed on the monitor when the unit is turned on. Single image: CH 1 - CH 8 Quad image: QUAD-4A (including 1-4), QUAD-4B (including 5-8) Multi image: 9-SCREEN (including 1-8) Sequence: SPOT SEQUENCE, MULTI SEQUENCE Multiscreen Selection Mode (MULTI SELECT MODE) When the [MULTISCREEN SELECT] button on the front panel is pressed, the monitor display will be switched as follows depending on the setup. QUAD ONLY: QUAD-4A → QUAD-4B → QUAD-4A ALL: QUAD-4A → QUAD-4B → 9-SCREEN → QUAD-4A 66
-
 1
1 -
2
-
3
-
4
-
5
-
6
-
7
-
8
-
9
-
10
-
11
-
12
-
13
-
14
-
15
-
16
-
17
-
18
-
19
-
20
-
21
-
22
-
23
-
24
-
25
-
26
-
27
-
28
-
29
-
30
-
31
-
32
-
33
-
34
-
35
-
36
-
37
-
38
-
39
-
40
-
41
-
42
-
43
-
44
-
45
-
46
-
47
-
48
-
49
-
50
-
51
-
52
-
53
-
54
-
55
-
56
-
57
-
58
-
59
-
60
-
 61
61 -
 62
62 -
 63
63 -
 64
64 -
 65
65 -
 66
66 -
 67
67 -
 68
68 -
 69
69 -
 70
70 -
 71
71 -
72
-
73
-
74
-
75
-
76
-
77
-
78
-
79
-
80
-
81
-
82
-
83
-
84
-
85
-
86
-
87
-
88
-
89
-
90
-
91
-
92
-
93
-
94
 |
 |
