Samsung CLX-9250ND Administration Guide - Page 14
SafeCom settings for A4 models
 |
View all Samsung CLX-9250ND manuals
Add to My Manuals
Save this manual to your list of manuals |
Page 14 highlights
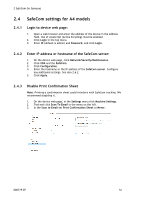
2 SafeCom Go Samsung 2.4 SafeCom settings for A4 models 2.4.1 Login to device web page: 1. Open a web browser and enter the address of the device in the address field. Use of JavaScript (Active Scripting) must be enabled. 2. Click Login in the top menu. 3. Enter ID (default is admin) and Password, and click Login. 2.4.2 Enter IP address or hostname of the SafeCom server: 1. On the device web page, click Network/Security/Maintenance. 2. Click XOA and the SafeCom. 3. Click Configuration. 4. Enter the hostname or the IP address of the SafeCom server. Configure any additional settings. See also 2.6.2. 5. Click Apply. 2.4.3 Disable Print Confirmation Sheet Note: Printing a confirmation sheet could interfere with SafeCom tracking. We recommend disabling it. 1. On the device web page, in the Settings menu click Machine Settings. 2. Find and click Scan To Email in the menu on the left. 3. In the Scan to Email set Print Confirmation Sheet to Never. D60719-07 14
-
 1
1 -
2
-
3
-
4
-
5
-
6
-
7
-
8
-
 9
9 -
 10
10 -
 11
11 -
 12
12 -
 13
13 -
 14
14 -
 15
15 -
 16
16 -
 17
17 -
 18
18 -
 19
19 -
20
-
21
-
22
-
23
-
24
-
25
-
26
-
27
-
28
-
29
-
30
-
31
-
32
-
33
-
34
-
35
-
36
-
37
-
38
-
39
-
40
-
41
-
42
-
43
-
44
-
45
-
46
-
47
-
48
 |
 |
