Samsung SCH-R430 User Manual (user Manual) (ver.f2) (English) - Page 105
System Select, Settings, Phone Settings, System, Select, Home only, Automatic, Set Time, Set Date
 |
View all Samsung SCH-R430 manuals
Add to My Manuals
Save this manual to your list of manuals |
Page 105 highlights
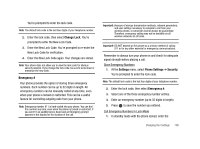
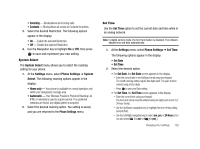
• Incoming - Blocks/allows all incoming calls. • Contacts - Blocks/allows all access to Contacts list entries. 3. Select the desired Restriction. The following options appear in the display: • On - Enable the selected Restriction. • Off - Disable the selected Restriction. 4. Use the Navigation key to highlight On or Off, then press to save and implement your new setting. System Select The System Select menu allows you to select the roaming setting for your phone. 1. At the Settings menu, select Phone Settings ➔ System Select. The following roaming options appear in the display: • Home only - Your phone is available for normal operation only within your designated coverage area. • Automatic - Your Wireless Provider's Preferred Roaming List (PRL) of networks is used to acquire service. If no preferred networks are found, any digital system is acquired. 2. Select the desired roaming option. You setting is saved, and you are returned to the Phone Settings menu. Set Time Use the Set Time option to set the current date and time while in an analog network. Note: In digital service mode, the Set Time feature is disabled. The network adjusts time and date automatically. 1. At the Settings menu, select Phone Settings ➔ Set Time. The following options appear in the display: • Set Date • Set Time 2. Select the desired option. • For Set Date, the Set Date screen appears in the display. - Enter the current date in mm/dd/yyyy format using your keypad. The month and day entries require two digits each. The year must be entered using all four digits. - Press to save your Date setting. • For Set Time, the Set Time screen appears in the display. - Enter the current time using your keypad. The hour and minute must be entered using two digits each and in 12/ 24-hour format. - Use the Up/Dowon navigation keys to highlight the time-of-day setting (am/pm) field. - Use the Left/Right navigation keys to select am, pm, or 24 Hours. [You can also press (for am) or (for pm).] Changing Your Settings 102
-
 1
1 -
2
-
3
-
4
-
5
-
6
-
7
-
8
-
9
-
10
-
11
-
12
-
13
-
14
-
15
-
16
-
17
-
18
-
19
-
20
-
21
-
22
-
23
-
24
-
25
-
26
-
27
-
28
-
29
-
30
-
31
-
32
-
33
-
34
-
35
-
36
-
37
-
38
-
39
-
40
-
41
-
42
-
43
-
44
-
45
-
46
-
47
-
48
-
49
-
50
-
51
-
52
-
53
-
54
-
55
-
56
-
57
-
58
-
59
-
60
-
61
-
62
-
63
-
64
-
65
-
66
-
67
-
68
-
69
-
70
-
71
-
72
-
73
-
74
-
75
-
76
-
77
-
78
-
79
-
80
-
81
-
82
-
83
-
84
-
85
-
86
-
87
-
88
-
89
-
90
-
91
-
92
-
93
-
94
-
95
-
96
-
97
-
98
-
99
-
 100
100 -
 101
101 -
 102
102 -
 103
103 -
 104
104 -
 105
105 -
 106
106 -
 107
107 -
 108
108 -
 109
109 -
 110
110 -
111
-
112
-
113
-
114
-
115
-
116
-
117
-
118
-
119
-
120
-
121
-
122
-
123
-
124
-
125
-
126
-
127
-
128
-
129
-
130
-
131
-
132
-
133
-
134
-
135
-
136
 |
 |
