Samsung SGH-I627 User Manual (user Manual) (ver.f12) (English) - Page 90
Work URL Exceptions, IPSec Pre-shared key
 |
View all Samsung SGH-I627 manuals
Add to My Manuals
Save this manual to your list of manuals |
Page 90 highlights
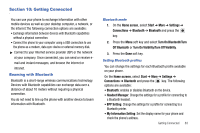
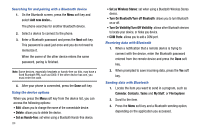
1. On the Home screen, select Start ➔ More ➔ Settings ➔ Connections ➔ VPN and press the key. 2. Highlight New in the menu list. - or - Press the Menu soft key and select Add. 3. Enter the requested information: • Description: Enter a name for the connection. • VPN type: Select the type of VPN. • Server: Enter the VPN server name. • Connects from: Select the type of network from which you will connect to VPN (typically The Internet). • Connects to: Select the type of network to which you will connect (typically Work). • User name: Enter your user name for the VPN. • Password: Enter your password. • Domain: Enter the domain name, if required. • IPSec authentication: If you selected IPSec/L2TP for VPN type, select the type of authentication. • IPSec Pre-shared key: If you selected Pre-Shared Key for IPSec authentication, enter the shared key. Note: If you are not sure about the information to enter, ask your network administrator. 4. Press the Done soft key when you are finished. Setting up data connections After creating connection profiles, you can assign a profile to each network type. 1. On the Connections screen, press the Menu soft key and select Advanced. 2. Select a connection profile in each network. 3. Press the Done soft key when you are finished. Adding a URL exception Some URL addresses for web pages on your company intranet may use periods, for example: intranet.companyname.com. To view these pages in Internet Explorer, you must create a URL exception. Note: You do not need to create URL exceptions for Internet URL addresses. 1. On the Connections screen, press Menu ➔ Advanced. 2. Press the Menu soft key and select Work URL Exceptions. 3. Press the Menu soft key and select Add. Getting Connected 87
-
 1
1 -
2
-
3
-
4
-
5
-
6
-
7
-
8
-
9
-
10
-
11
-
12
-
13
-
14
-
15
-
16
-
17
-
18
-
19
-
20
-
21
-
22
-
23
-
24
-
25
-
26
-
27
-
28
-
29
-
30
-
31
-
32
-
33
-
34
-
35
-
36
-
37
-
38
-
39
-
40
-
41
-
42
-
43
-
44
-
45
-
46
-
47
-
48
-
49
-
50
-
51
-
52
-
53
-
54
-
55
-
56
-
57
-
58
-
59
-
60
-
61
-
62
-
63
-
64
-
65
-
66
-
67
-
68
-
69
-
70
-
71
-
72
-
73
-
74
-
75
-
76
-
77
-
78
-
79
-
80
-
81
-
82
-
83
-
84
-
 85
85 -
 86
86 -
 87
87 -
 88
88 -
 89
89 -
 90
90 -
 91
91 -
 92
92 -
 93
93 -
 94
94 -
 95
95 -
96
-
97
-
98
-
99
-
100
-
101
-
102
-
103
-
104
-
105
-
106
-
107
-
108
-
109
-
110
-
111
-
112
-
113
-
114
-
115
-
116
-
117
-
118
-
119
-
120
-
121
-
122
-
123
-
124
-
125
-
126
-
127
-
128
-
129
-
130
-
131
-
132
-
133
-
134
-
135
-
136
-
137
-
138
-
139
-
140
-
141
-
142
-
143
-
144
-
145
-
146
-
147
-
148
-
149
-
150
-
151
-
152
-
153
-
154
 |
 |
