Samsung SGH-T849 User Manual (user Manual) (ver.f7) (English) - Page 49
Finding a Contact
 |
UPC - 610214625366
View all Samsung SGH-T849 manuals
Add to My Manuals
Save this manual to your list of manuals |
Page 49 highlights
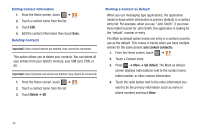
Note: For further details about how to enter characters, see "Text Input Methods" on page 38. 5. Touch the image icon and select a photo for this contact. Selections are: Album, or Take photo. 6. Touch the Mobile button, then select one of the phone labels to represent this contacts phone number. 7. Touch the Work button, select an email label, then enter and email address for this contact. 8. Touch Google Talk button and select an instant messaging service. Touch the text field and begin entering text to send to this contact. 9. Touch Groups to assign this contact to a group. 10. Touch Postal address, select a label to identify what this address represents, then enter the number in the field. 11. Continue and add Street, City, State, and Zip code information. 12. Touch the Organization field, then select a label that describes this type of organization and enter the name of the organization in the field. 13. Select More and enter a Note, Nickname, Web address, Birthday, or Anniversary for this contact. 14. Touch Done when you finish entering information for this contact. A Contact summary displays. Finding a Contact You can store tablet numbers and their corresponding names onto either your SIM card or tablet's built-in memory. They are physically separate but are used as a single entity, referred to as Contacts. Depending on the storage size of the particular SIM card, the maximum number of tablet numbers the card can store may differ. 1. From the Home screen, touch ➔ . 2. Swipe up or down until you see the contact displayed. - or - Touch the letter of the contact name on the right, then scroll through the list. If any contacts are listed under that letter, the list of contacts associated with that letter displays. Touch the contact entry. Contacts 45
-
 1
1 -
2
-
3
-
4
-
5
-
6
-
7
-
8
-
9
-
10
-
11
-
12
-
13
-
14
-
15
-
16
-
17
-
18
-
19
-
20
-
21
-
22
-
23
-
24
-
25
-
26
-
27
-
28
-
29
-
30
-
31
-
32
-
33
-
34
-
35
-
36
-
37
-
38
-
39
-
40
-
41
-
42
-
43
-
 44
44 -
 45
45 -
 46
46 -
 47
47 -
 48
48 -
 49
49 -
 50
50 -
 51
51 -
 52
52 -
 53
53 -
 54
54 -
55
-
56
-
57
-
58
-
59
-
60
-
61
-
62
-
63
-
64
-
65
-
66
-
67
-
68
-
69
-
70
-
71
-
72
-
73
-
74
-
75
-
76
-
77
-
78
-
79
-
80
-
81
-
82
-
83
-
84
-
85
-
86
-
87
-
88
-
89
-
90
-
91
-
92
-
93
-
94
-
95
-
96
-
97
-
98
-
99
-
100
-
101
-
102
-
103
-
104
-
105
-
106
-
107
-
108
-
109
-
110
-
111
-
112
-
113
-
114
-
115
-
116
-
117
-
118
-
119
-
120
-
121
-
122
-
123
-
124
-
125
-
126
-
127
-
128
-
129
-
130
-
131
-
132
-
133
-
134
-
135
-
136
-
137
-
138
-
139
-
140
-
141
-
142
-
143
-
144
-
145
-
146
-
147
-
148
-
149
-
150
-
151
-
152
-
153
-
154
-
155
-
156
-
157
-
158
 |
 |