Sony CCD-V8 Operating Instructions - Page 14
imontroot
 |
View all Sony CCD-V8 manuals
Add to My Manuals
Save this manual to your list of manuals |
Page 14 highlights
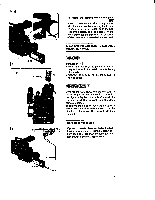
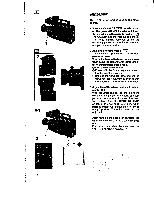
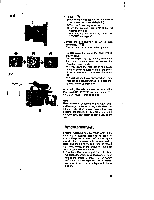
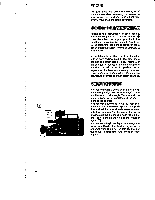
H-1 H-2 [H.31 3 ViWTE At.ARCC. ■ 14 imontroot The NP-22 battery pack is used as the power source. 1 Slide the CAMERA POWER switch to turn on the power (CAMERA mode) and insert the cassette into the cassette holder. El The CAMERA and the VTR lamps light up. The video camera recorder enters the recording pause mode and the recording and pause lamps light up. Fi 2 Adjust the viewfinder lens. The distance of optimum vision varies from person to person. Viewfinder lens adjustment is necessary when using the camera for the first time or after another person has used it. 0 Lift up the viewfinder lens. O Focus with the focus ring while observ- ing the viewfinder screen. O Replace the viewfinder lens and set the viewfinder lens adjustment lever so that the subject in the viewfinder is in focus. 3 Adjust the white balance (automatic adjust. ment). ni With the white cap on the lens, point the camera at a light source (indoors) or a subject (outdoors) from a distance of at least two meters. Slide the WHITE BALANCE switch all the way down to tEli ; the white balance switch will immediately return to the position. The white balance is now adjusted. After white balance has been adjusted, the white balance lamp in the viewfinder goes out. For details on white balance, see the "WHITE BALANCE" on page 17. *
-
 1
1 -
2
-
3
-
4
-
5
-
6
-
7
-
8
-
 9
9 -
 10
10 -
 11
11 -
 12
12 -
 13
13 -
 14
14 -
 15
15 -
 16
16 -
 17
17 -
 18
18 -
 19
19 -
20
-
21
-
22
-
23
-
24
-
25
-
26
-
27
-
28
-
29
-
30
-
31
-
32
-
33
-
34
-
35
-
36
-
37
-
38
-
39
-
40
-
41
-
42
-
43
-
44
-
45
-
46
-
47
 |
 |
