Sony CCD-V8 Operating Instructions - Page 4
compartment
 |
View all Sony CCD-V8 manuals
Add to My Manuals
Save this manual to your list of manuals |
Page 4 highlights
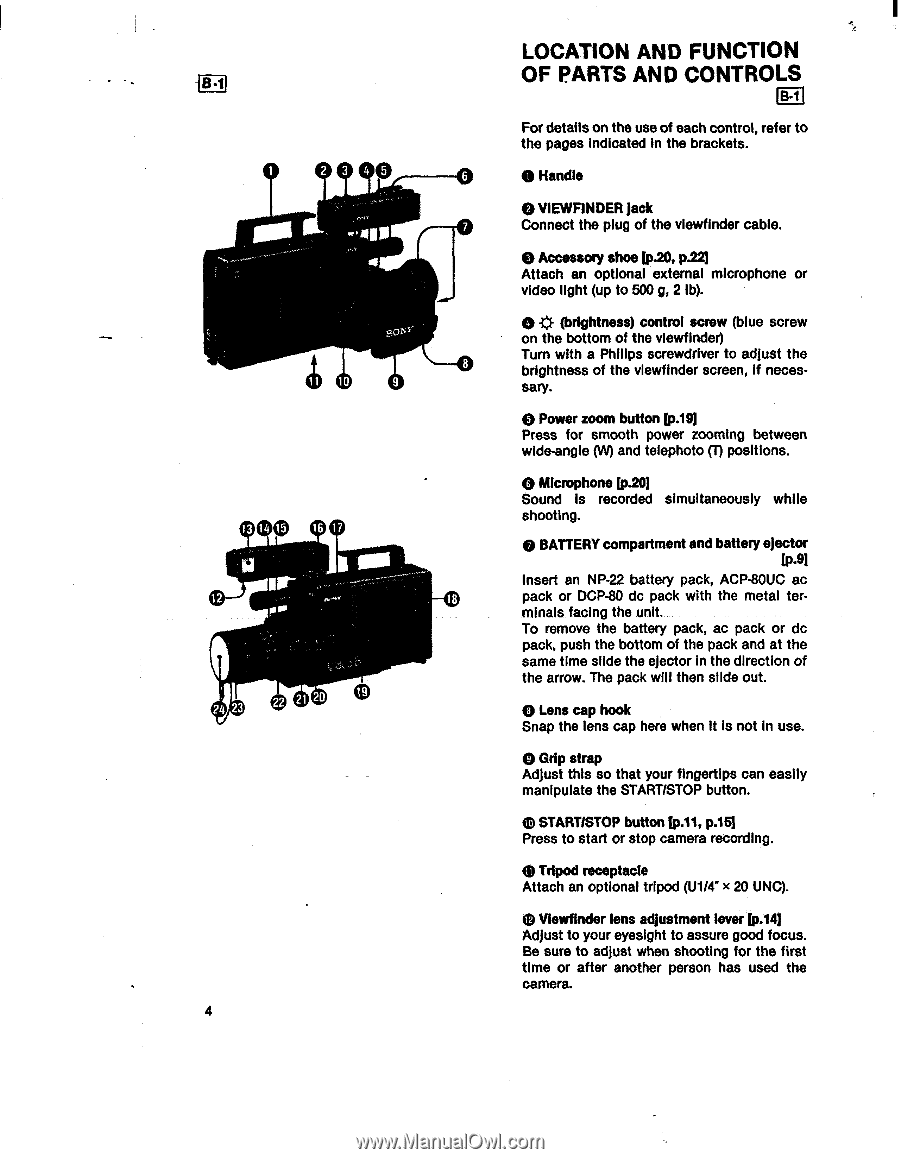
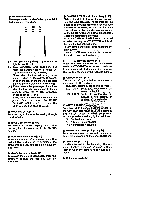
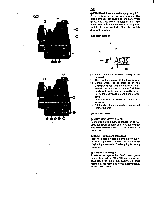
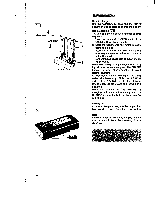
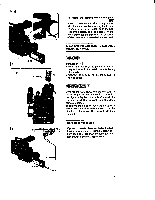
FB-1 1 2 3 4 - 7 4 8 10 9 13 14 f 16 17 N 12 18 2) 23 22 21 20 4 0 LOCATION AND FUNCTION OF PARTS AND CONTROLS For details on the use of each control, refer to the pages indicated In the brackets. 0 Handle e VIEWFINDER jack Connect the plug of the viewfinder cable. e Accessory shoe (p.20, p.22] Attach an optional external microphone or video light (up to 500 g, 2 Ib). 0 (brightness) control screw (blue screw on the bottom of the viewfinder) Turn with a Philips screwdriver to adjust the brightness of the viewfinder screen, if necessary. 41) Power zoom button [p.19] Press for smooth power zooming between wide-angle (W) and telephoto (1) positions. 0 Microphone (p.201 Sound is recorded simultaneously while shooting. BATTERY compartment and battery ejector 1P-91 Insert an NP-22 battery pack, ACP-80UC ac pack or DCP-80 do pack with the metal terminals facing the unit. To remove the battery pack, ac pack or dc pack, push the bottom of the pack and at the same time slide the ejector in the direction of the arrow. The pack will then slide out. Lens cap hook Snap the lens cap here when it is not in use. Grip strap Adjust this so that your fingertips can easily manipulate the STARTISTOP button. 0 STARTISTOP button [p.11, p.15] Press to start or stop camera recording. e Tripod receptacle Attach an optional tripod (U1/4" x 20 UNC). e Viewfinder lens adjustment lever [p.14] Adjust to your eyesight to assure good focus. Se sure to adjust when shooting for the first time or after another person has used the camera.
-
 1
1 -
 2
2 -
 3
3 -
 4
4 -
 5
5 -
 6
6 -
 7
7 -
 8
8 -
 9
9 -
 10
10 -
11
-
12
-
13
-
14
-
15
-
16
-
17
-
18
-
19
-
20
-
21
-
22
-
23
-
24
-
25
-
26
-
27
-
28
-
29
-
30
-
31
-
32
-
33
-
34
-
35
-
36
-
37
-
38
-
39
-
40
-
41
-
42
-
43
-
44
-
45
-
46
-
47
 |
 |