Sony CCD-V8 Operating Instructions - Page 28
Program, Recording
 |
View all Sony CCD-V8 manuals
Add to My Manuals
Save this manual to your list of manuals |
Page 28 highlights
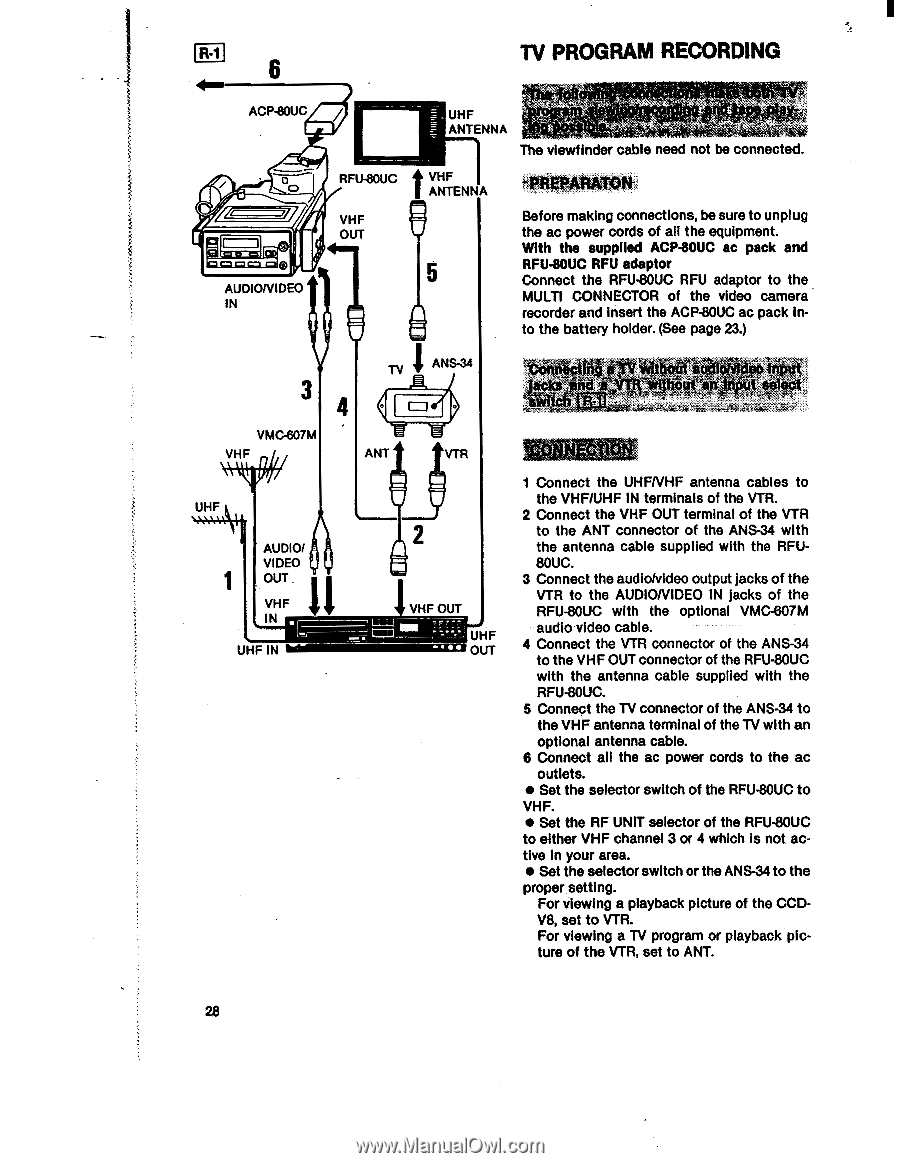
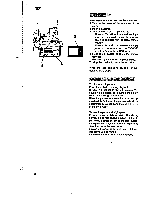
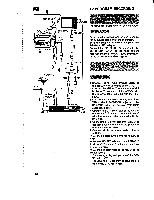
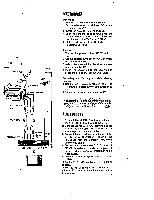
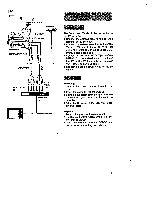
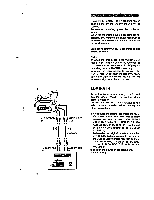
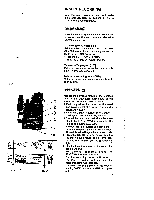
RI TV PROGRAM RECORDING ACP430UC 00 ==7 =I AUDIONIDEO IN UHF ANTENNA The viewfinder cable need not be connected. RFU-80UC 11, VHF ANTENNA EPARATOW VHF OUT 5 Before making connections, be sure to unplug the ac power cords of all the equipment. With the supplied ACP-80UC ac pack and RFU-80UC RFU adaptor Connect the RFU-80UC RFU adaptor to the MULTI CONNECTOR of the video camera recorder and insert the ACP-80UC ac pack into the battery holder. (See page 23.) TV I ANS-34 . . g thout audioNtdoo input . 414$ nd a T without InpUt seI VMC-607M VHF UHF AUDIO/ VIDEO OUT . VHF IN UHF IN ANT t VTR VHF OUT UHF OUT 1 Connect the UHFNHF antenna cables to the VHF/UHF IN terminals of the VTR. 2 Connect the VHF OUT terminal of the VTR to the ANT connector of the ANS-34 with the antenna cable supplied with the RFU80UC. 3 Connect the audio/video output jacks of the VTR to the AUDIONIDEO IN jacks of the RFU-80UC with the optional VMC-607M audio video cable. 4 Connect the VTR connector of the ANS-34 to the VHF OUT connector of the RFU-80UC with the antenna cable supplied with the RFU-80UC. 5 Connect the TV connector of the ANS-34 to the VHF antenna terminal of the TV with an optional antenna cable. 6 Connect all the ac power cords to the ac outlets. • Set the selector switch of the RFU-80UC to VHF. • Set the RF UNIT selector of the RFU-80UC to either VHF channel 3 or 4 which is not active in your area. • Set the selector switch or the ANS-34 to the proper setting. For viewing a playback picture of the CCDV8, set to VTR. For viewing a TV program or playback picture of the VTR, set to ANT. 28
-
 1
1 -
2
-
3
-
4
-
5
-
6
-
7
-
8
-
9
-
10
-
11
-
12
-
13
-
14
-
15
-
16
-
17
-
18
-
19
-
20
-
21
-
22
-
 23
23 -
 24
24 -
 25
25 -
 26
26 -
 27
27 -
 28
28 -
 29
29 -
 30
30 -
 31
31 -
 32
32 -
 33
33 -
34
-
35
-
36
-
37
-
38
-
39
-
40
-
41
-
42
-
43
-
44
-
45
-
46
-
47
 |
 |