Sony DCR SR100 Operating Guide - Page 35
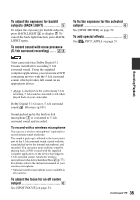
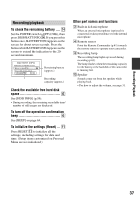
To adjust the exposure for backlit subjects (BACK LIGHT) - parts
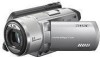 |
UPC - 027242692251
View all Sony DCR SR100 manuals
Add to My Manuals
Save this manual to your list of manuals |
Page 35 highlights
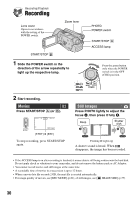
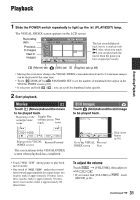
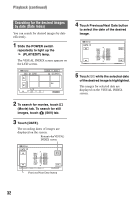
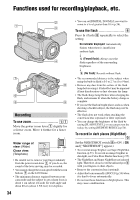
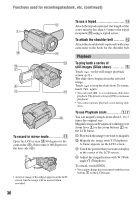
To adjust the exposure for backlit subjects (BACK LIGHT 5 To adjust the exposure for backlit subjects, press BACK LIGHT 5 to display .. To cancel the back light function, press BACK LIGHT again. To record sound with more presence (5.1ch surround recording) ..... 23 To fix the exposure for the selected subject 6 See [SPOT METER] on page 52. To add special effects 6 See PICT. APPLI. on page 57. Recording/Playback Your camcorder has Dolby Digital 5.1 Creator installed for recording 5.1ch surround sound. Using the supplied computer applications, you can create a DVD containing movies with the 5.1ch surround sound, which provides full sound on an appropriate device. • is displayed on the screen during 5.1ch recording. 5.1ch sound is converted to 2ch when played back on your camcorder. Dolby Digital 5.1 Creator, 5.1ch surround sound Glossary (p.101) Sound picked up by the built-in 4ch microphone 3 is converted to 5.1ch surround sound and recorded. To record with a wireless microphone You can use a wireless microphone* (optional) to record distant sound wirelessly. The sound it picks up is allotted to the front center part of the 5.1ch surround sound, mixed with the sound picked up by the internal microphone, and recorded. You can enjoy more realistic sound by playing back a DVD created with the supplied computer application on the device that supports 5.1ch surround sound. Attach the wireless microphone to the Active Interface Shoe 2 (p.77). For details, refer to the instruction manual of your wireless microphone. * Optional wireless microphone is not available in all countries. To adjust the focus for an off center subject 6 See [SPOT FOCUS] on page 54. Continued , 35
-
 1
1 -
2
-
3
-
4
-
5
-
6
-
7
-
8
-
9
-
10
-
11
-
12
-
13
-
14
-
15
-
16
-
17
-
18
-
19
-
20
-
21
-
22
-
23
-
24
-
25
-
26
-
27
-
28
-
29
-
 30
30 -
 31
31 -
 32
32 -
 33
33 -
 34
34 -
 35
35 -
 36
36 -
 37
37 -
 38
38 -
 39
39 -
 40
40 -
41
-
42
-
43
-
44
-
45
-
46
-
47
-
48
-
49
-
50
-
51
-
52
-
53
-
54
-
55
-
56
-
57
-
58
-
59
-
60
-
61
-
62
-
63
-
64
-
65
-
66
-
67
-
68
-
69
-
70
-
71
-
72
-
73
-
74
-
75
-
76
-
77
-
78
-
79
-
80
-
81
-
82
-
83
-
84
-
85
-
86
-
87
-
88
-
89
-
90
-
91
-
92
-
93
-
94
-
95
-
96
-
97
-
98
-
99
-
100
-
101
-
102
-
103
-
104
-
105
-
106
-
107
 |
 |