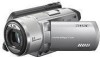
Sony DCR SR100 Operating Guide - Page 9

Table of Contents, Enjoying with your Hard Disk Drive Handycam, Getting Started - camcorder

Page 9 highlights

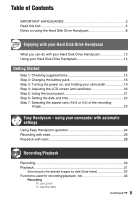
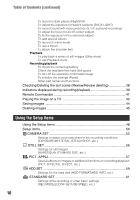
Table of Contents IMPORTANT SAFEGUARDS 3 Read this first 5 Notes on using the Hard Disk Drive Handycam 8 Enjoying with your Hard Disk Drive Handycam What you can do with your Hard Disk Drive Handycam 12 Using your Hard Disk Drive Handycam 14 Getting Started Step 1: Checking supplied items 15 Step 2: Charging the battery pack 16 Step 3: Turning the power on, and holding your camcorder 19 Step 4: Adjusting the LCD screen and viewfinder 20 Step 5: Using the touch panel 21 Step 6: Setting the date and time 22 Step 7: Selecting the aspect ratio (16:9 or 4:3) of the recording image 23 Easy Handycam - using your camcorder with automatic settings Using Easy Handycam operation 24 Recording with ease 26 Playback with ease 28 Recording/Playback Recording 30 Playback 31 Searching for the desired images by date (Date Index 32 Functions used for recording/playback, etc 34 Recording To use zoom To use the flash Continued , 9

  • 1
  • 2
  • 3
  • 4
  • 5
  • 6
  • 7
  • 8
  • 9
  • 10
  • 11
  • 12
  • 13
  • 14
  • 15
  • 16
  • 17
  • 18
  • 19
  • 20
  • 21
  • 22
  • 23
  • 24
  • 25
  • 26
  • 27
  • 28
  • 29
  • 30
  • 31
  • 32
  • 33
  • 34
  • 35
  • 36
  • 37
  • 38
  • 39
  • 40
  • 41
  • 42
  • 43
  • 44
  • 45
  • 46
  • 47
  • 48
  • 49
  • 50
  • 51
  • 52
  • 53
  • 54
  • 55
  • 56
  • 57
  • 58
  • 59
  • 60
  • 61
  • 62
  • 63
  • 64
  • 65
  • 66
  • 67
  • 68
  • 69
  • 70
  • 71
  • 72
  • 73
  • 74
  • 75
  • 76
  • 77
  • 78
  • 79
  • 80
  • 81
  • 82
  • 83
  • 84
  • 85
  • 86
  • 87
  • 88
  • 89
  • 90
  • 91
  • 92
  • 93
  • 94
  • 95
  • 96
  • 97
  • 98
  • 99
  • 100
  • 101
  • 102
  • 103
  • 104
  • 105
  • 106
  • 107

9
Table of Contents
IMPORTANT SAFEGUARDS
...................................................................
3
Read this first
............................................................................................
5
Notes on using the Hard Disk Drive Handycam
........................................
8
What you can do with your Hard Disk Drive Handycam
..........................
12
Using your Hard Disk Drive Handycam
...................................................
14
Step 1: Checking supplied items
.............................................................
15
Step 2: Charging the battery pack
...........................................................
16
Step 3: Turning the power on, and holding your camcorder
...................
19
Step 4: Adjusting the LCD screen and viewfinder
...................................
20
Step 5: Using the touch panel
.................................................................
21
Step 6: Setting the date and time
............................................................
22
Step 7: Selecting the aspect ratio (16:9 or 4:3) of the recording
image
..........................................................................................
23
Using Easy Handycam operation
............................................................
24
Recording with ease
................................................................................
26
Playback with ease
..................................................................................
28
Recording
................................................................................................
30
Playback
..................................................................................................
31
Searching for the desired images by date (Date Index)
............................
32
Functions used for recording/playback, etc
.............................................
34
Recording
To use zoom
To use the flash
Enjoying with your Hard Disk Drive Handycam
Getting Started
Easy Handycam – using your camcorder with automatic
settings
Recording/Playback
Continued
,