Sony DCR SR100 Operating Guide - Page 36
To record in mirror mode, To use a tripod, To attach the shoulder belt, Playback
 |
UPC - 027242692251
View all Sony DCR SR100 manuals
Add to My Manuals
Save this manual to your list of manuals |
Page 36 highlights
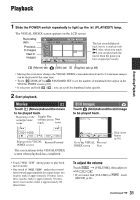
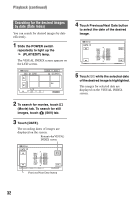
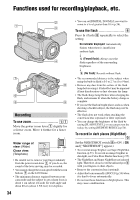
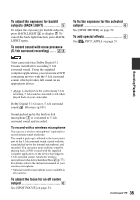
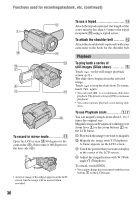
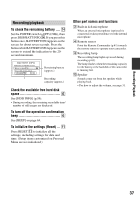
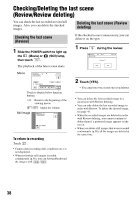
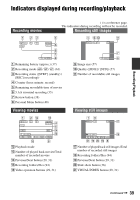
Functions used for recording/playback, etc. (continued) To record in mirror mode qs Open the LCD screen qs 90 degrees to the camcorder (1), then rotate it 180 degrees to the lens side (2). • A mirror-image of the subject appears on the LCD screen, but the image will be normal when recorded. 36 To use a tripod qg Attach the tripod (optional: the length of the screw must be less than 5.5 mm) to the tripod receptacle qg using a tripod screw. To attach the shoulder belt ......... 0 Attach the shoulder belt (optional) with your camcorder to the hook for the shoulder belt. Playback To play back a series of still images (Slide show 6 Touch on the still image playback screen (p.31). The slide show begins from the selected image. Touch to stop the slide show. To restart, touch again. • You can touch to set continuous slide show playback. The default setting is [ON] (continuous playback). • You cannot operate playback zoom during slide show. To use Playback zoom 17 You can magnify images from about 1.1 to 5 times the original size. Magnification can be adjusted with the power zoom lever 1 or the zoom buttons 7 on the LCD frame. 1 Play back the image you want to magnify. 2 Magnify the image with T (Telephoto). A frame appears on the LCD screen. 3 Touch the portion that you want to display in the center of the LCD screen. 4 Adjust the magnification with W (Wide angle)/T (Telephoto). To cancel, touch [END]. • You cannot change the zoom speed with the zoom buttons 7 on the LCD frame.
-
 1
1 -
2
-
3
-
4
-
5
-
6
-
7
-
8
-
9
-
10
-
11
-
12
-
13
-
14
-
15
-
16
-
17
-
18
-
19
-
20
-
21
-
22
-
23
-
24
-
25
-
26
-
27
-
28
-
29
-
30
-
 31
31 -
 32
32 -
 33
33 -
 34
34 -
 35
35 -
 36
36 -
 37
37 -
 38
38 -
 39
39 -
 40
40 -
 41
41 -
42
-
43
-
44
-
45
-
46
-
47
-
48
-
49
-
50
-
51
-
52
-
53
-
54
-
55
-
56
-
57
-
58
-
59
-
60
-
61
-
62
-
63
-
64
-
65
-
66
-
67
-
68
-
69
-
70
-
71
-
72
-
73
-
74
-
75
-
76
-
77
-
78
-
79
-
80
-
81
-
82
-
83
-
84
-
85
-
86
-
87
-
88
-
89
-
90
-
91
-
92
-
93
-
94
-
95
-
96
-
97
-
98
-
99
-
100
-
101
-
102
-
103
-
104
-
105
-
106
-
107
 |
 |
