Sony DCR-TRV350 Operating Instructions - Page 141
Before operation, Still image, START/STOP, Superimposing a still image in the, Memory Stick
 |
View all Sony DCR-TRV350 manuals
Add to My Manuals
Save this manual to your list of manuals |
Page 141 highlights
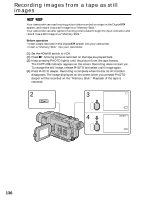
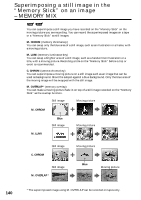
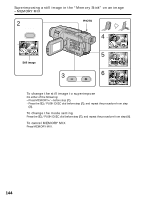
Superimposing a still image in the "Memory Stick" on an image - MEMORY MIX Recording superimposed images on a tape Before operation •Insert a tape for recording into your camcorder. •Insert a "Memory Stick" containing still images into your camcorder. (1) Set the POWER switch to CAMERA. (2) In the standby mode, press MEMORY MIX. The first recorded image appears in the bottom-right corner of the screen as a thumbnail image. The last image that is used in MEMORY MIX will be displayed next time. (3) Press MEMORY+/- to select the still image you want to superimpose. - : To see the previous image + : To see the next image (4) Turn the SEL/PUSH EXEC dial to select the desired mode. The mode changes as follows: M. CHROM y M. LUMI y C. CHROM y M. OVERLAP (5) Press the SEL/PUSH EXEC dial. The still image overlaps with the picture on the screen. (6) Turn the SEL/PUSH EXEC dial to adjust the effect. M. CHROM - The degree of the blue areas in the still image which is to be swapped with a moving picture M. LUMI - The brightness of the area in the still image which is to be swapped with a moving picture C. CHROM - The degree of the blue areas in the moving picture which is to be swapped with a still image M. OVERLAP - No adjustment necessary The fewer bars there are on the screen, the stronger the effect becomes. (7) Press START/STOP to start recording. "Memory Stick" Operations - Recording 2 MEMORY MIX M. CHROM 101 101-0021 Still image START/STOP 4 M. LUMI 5 101 101-0021 M. LUMI I I I 101 101-0021 3 6 M. LUMI I 101 101-0021 141
-
 1
1 -
2
-
3
-
4
-
5
-
6
-
7
-
8
-
9
-
10
-
11
-
12
-
13
-
14
-
15
-
16
-
17
-
18
-
19
-
20
-
21
-
22
-
23
-
24
-
25
-
26
-
27
-
28
-
29
-
30
-
31
-
32
-
33
-
34
-
35
-
36
-
37
-
38
-
39
-
40
-
41
-
42
-
43
-
44
-
45
-
46
-
47
-
48
-
49
-
50
-
51
-
52
-
53
-
54
-
55
-
56
-
57
-
58
-
59
-
60
-
61
-
62
-
63
-
64
-
65
-
66
-
67
-
68
-
69
-
70
-
71
-
72
-
73
-
74
-
75
-
76
-
77
-
78
-
79
-
80
-
81
-
82
-
83
-
84
-
85
-
86
-
87
-
88
-
89
-
90
-
91
-
92
-
93
-
94
-
95
-
96
-
97
-
98
-
99
-
100
-
101
-
102
-
103
-
104
-
105
-
106
-
107
-
108
-
109
-
110
-
111
-
112
-
113
-
114
-
115
-
116
-
117
-
118
-
119
-
120
-
121
-
122
-
123
-
124
-
125
-
126
-
127
-
128
-
129
-
130
-
131
-
132
-
133
-
134
-
135
-
 136
136 -
 137
137 -
 138
138 -
 139
139 -
 140
140 -
 141
141 -
 142
142 -
 143
143 -
 144
144 -
 145
145 -
 146
146 -
147
-
148
-
149
-
150
-
151
-
152
-
153
-
154
-
155
-
156
-
157
-
158
-
159
-
160
-
161
-
162
-
163
-
164
-
165
-
166
-
167
-
168
-
169
-
170
-
171
-
172
-
173
-
174
-
175
-
176
-
177
-
178
-
179
-
180
-
181
-
182
-
183
-
184
-
185
-
186
-
187
-
188
-
189
-
190
-
191
-
192
-
193
-
194
-
195
-
196
-
197
-
198
-
199
-
200
-
201
-
202
-
203
-
204
-
205
-
206
-
207
-
208
-
209
-
210
-
211
-
212
-
213
-
214
-
215
-
216
-
217
-
218
-
219
-
220
-
221
-
222
-
223
-
224
-
225
-
226
-
227
-
228
-
229
-
230
-
231
-
232
-
233
-
234
-
235
-
236
-
237
-
238
-
239
-
240
-
241
-
242
-
243
-
244
-
245
-
246
-
247
-
248
-
249
-
250
-
251
-
252
-
253
-
254
-
255
-
256
-
257
-
258
-
259
-
260
-
261
-
262
-
263
-
264
-
265
-
266
-
267
-
268
 |
 |
