Sony DCR-TRV350 Operating Instructions - Page 160
Setting up a folder
 |
View all Sony DCR-TRV350 manuals
Add to My Manuals
Save this manual to your list of manuals |
Page 160 highlights
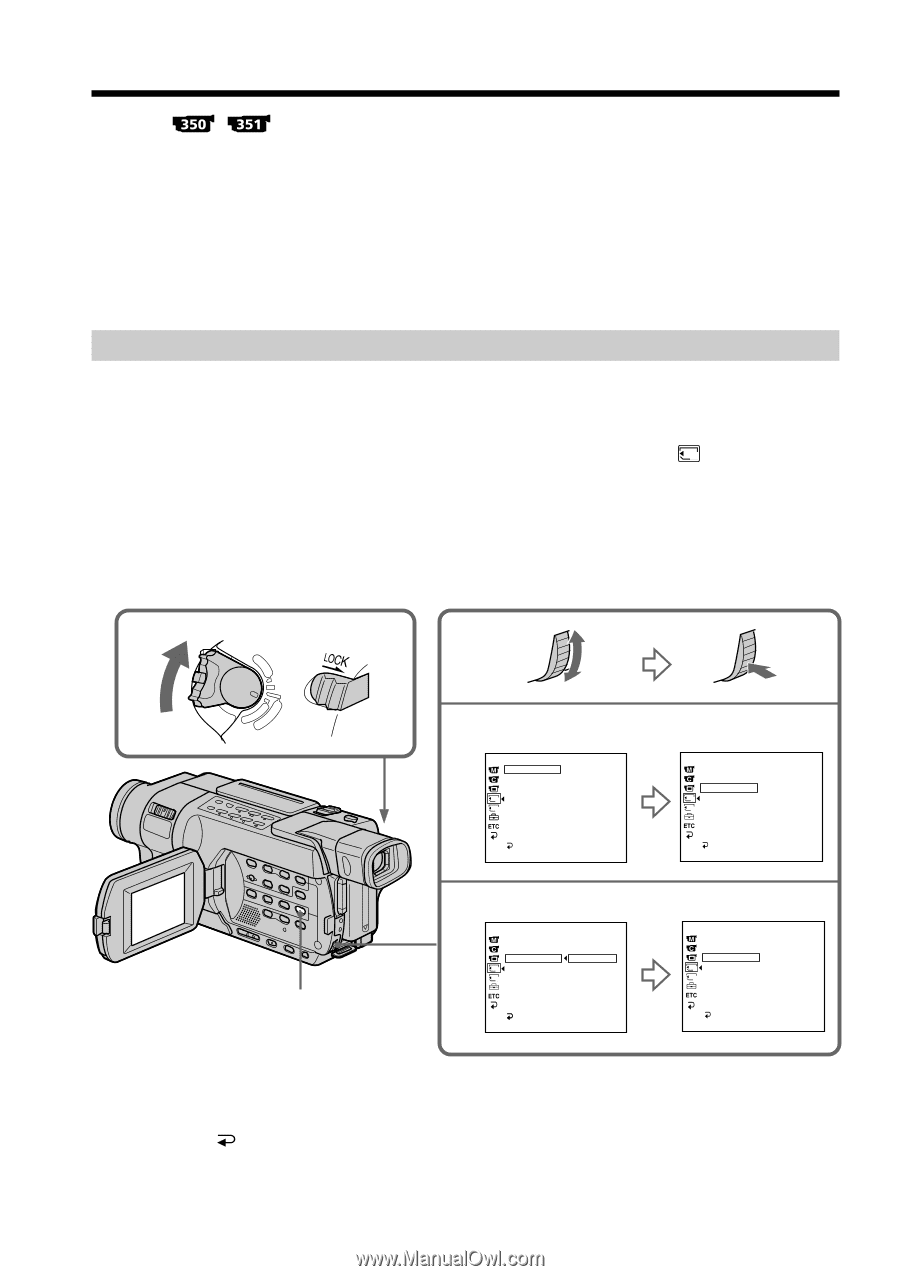
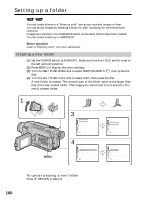
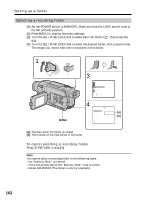
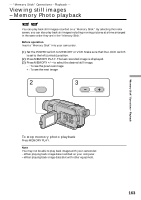
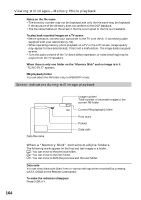
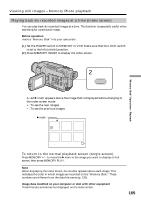
Setting up a folder You can create folders in a "Memory stick" and group recorded images in them. You can group images by selecting a folder for each recording, for convenient later reference. Images are recorded in the 101MSDCF folder unless other folders have been created. You can create folders up to 999MSDCF. Before operation Insert a "Memory stick" into your camcorder. Creating a new folder (1) Set the POWER switch to MEMORY. Make sure that the LOCK switch is set to the left (unlock) position. (2) Press MENU to display the menu settings. (3) Turn the SEL/PUSH EXEC dial to select NEW FOLDER in 1 , then press the dial. (4) Turn the SEL/PUSH EXEC dial to select ADD, then press the dial. A new folder is created. The numeric part of the folder name is one larger than that of the last created folder. The image you record next time is stored in this newly created folder. 1 V POWER MENU E ERMAORY CAM M OFCFR(CHG) 3 MEM SET 1 STILL SET MOVIE SET NEW FOLDER 1 REC FOLDER 2 FILE NO. PRINT MARK PROTECT PB FOLDER RETURN [MENU] : END 4 MEM SET 1 STILL SET MOVIE SET NEW FOLDER 1 REC FOLDER 2 FILE NO. PRINT MARK PROTECT PB FOLDER RETURN [MENU] : END ADD RETURN ADD FOLDER 102MSDCF MEM SET 1 STILL SET MOVIE SET NEW FOLDER 1 REC FOLDER 2 FILE NO. PRINT MARK PROTECT PB FOLDER RETURN [MENU] : END ADD CURRENTLY 101MSDCF MEM SET 1 STILL SET MOVIE SET NEW FOLDER ADD 1 REC FOLDER 2 FILE NO. PRINT MARK CURRENTLY PROTECT 102MSDCF PB FOLDER RETURN [MENU] : END 160 To cancel creating a new folder Press RETURN in step (4).
-
 1
1 -
2
-
3
-
4
-
5
-
6
-
7
-
8
-
9
-
10
-
11
-
12
-
13
-
14
-
15
-
16
-
17
-
18
-
19
-
20
-
21
-
22
-
23
-
24
-
25
-
26
-
27
-
28
-
29
-
30
-
31
-
32
-
33
-
34
-
35
-
36
-
37
-
38
-
39
-
40
-
41
-
42
-
43
-
44
-
45
-
46
-
47
-
48
-
49
-
50
-
51
-
52
-
53
-
54
-
55
-
56
-
57
-
58
-
59
-
60
-
61
-
62
-
63
-
64
-
65
-
66
-
67
-
68
-
69
-
70
-
71
-
72
-
73
-
74
-
75
-
76
-
77
-
78
-
79
-
80
-
81
-
82
-
83
-
84
-
85
-
86
-
87
-
88
-
89
-
90
-
91
-
92
-
93
-
94
-
95
-
96
-
97
-
98
-
99
-
100
-
101
-
102
-
103
-
104
-
105
-
106
-
107
-
108
-
109
-
110
-
111
-
112
-
113
-
114
-
115
-
116
-
117
-
118
-
119
-
120
-
121
-
122
-
123
-
124
-
125
-
126
-
127
-
128
-
129
-
130
-
131
-
132
-
133
-
134
-
135
-
136
-
137
-
138
-
139
-
140
-
141
-
142
-
143
-
144
-
145
-
146
-
147
-
148
-
149
-
150
-
151
-
152
-
153
-
154
-
 155
155 -
 156
156 -
 157
157 -
 158
158 -
 159
159 -
 160
160 -
 161
161 -
 162
162 -
 163
163 -
 164
164 -
 165
165 -
166
-
167
-
168
-
169
-
170
-
171
-
172
-
173
-
174
-
175
-
176
-
177
-
178
-
179
-
180
-
181
-
182
-
183
-
184
-
185
-
186
-
187
-
188
-
189
-
190
-
191
-
192
-
193
-
194
-
195
-
196
-
197
-
198
-
199
-
200
-
201
-
202
-
203
-
204
-
205
-
206
-
207
-
208
-
209
-
210
-
211
-
212
-
213
-
214
-
215
-
216
-
217
-
218
-
219
-
220
-
221
-
222
-
223
-
224
-
225
-
226
-
227
-
228
-
229
-
230
-
231
-
232
-
233
-
234
-
235
-
236
-
237
-
238
-
239
-
240
-
241
-
242
-
243
-
244
-
245
-
246
-
247
-
248
-
249
-
250
-
251
-
252
-
253
-
254
-
255
-
256
-
257
-
258
-
259
-
260
-
261
-
262
-
263
-
264
-
265
-
266
-
267
-
268
 |
 |